メインコンテンツにスキップ

Dell Latitude E6510 RAM Replacement

必要な工具と部品

  1. Dell Latitude E6510 RAM Replacement, RAM: 手順 1、 3の画像 1 Dell Latitude E6510 RAM Replacement, RAM: 手順 1、 3の画像 2 Dell Latitude E6510 RAM Replacement, RAM: 手順 1、 3の画像 3
    • Orient the laptop so that the bottom is facing up towards you.

    • Place your thumbs on the grooved sections above the battery and firmly pull away from each other.

    • Slide the battery out and separate it from the laptop.

  2. Dell Latitude E6510 RAM Replacement: 手順 2、 3の画像 1 Dell Latitude E6510 RAM Replacement: 手順 2、 3の画像 2 Dell Latitude E6510 RAM Replacement: 手順 2、 3の画像 3
    • Remove the 5 screws from the back panel with a type 0 Phillips head.

    • Pull the panel towards you in a slightly upwards motion.

    • Remove the panel from the laptop and set it aside.

  3. Dell Latitude E6510 RAM Replacement: 手順 3、 3の画像 1 Dell Latitude E6510 RAM Replacement: 手順 3、 3の画像 2 Dell Latitude E6510 RAM Replacement: 手順 3、 3の画像 3
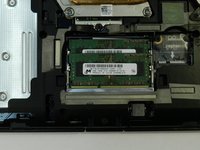
    • Locate the RAM sticks in the laptop.

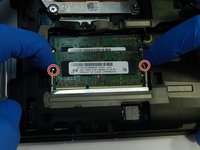
    • Using your fingers, disconnect the prongs connected to the RAM sticks.

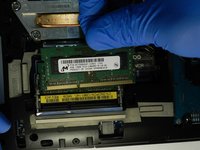
    • Gently remove the RAM from the port.

    • Repeat the first three steps to remove the second RAM stick.

終わりに

To reassemble your device, follow these instructions in reverse order.

作成者

1人の作成者と共同作成されました。

Seth Thomas

メンバー登録日: 02/05/19

112 ポイント

1ガイドが承認済み

0 件のコメント

コメントを追加

統計データ:

過去 24時間: 0

過去 7 日: 1

過去 30 日: 3

今までの合計 231