
Blink Video Doorbell Speaker Replacement

はじめに
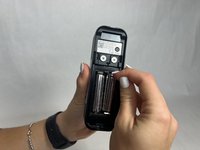
手順 1 に進むThe Blink Video Doorbell is a doorbell to provide extra security to your residence by giving you an accessible view whenever necessary. The speaker is a key function of the device. It allows you to be able to hear during the video and relay a message back through the device. Refer to the troubleshooting page if there are issues with the speaker which could be connected to causes such as debris. If you need to take out the speaker, use this guide to remove and replace the speaker.
必要な工具と部品
ツール


もっと見る
-
-
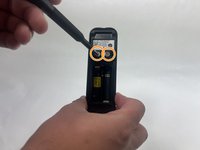
Push the opening key into the small opening with the two gray buttons on the bottom of the device.
-
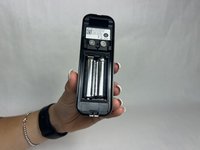
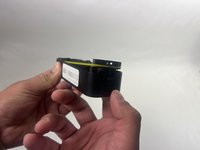
Push the device up from the mount and slide it off.
-
-
-
-
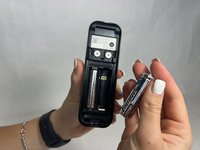
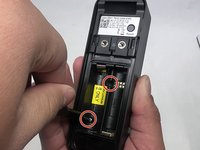
Remove the two 6 mm screws in the battery compartment using a JIS #1 screwdriver.
-
Remove the two 7 mm screws above the battery compartment using a JIS #1 screwdriver.
-
Starting from the bottom of the device, pry the back plate away from the rest of the doorbell.
-
-
-
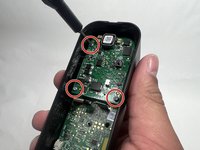
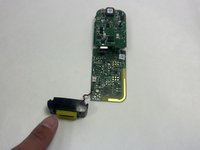
Remove the three 6 mm screws from the upper part of the motherboard using a JIS #1 screwdriver.
-
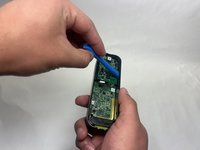
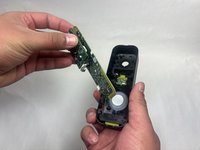
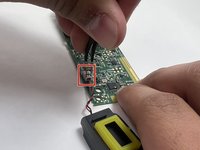
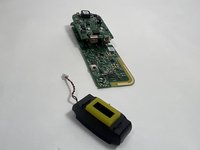
Use an opening tool to release the motherboard from the device.
-


To reassemble your device, follow these instructions in reverse order.
To reassemble your device, follow these instructions in reverse order.

チーム

UMass Dartmouth, Team 1-1, Konn Fall 2024 UMass Dartmouth, Team 1-1, Konn Fall 2024人のメンバー
UMASSD-KONN-F24S1G1
4 メンバー
5のガイドは作成済み