メインコンテンツにスキップ
BMX Chain Sprocket Replacement

BMX Chain Sprocket Replacement

Andy Barrientos

Andy Barrientos とその他 人の作成者

最終更新日: June 23, 2023

30 - 45 分
中レベル

This guide will show you how to change a BMX sprocket on a BMX bike with pegs, step by step. Sometimes, a sprocket tooth will break, or you want to try a new BMX sprocket, so this guide will help you change that sprocket easily at home.

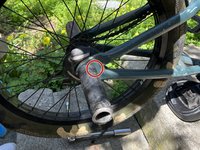
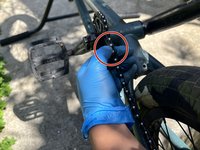
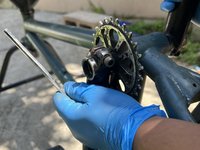
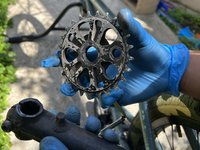
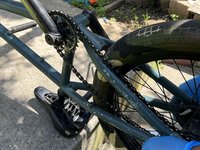
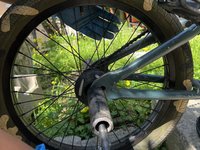
The sprocket is a component of the bike that looks like a star and it's located by the pedals spinning the chain as it is being pulled to make the back wheel spin to make the bike move. If the sprocket is damaged or broken, it can cause the chain to skip and potentially break out of nowhere, leading to an accident.

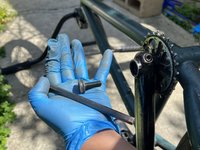
The only tool that will be needed is a 17mm socket, an extension, a ratchet, 2 Allen keys (one that fits the big compression bolt and a smaller one to fit the faller compression bolt), your bike, and the new sprocket that will be installed to the bike. Some hazards with this fix are the fact that your finger can get caught between the chain and the sprocket or the back wheel, so it is essential to make sure that your fingers are not in a position where they can get dragged into the teeth of the sprocket or caught in the back wheel.

  1. BMX Chain Sprocket Replacement, BMX Chain Sprocket: 手順 1、 2の画像 1 BMX Chain Sprocket Replacement, BMX Chain Sprocket: 手順 1、 2の画像 2
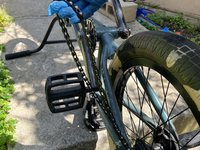
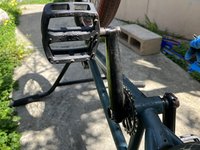
    • Flip the bike upside down in a position where the back wheel can spin freely.

    • Gather your tools.

  2. BMX Chain Sprocket Replacement: 手順 2、 2の画像 1 BMX Chain Sprocket Replacement: 手順 2、 2の画像 2
    • Get a ratchet, socket, extension and connect the extension to the socket and the ratchet to the extension.

    • Insert the socket with the extension in the peg till it hits the end.

    • Loosen the nut inside the peg.

    • Repeat these steps for the other side.

  3. BMX Chain Sprocket Replacement: 手順 3、 2の画像 1 BMX Chain Sprocket Replacement: 手順 3、 2の画像 2
    • Push the wheel forward till it stops, and there is no gap.

  4. BMX Chain Sprocket Replacement: 手順 4、 2の画像 1 BMX Chain Sprocket Replacement: 手順 4、 2の画像 2
    • Grab the chain

    • Slightly pull the chain to the side, away and back from the wheel

    • Make sure that it isn't attached to the wheel driver (spikes that chain sits on normally to make bike wheel move)

    • Make sure to keep an eye out for your fingers because you can get your hand caught between the chain and the wheel

  5. BMX Chain Sprocket Replacement: 手順 5、 3の画像 1 BMX Chain Sprocket Replacement: 手順 5、 3の画像 2 BMX Chain Sprocket Replacement: 手順 5、 3の画像 3
    • Grab the chain by the sprocket on the bottom of the bike

    • Pick it up and slightly pull to the side to remove the chain from the sprocket

    • Spin bike cranks to create clearance to move chain away from the sprocket and off the cranks

    • Make sure to keep an eye out for your fingers because you can get your hand caught between the chain and the wheel

  6. BMX Chain Sprocket Replacement: 手順 6、 2の画像 1 BMX Chain Sprocket Replacement: 手順 6、 2の画像 2
    • Grab the Allen key that fits the compression bold

    • Loosen the compression bold

    • Completely remove the compression bold from the cranks

  7. BMX Chain Sprocket Replacement: 手順 7、 2の画像 1 BMX Chain Sprocket Replacement: 手順 7、 2の画像 2
    • Use the Allen key that fits the smaller bolt to loosen the cranks.

    • Loosen the bolt on the cranks.

    • Do not remove the bolt.

  8. BMX Chain Sprocket Replacement: 手順 8、 3の画像 1 BMX Chain Sprocket Replacement: 手順 8、 3の画像 2 BMX Chain Sprocket Replacement: 手順 8、 3の画像 3
    • Pull crank with the sprocket off the crank spindle.

    • Loosen the bolt that is holding sprocket (optional depending if cranks have the bolt).

    • Remove the sprocket from crank.

  9. BMX Chain Sprocket Replacement: 手順 9、 3の画像 1 BMX Chain Sprocket Replacement: 手順 9、 3の画像 2 BMX Chain Sprocket Replacement: 手順 9、 3の画像 3
    • Place the new sprocket on the cranks with the corresponding hole to hold the sprocket still.

    • Tighten the bolt to keep the sprocket in place (optional depending on bike cranks).

    • Push the cranks back onto the crank spindle still it stops moving and the other crank isn't pushed out.

    • Make sure that the crank is placed well and balanced.

  10. BMX Chain Sprocket Replacement: 手順 10、 3の画像 1 BMX Chain Sprocket Replacement: 手順 10、 3の画像 2 BMX Chain Sprocket Replacement: 手順 10、 3の画像 3
    • Thread in the crank compression bolt by hand on the cranks.

    • Use the Allen wrench to tighten the compression bolt and compress the crank and the crank spindle together.

  11. BMX Chain Sprocket Replacement: 手順 11、 1の画像 1
    • Use the Allen key to tighten the smaller compression bolt and prevent the cranks from spinning.

  12. BMX Chain Sprocket Replacement: 手順 12、 3の画像 1 BMX Chain Sprocket Replacement: 手順 12、 3の画像 2 BMX Chain Sprocket Replacement: 手順 12、 3の画像 3
    • Spin the crank with the sprocket to the position where the pedal is close to the peg.

    • Grab the chain.

    • Hover over the pedal to where you can place the chain back onto the sprocket.

    • Make sure that the chain is placed correctly on the sprocket.

    • Make sure to keep an eye out for your fingers because you can get your hand caught between the chain and the wheel.

  13. BMX Chain Sprocket Replacement: 手順 13、 3の画像 1 BMX Chain Sprocket Replacement: 手順 13、 3の画像 2 BMX Chain Sprocket Replacement: 手順 13、 3の画像 3
    • Place the chain back on the the wheel drive on the back wheel.

    • Spin the back wheel backwards so the chain can get rotation and sit correctly on the driver.

    • Make sure to keep an eye out for your fingers because you can get your hand caught between the chain and the wheel.

  14. BMX Chain Sprocket Replacement: 手順 14、 2の画像 1 BMX Chain Sprocket Replacement: 手順 14、 2の画像 2
    • Pull the back wheel till it stops moving.

    • Align the wheel so it wont hit either side of the frame.

  15. BMX Chain Sprocket Replacement: 手順 15、 3の画像 1 BMX Chain Sprocket Replacement: 手順 15、 3の画像 2 BMX Chain Sprocket Replacement: 手順 15、 3の画像 3
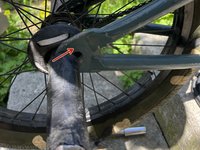
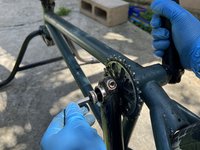
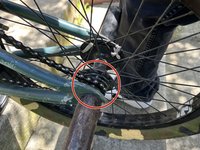
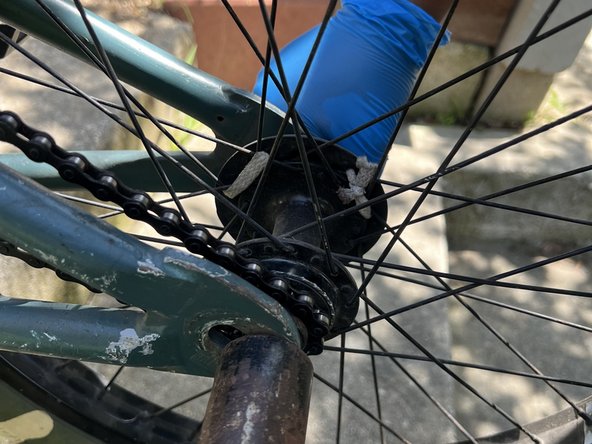
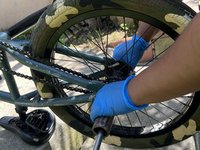
    • Use the socket with ratchet and the extension to tighten the nut inside the peg slightly, which will allow the wheel to move slightly if needed.

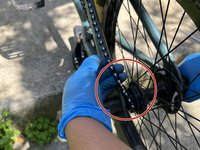
    • Do the same thing on the other side.

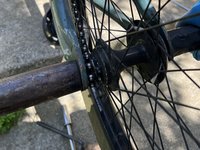
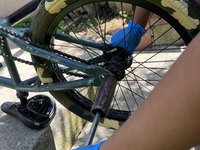
    • Once the wheel is aligned, tighten one side slightly and then tighten the other side slightly as well.

    • Keep doing this process until the nuts are tightened enough to they won't move without the use of the ratchet.

  16. BMX Chain Sprocket Replacement: 手順 16、 1の画像 1
    • Flip the bike right side up and the bike is ready to go.

終わりに

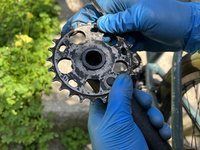
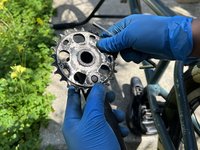
The new bike sprocket will be installed if bike sprocket was broken or wanted a new one

作成者

1人の作成者と共同作成されました。

Andy Barrientos

メンバー登録日: 04/03/23

253 ポイント

1ガイドが承認済み

チーム

CSU Los Angeles, Team H-99, Briggs Spring 2023 CSU Los Angeles, Team H-99, Briggs Spring 2023人のメンバー

CSULA-BRIGGS-S23SHG99

1 メンバー

1のガイドは作成済み

0 件のコメント

コメントを追加

統計データ:

過去 24時間: 4

過去 7 日: 15

過去 30 日: 24

今までの合計 653