この翻訳は、ソースガイドの最新の更新を反映していない可能性があります。 翻訳の更新に協力してください。 または ソースガイドを参照してください。
はじめに
このガイドを参照して、Apple Watch Series 4の消耗したバッテリーの交換をします。
このガイドでは、スタンダードGPSバージョン用の修理ガイドですが、セルラー/LTEバージョンの作業内容も類似しています。
安全上の理由から、Apple Watchの解体を始める前に、バッテリー残量を25%以下まで放電してください。 作業中、アクシデントでバッテリーにダメージを与えてしまうと、熱に伴う危険が潜んでいます。
バッテリーが膨張している場合は、適切な方法で処理してください。
ディスプレイ開口作業中、Apple WatchのForce Touchガスケットにダメージを与えてしまうことがあります。ガスケットのレイヤーを外してしまった場合は、新しいForce Touchガスケットに交換しなければなりません。
デバイスを再組み立てする際は、コンポーネントを密封するために交換用の接着剤が必要です。
必要な工具と部品
-
-
修理を始める前に、デバイスをチャージャーから外して、電源を切ります。
-
タッチスクリーンが破損していて、電源を切れない場合は、こちらの代用方法で電源を切ります。
-
-
-
iOpenerを準備して(もしくはヘアドライヤーやヒートガン)Watchのディスプレイに留められた接着剤を柔らかくするため、ディスプレイ表面にのせて温めます。
-
スクリーンが完全に温まり、ケースを固定している接着剤が柔らかくなるまで、iOpenerをデバイス上に少なくとも2分間置きます。
-
-
-
-
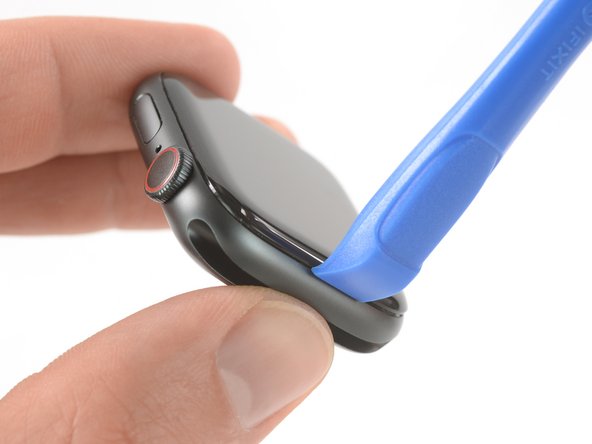
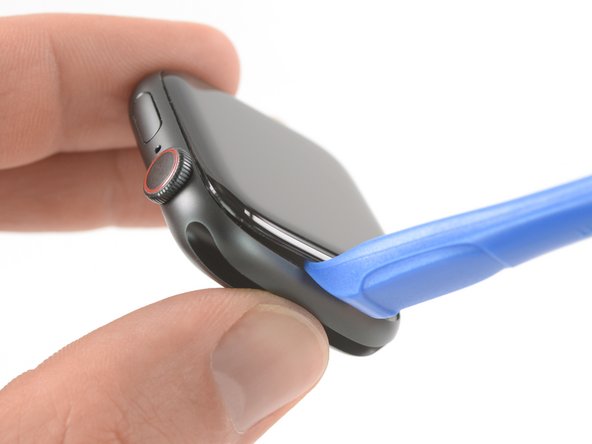
バッテリーを取り出すのに十分なスペースができるまで、慎重にスクリーンを後ろ側に開きます。
-
開口ピックをバッテリーとTaptic Engineの間に差し込みます。
If you are just replacing the screen then there is no need to remove battery.
When removing the screen I tore the two outer cables attached to the lcd screen. What are their purpose? I read somewhere they are just some sort of shield. Will my watch function normally without them?
thanks
-
-
-
次の手順では、Watchを再シールするための準備として、交換用接着剤を塗布する方法について説明します。
-
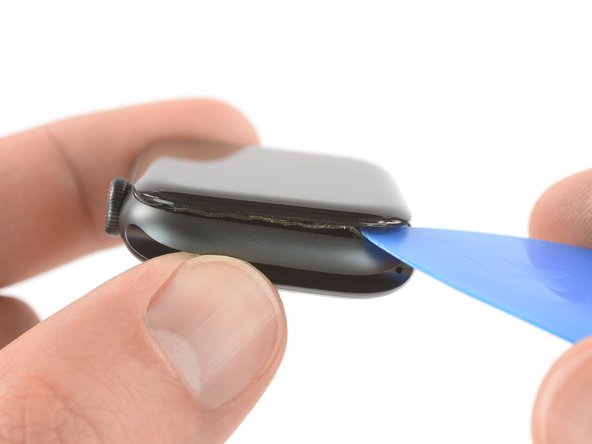
綿棒に少量の高濃度イソプロピルアルコール(90%以上)を塗布するか、クリーニングパッドを使用して、Force Touchガスケットの上に残っている接着剤を丁寧に取り除きます。
-
-
-
Apple Watchを裏側して、ディスプレイを水平にして、ケースを持ち上げます。
-
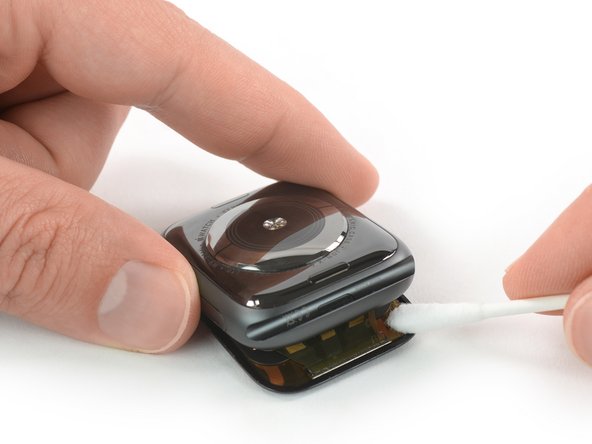
ディスプレイ裏面の、残りの接着剤を除去してください。
Und warum soll ich dann bei Amazon 70% Tigern kaufen?
Was genau meinst du?
-
-
-
ピンセットを使って、交換用の接着剤からブルーの保護フィルムを慎重に剥がします。
The step showing the new battery being installed is missing.
As stated 3 layers. Trick is to separate them correctly and at the right time. The greatest adhesion is to the blue top layer. If done as shown the most difficult task of separating the blue film will be done at the worst time, on the watch. It is better to do the hard part first, separate the blue from the adhesive. So leave the adhesive on the paper backing in the picture above. Then remove the inner part as 3 layers together leaving you with the paper backed adhesive.
-
-
-
Force Touchガスケットをディスプレイ上に対して対角に持ちます。
-
ディスプレイをわずか手前に傾けます。Force Touchガスケットとフレームの位置が揃います。
-
Force Touchガスケット上部に交換用の接着剤を配置します。
See my comments previous step. Instead of blue it should look like the brown paper side with the adhesive down. Now press into the cavity in the watch frame. The paper and cavity will make location easy. You shouldn't have to adjust much. Press the face down on top to squish the adhesive into place. It won't stick because the paper is still on. Open and check placement. Now remove the paper
See my comments previous step. Instead of blue it should look like the brown paper side with the adhesive down. Now press into the cavity in the watch frame. The paper and cavity will make location easy. You shouldn't have to adjust much. Press the face down on top to squish the adhesive into place. It won't stick because the paper is still on. Open and check placement. Now remove the paper
-


Apple Watch Series 4を再組み立てするには、バッテリーを再装着するために、このインストラクションを逆の順番に従って作業を進めてください。
バッテリーの最適化のために、この手順を完了後、新しく搭載したバッテリーの残量を調整してください。 100%まで充電したら、そのままプラグに繋いだまま、さらに2時間充電状態にします。それから自動的にシャットダウンするまで放電させて、中断なく一気に100%まで充電してください。
e-wasteを処理する場合は、認可済みリサイクルセンターR2を通じて廃棄してください。
修理が上手く進みませんか?トラブルシューティングとして、アンサーコミュニティを参照してください。
40 の人々がこのガイドを完成させました。
以下の翻訳者の皆さんにお礼を申し上げます:
90%

Midori Doiさんは世界中で修理する私たちを助けてくれています! あなたも貢献してみませんか?
翻訳を始める ›


4 件のコメント
Hi laws,
iFixit makes no claims to the continued splash-resistance of the Apple Watch after applying this adhesive strip. It's probably going to be just fine, but we can't confirm that the Apple Watch will maintain its IPX7 waterproof rating after being repaired.
Ich habe jetzt 2 Uhren durch - besten Dank für die Hilfestellung. Ich habe mir die “Dichtungs-Klebestreifen” besorgt, waren für mich aber nicht praktikabel. Bei beiden Uhren hat sich die Force-Touch-Dichtung teilweise gelöst und der Klebestreifen hat zwar auf der FT-Dichtung gehalten, aber das Display kam wieder hoch, da der die FT-Dichtung eben nicht mehr am Gehäuse geklebt hat.
Ich habe mir eine Tube Smartphone-Dichtmasse besorgt, damit konnte ich die FT-Dichtung wieder befestigen und habe damit auch das Glas wieder optimal einkleben können. Da sich sich die Masse (wie die Klebestreifen auch) bei Hitze wieder entfernen lässt: für mich die praktikablere Lösung. Auch nicht ganz so frickelig…
Wie heißt der Kleber? T-7000?
Hi. I changed the screen on an apple watch series 4, now the screen works, whcih is great, but when I charge it, the green snake comes on but never charges. It heats up the bottom, gets very warm. Could it be the battery itself? Maybe needs a new one? Is rthere anything else that woudl be causing the battery to not charge and or heat up on the bottom when chaging the screen?
Derrick Brewer - 返信