
Apple EarPods ジャックプラグの交換
はじめに
手順 1 に進むこのガイドでは、Apple EarPodsのヘッドフォンジャックのプラグを交換する方法を扱っています。このガイドでは、適切なはんだ付けのスキルを持っていることが必要です。はんだ付けを行う場合は、煙や熱に注意しながら作業を行ってください。 Apple EarPodsは非常に優れた品質のヘッドフォンですが、高価でありながら比較的簡単に修理することができます。このガイドを参照すればヘッドフォンを廃棄する際のコスト削減と廃棄物の発生を防ぐことができます。


-
-
ヘッドホンを使う人が使いやすい長さ(旧ジャックプラグの近くが望ましい)にワイヤーをカットします。
-
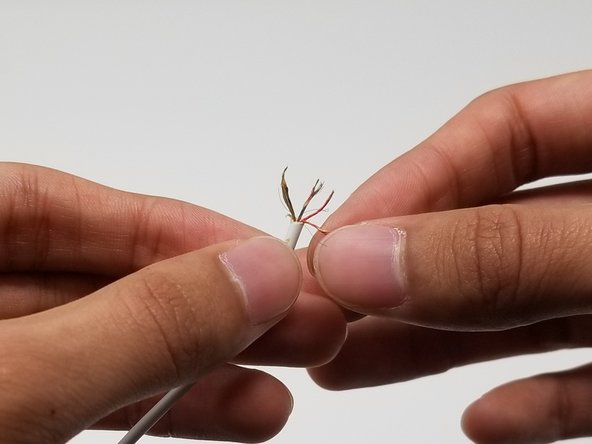
ワイヤーストリッパーを使って、ワイヤーの端から約1~2cmの絶縁体を外します。
-
-
-
-
以下の手順で、ジャックのポールにワイヤーをはんだ付けします。ポールは、カラーボックスで分割された左側の画像で詳細に確認できます。適切なはんだ付け方法については、iFixitのはんだ付けガイドをご参照ください。
-
第1ポール(赤い枠で囲った部分)を接地します。グリーン-ゴールド、レッド-ゴールド、レッド-グリーンの各線をはんだ付けします。
-
2番目のポール(オレンジの枠で囲まれた部分)は、右側イヤホン用です。赤色のワイヤをはんだ付けしてください。
-
3番目のポール(黄色の枠で囲まれた部分)は、左側のイヤホン用です。グリーンの線をはんだ付けします。
-
最後に、他の部分に接続されていない4番目のポール(グリーンの枠で囲まれた部分)は、マイク用です。ゴールドのワイヤをはんだ付けしてください。
-


5 の人々がこのガイドを完成させました。
以下の翻訳者の皆さんにお礼を申し上げます:
100%

Midori Doiさんは世界中で修理する私たちを助けてくれています! あなたも貢献してみませんか?
翻訳を始める ›
チーム

University of Memphis, Team S2-G4, Baddour Spring 2019 University of Memphis, Team S2-G4, Baddour Spring 2019人のメンバー
UM-BADDOUR-S19S2G4
2 メンバー
5のガイドは作成済み
6 件のコメント
Step 5 wrong! The Mic is the red&green cable and the gold cable doesn't exist in my earpods. There is a 6th cord however which is a nylon like support cord.
The gold wire is hidden inside the red-green wire. Unwind the red-green to find it. The gold is the mic, the red-green is the mic ground. If you use the original jack (cut away the moulded on white plastic) you can use a multimeter to find the mic connection which is on the other side of the ground connection. Thanks for the page. Good luck
Jonathan -
I recycled the same factory jack and identified the poles with a multimeter. I followed the same instructions. Their volume is lower than usual. Thanks for the page.
This article was pretty useful for me. Great thanks to the author and also people who commented here.