手順 1を翻訳中
手順1


-
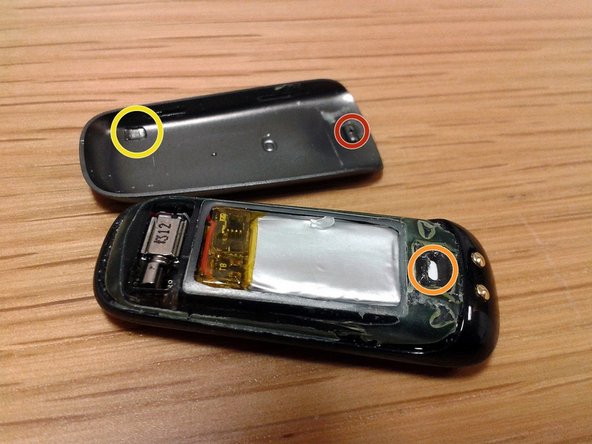
Removing the metal backplate is simple. This is just stuck on with some flexible glue. So prise something under and off it pops.
-
Inside you can see a number of large cut outs in the rear of the plastic casing.
-
Note the small pinhole in the metal backplate that aligns with the rubber sealed hole in the plastic casing - more on that later.
-
There is also a very small ground out area inside the metal backplate that appears to align with the rotating mass of the vibrator.
クリエイティブコモンズのオープンソース著作権のもと、あなたの投稿は著作権の対象となります。