メインコンテンツにスキップ

必要な工具と部品

ツール

もっと見る

この分解は修理ガイドでは ありません。 お持ちのSamsung Galaxy A14 5Gを修理する際は、iFixitの修理ガイドをご利用ください。

  1. Samsung Galaxy A14 5G Teardown, Remove Sim Tray: 手順 1、 1の画像 1
    • Remove Sim Card & SD Card Tray with a Sim Ejector Tool

  2. Samsung Galaxy A14 5G Teardown, Pop Out Back Cover: 手順 2、 3の画像 1 Samsung Galaxy A14 5G Teardown, Pop Out Back Cover: 手順 2、 3の画像 2 Samsung Galaxy A14 5G Teardown, Pop Out Back Cover: 手順 2、 3の画像 3
    • Pop out the back cover using a spudger or opening pick

  3. Samsung Galaxy A14 5G Teardown, Removing Fingerprint Scanner (Optional): 手順 3、 1の画像 1
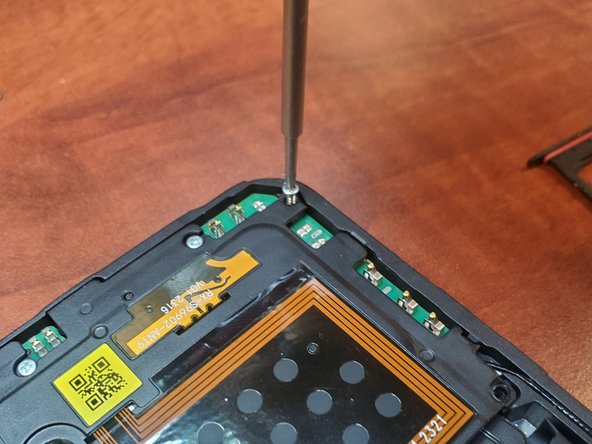
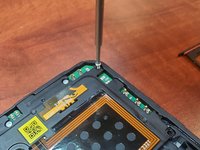
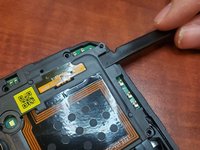
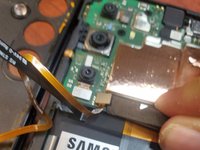
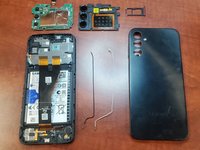
    • After "popping out" the back cover, you can remove the Scanner from the back cover or set the back cover aside, insert a thin pick in from the screen side and gently work round undoing the clips. When you lift the back off be mindful of the power switch/fingerprint reader cable. Lift the back away slowly.

  4. Samsung Galaxy A14 5G Teardown, Unscrew All 16 Screws: 手順 4、 3の画像 1 Samsung Galaxy A14 5G Teardown, Unscrew All 16 Screws: 手順 4、 3の画像 2 Samsung Galaxy A14 5G Teardown, Unscrew All 16 Screws: 手順 4、 3の画像 3
    • Unscrew all 16 screws on the plates

  5. Samsung Galaxy A14 5G Teardown: 手順 5、 2の画像 1 Samsung Galaxy A14 5G Teardown: 手順 5、 2の画像 2
    • Pop off the 2 plates holding on the Motherboard and Charging Port

  6. Samsung Galaxy A14 5G Teardown, Unplug Cables: 手順 6、 3の画像 1 Samsung Galaxy A14 5G Teardown, Unplug Cables: 手順 6、 3の画像 2 Samsung Galaxy A14 5G Teardown, Unplug Cables: 手順 6、 3の画像 3
    • Unplug the battery, display cables, and fingerprint scanner from the Phone

  7. Samsung Galaxy A14 5G Teardown, Unplug Front Camera & Antenna Cables: 手順 7、 3の画像 1 Samsung Galaxy A14 5G Teardown, Unplug Front Camera & Antenna Cables: 手順 7、 3の画像 2 Samsung Galaxy A14 5G Teardown, Unplug Front Camera & Antenna Cables: 手順 7、 3の画像 3
    • Unplug the front camera & Antenna Cables from the phone

  8. Samsung Galaxy A14 5G Teardown, Unplug Charging Port: 手順 8、 1の画像 1
    • Unplug the Charging Port from the Display Cable and Antenna Cables

  9. Samsung Galaxy A14 5G Teardown, Remove Charging Port: 手順 9、 1の画像 1
    • Pry Up on the Charging Port

  10. Samsung Galaxy A14 5G Teardown, Remove Motherboard: 手順 10、 1の画像 1
    • Pry Up on the Motherboard

  11. Samsung Galaxy A14 5G Teardown, Reassemble Phone: 手順 11、 2の画像 1 Samsung Galaxy A14 5G Teardown, Reassemble Phone: 手順 11、 2の画像 2
    • Do what you just did but in reverse

作成者

2人の作成者と共同で作成されました。

FadingBulb57227

メンバー登録日: 02/01/24

181 ポイント

1ガイドが承認済み

4 件のコメント

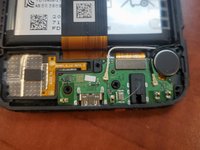
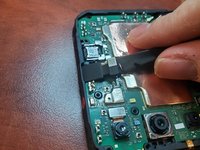
What is the black square the connects the speaker.

Judy LeBrun - 返信

it is a foam pad

FadingBulb57227 -

No mention of the battery.... assuming it must be removed also...

Heather Gussman - 返信

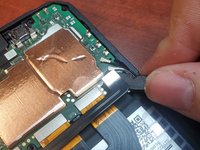
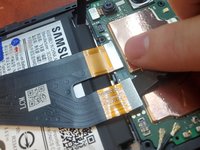
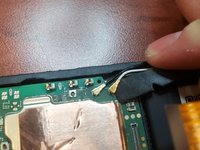
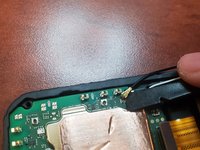
Peel part A then Pull up on B, if it is too hard to pull then add isopropyl alcohol

FadingBulb57227 -

コメントを追加

統計データ:

過去 24時間: 14

過去 7 日: 59

過去 30 日: 266

今までの合計 7,411