はじめに
In this teardown, we open a Wii to the logic board. I couldn't have done this without the help of my girlfriend, Elizabeth.
必要な工具と部品
-
-
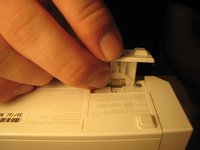
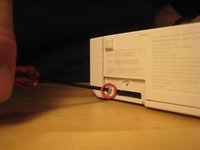
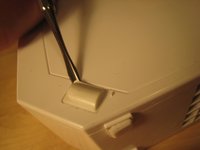
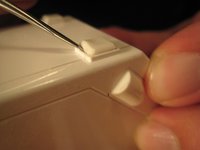
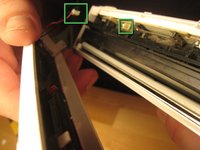
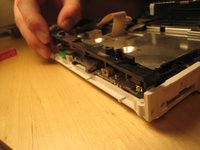
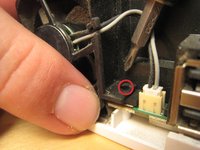
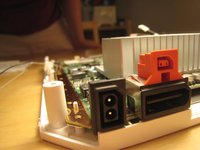
One small screw holds the BIOS memory battery.
-
Once that screw is removed, you can slide out the plastic slot.
-
-
-
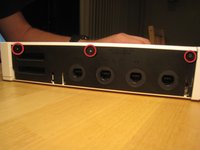
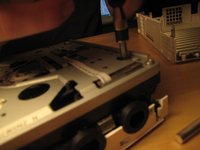
Remove these three black case screws. The one on the right is a few mm longer. These screws hold on the black plastic cover for the GameCube ports.
-
-
-
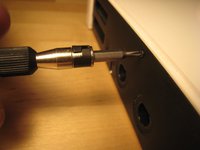
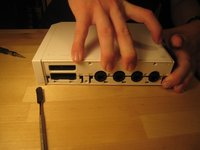
Remove all screws from the case.
-
Several case screws require a Tri-Wing screwdriver.
-
The next step has more pictures of removing rubber feet and the screws underneath. The feet and screwcovers are self-adhesive, but not every foot or screwcover has a screw.
What tri wing screwdriver size i need?
I used Y1 in the ifixit kit
I used a small enough flat head and a lot of pressure to loosen these, but that won’t work in the long run I figured out because of the screws on the left side of the Wii. Get a cheap long one from Amazon.
-
-
-
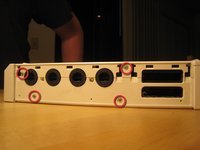
Remove rubber feet and screws underneath.
The screws beneath the thick feet are very deep and therefore can't be loosened by a precision screwdriver with a bit. The precision screwdriver is barely too big to fit inside the screwhole.
If you have the size 4 socket bit you can use it as a narrow extender
ZEDZANO -
There are no screws under the two rear rubber pads on the serial number side of my RVL-001(AUS) Wii. I don't know why the author photographed themselves removing those rubber feet. Only remove the rubber pad near the front on that side (as well as the battery compartment, and the screws mentioned in step 4) to get the front bezel off.
I found this helpful teardown vid which shows all the screws you have to remove: https://www.youtube.com/watch?v=80DvlAE8...
-
-
-
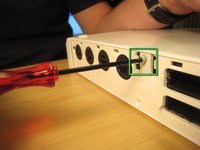
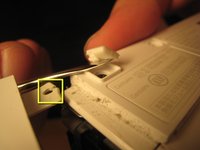
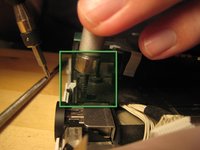
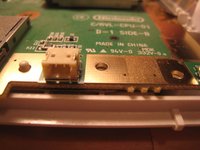
Once all screws are removed, you should be able to pull off the front drive panel.
-
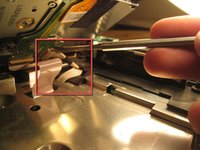
The wire connecting the front panel (green squares in the third image) can be pulled out gently by hand or with the help of a spudger.
If you actually take the time to do this step It would not have a broken holder
I was not gentle enough in removing the plastic wire connector. The red wire broke off, with a small piece of the red wire stuck in the plastic connector. I really can't get the small piece of red wire out of the connector.
Anyone know of anywhere that sells a connector, or at least what the name of kind of connector is?
Bronze Owl - 返信
-
-
-
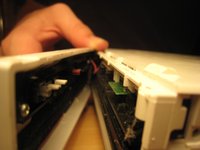
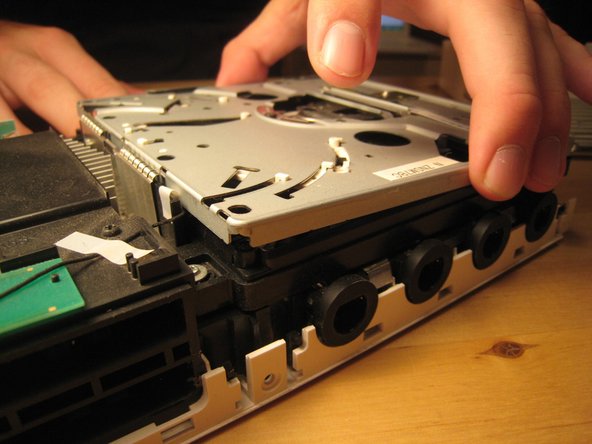
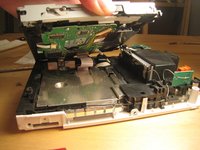
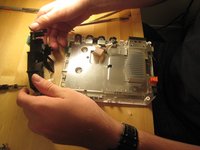
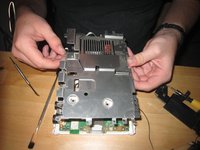
Now the case can be pulled apart.
-
-
-
-
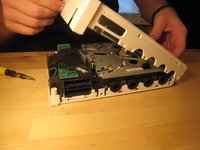
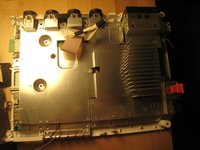
We lifted up the cover of the optical drive by removing the six Phillips #00 screws. These are all labeled on the previous image.
-
There are a ton of parts in the optical drive, but there is nothing very fancy about this drive compared to other slot-loading drives, so I didn't take it apart completely. There are also a ton of gears and levers that I did not want to deal with.
The six Phillips screws are only holding in the optical drive, so if you only need to take the case off, the sides of it are just very snug against the inside wall and other components
I had a small spring fall out at this step. It went right next to the motor by the actual spiral part of it going on a small black stud while one end of it goes under the white plastic piece by it, and the other end of it gets kind of held by the black plastic frame. It’s hard to describe, but it can be faintly seen in the bottom middle of the third image in this step.
-
-
-
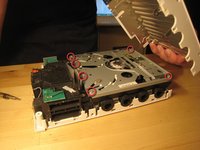
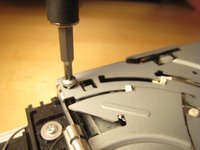
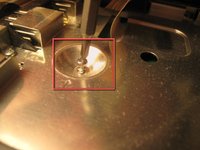
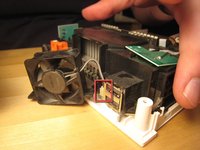
The screws holding in the drive were deep within the casing.
-
Once those screws were removed, the entire case could be lifted off.
-
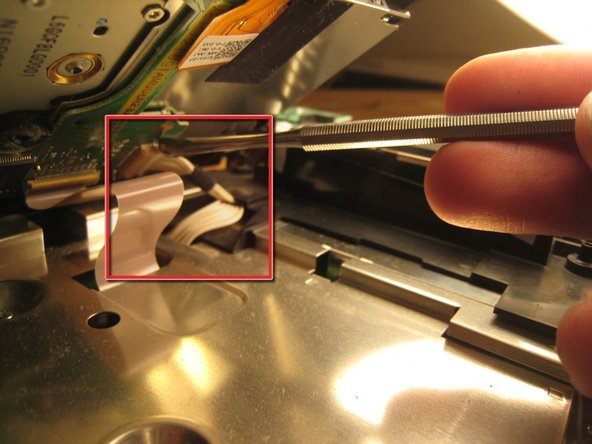
This wire slid out from its horizontal slot. Once it was detached, the ribbon cable came out as well.
-
-
-
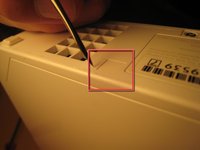
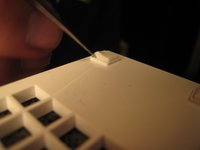
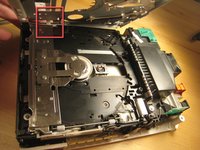
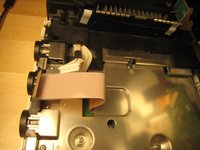
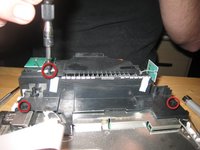
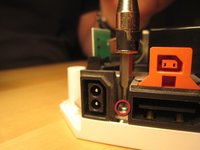
We begin trying to get to the logic board by removing this small black plastic rim.
No worries, it fell out long before I got this far and I heard it bounce around inside. Set it aside once I got the lid off and it rolled out.
It fits in this small stand-up slot that doesn't seem to hold the square nut in .. so a dab of white glue to keep it there while the work is going on did the trick.
-
-
-
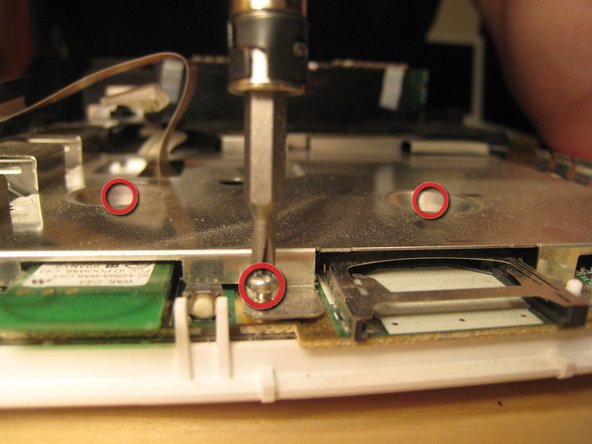
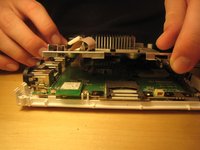
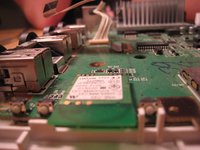
Remove all screws from the logic board cover. Two are recessed in the middle; others are along the edge. More will become visible as other parts are removed. It's like a game! You can start with the screws holding in the black plastic pieces, but I started with the most visible and went from there.
-
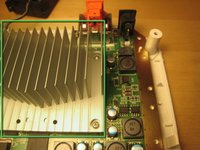
There are two wires (shown in the third picture) coming from the logic board and connected to the Wi-Fi antennas. These are delicate. Do not break them.
-
-
-
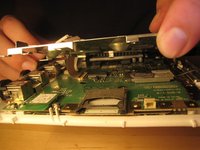
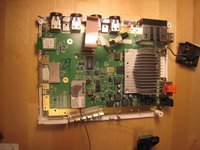
With the black plastic covers off, we can see all the screw holes. Most of the screws are out by now, but once the rest of them are out, you can lift off the logic board cover.
-
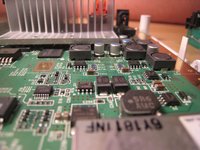
Note that at least one part is thermal padded to the logic board cover. You might have to replace this thermal pad, but I didn't. I just pushed them back together. Oh well!
-
Remove any remaining screws in the logic board cover.
-
-
-
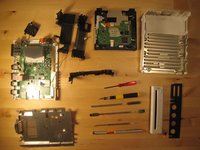
We stopped there.
-
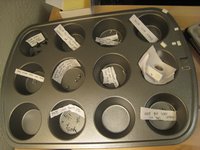
A muffin tin worked really well to organize all the screws.
-
Putting the Wii back together took only about half an hour, and it works perfectly. We improved Nintendo's design by three or four screws and one square nut, but worsened their design by one piece of duct tape (to hold in the bios battery).
The extra Square Nut goes in the right hand side of the plastic bracket in step 12. It is the reason you ended up needing duct tape for the battery door.
-


30 件のコメント
I was kinda hoping you would take apart the optical drive assembly, you said there is "nothing fancy" about it, but since Nintendo designed this drive to be able to take the "mini" discs from GameCube, they have to work out a mechanism to center the disc before loading it onto the motor, hence "a ton of gear and levers" and that's the exact thing I actually wanted to see, I really wanted to know how they made it work..
:P
Maybe I can make a guide for you with it like that. I plan to replace the Hard Drive in my wii so ill make a guide.
@zeldaawesome It is not a hard drive, it is NAND. In fact, that’s about as far away from a hard drive as you can get.
Xu Xian -
I have a dud drive, so i might just do this.
Nice guide. I have one suggestion and one comment to add.
Suggestion: a different color circle in the pictures for the Tri tip screws would speed up re-installation.
Comment: the extra square nut holds in the BIOS battery cover which is quite inconvenient to discover as it is the last screw you reinstall.
Good suggestion, very glad it was added :)
THANK YOU AUTHOR.
Thank you! Helped a lot to change the casing. The only advice that I can give is to organize the screws properly to mount it up again.
Cheers!
Thanks for this. My Wii is now 9 and I need to do a good clean out of dust and what not. This will be really helpful.
Wizbang FL - 返信
so i got off the first two triangle screws under the black plastic on the gamecube controller ports, and after, i went to take off the four on the side of the wii. i got the ones that were deep in the console, but as i tried to get the black triangle ones that are a little smaller i messed up the screws to much and i pretty much lost the threading on the two. what can i do to get them off. i can replace them if i can get the darn things off. also i was using a flat head that worked on all the other silver triangle screws.
Would you mind answering a question? My Wii was dropped on accident, and I thought I heard something come loose. Sure enough, little black chunks of plastic came out of the fan slot when I examined it. The Wii itself appeared to work, but I can't help but worry that somehow gameplay might be effected. Any ideas where the black pieces of plastic came from? Will this effect the Wii's performance? Please respond as soon as you can!
It's probably fan blades or pieces of fan blades. Don't want anything too resource intensive for too long, or just put an ice pack on it Idk
Thanks for the 411. It was useful, with a few side notes:
1)I tried following your tool list on the cheap. Thinking that I had a ton of tool kits already, I skipped ordering the Phillips screw drivers. I panicked a little when I started my teardown, only to find all my drivers too big for the job....save one. The Phillips screw driver in the "Radio Shack 61PC Computer and Electrical Tool Set" handles all the Phillips screws on the teardown.
2)The notation about the hidden screws was a little misleading and a bit of an aggravation, as only a small percent of the feet actually covered screws (1, actually, IIRC). For a future edition of this teardown, please add some sketches to show the proper locations.The recommended "Pro Magnetic Project Mat" and my lame excuse for art skills saved me in this area.
Thanks for the brilliant and well annotated tear down! A dab of no nails with a cocktail stick will make sure the rubber feet will stay sat when you reattach them.
@gjwilder - that's the center piece out of the holder inside the game case, it probably broke off and got stuck in the center hole of the disk and loaded into the slot unnoticed.
I can't imagine how that would work; torx and tri-wings are shaped very differently. In any case, it's much better to use the right tool for the job, or you risk stripping screws and never getting them out again. Tri-wing drivers are pretty easy to get ahold of, so best not to take shortcuts ;)
the hannah mareiMedlock
misc parts (ie metal & plastic holdings) missing from the final picture. Could be useful to make sure you have all the parts when you try to put it back together…
We improved Nintendo's design by three or four screws and one square nut, but worsened their design by one piece of duct tape.
LMAO (good tutorial tho)
You missed the face and the screws for re assembling are super confusing …I stripped my case from that confusion and missing face
Hey guys, Here it is, I still have the original Wii. Still looks immaculate, and has no mechanical issues. The problem is… I wanted to play the Original Luigi’s Haunted Mansion. I picked up a memory card (Supposedly OEM Nintendo Brand), put it in the slot up top. Played the Game for a while. But, when trying to remove the card. It’s a no go. It is stuck. I used a strip of an old super thin laminated ID card. I Got in the slot to the side of the card, but now see that there is also prongs on the inside of the card too.
Any solutions, or is this going to need a complete tear down to remove?
Nicole Amy - 返信
I wanted to see the CPU, but it still looks good inside.
Where is the wireless receiver that is inside the wii console
I need to remove it and put it in
The usb part of the wii console
In order for me to play spyros adventures
Yea, I used cello tape for the bios battery too.
Love this guide as it helped me to replace my shell thanks!
jcku jxgjk - 返信