メインコンテンツにスキップ

Canon PowerShot A75 Casing Replacement

注意:あなたはさきほど閲覧しているガイドの前提となるページを編集しています。あなたが行った変更は、この手順を含むガイド全体に影響を与えます。

英語
日本語

手順 11を翻訳中

手順11
Canon PowerShot A75 Casing Replacement: 手順 0、 3の画像 1 Canon PowerShot A75 Casing Replacement: 手順 0、 3の画像 2 Canon PowerShot A75 Casing Replacement: 手順 0、 3の画像 3
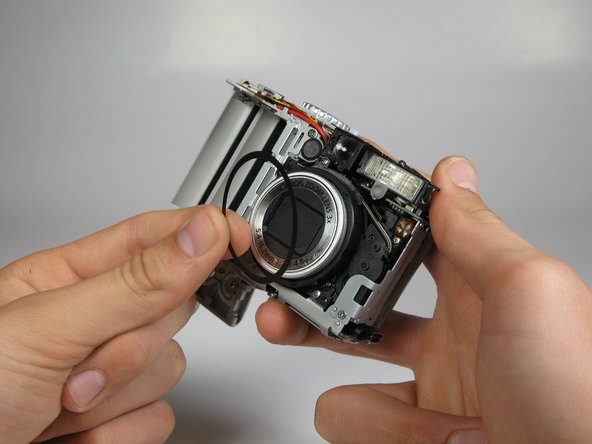
  • Take off the front casing.

  • There is a black rubber washer around the lens that comes out after you take the casing off. Make sure to replace it when putting the camera back together.

ここに翻訳を挿入する

ここに翻訳を挿入する

クリエイティブコモンズのオープンソース著作権のもと、あなたの投稿は著作権の対象となります