ご注意:あなたは前提となるガイドを編集しています。あなたが行なう変更は、この手順を含むガイド全体に反映されます。
手順 3を翻訳中
手順3


-
The unbelievably easy task of removing the plastic rear cover gives access to the replaceable battery. Hey Apple, take notes!
-
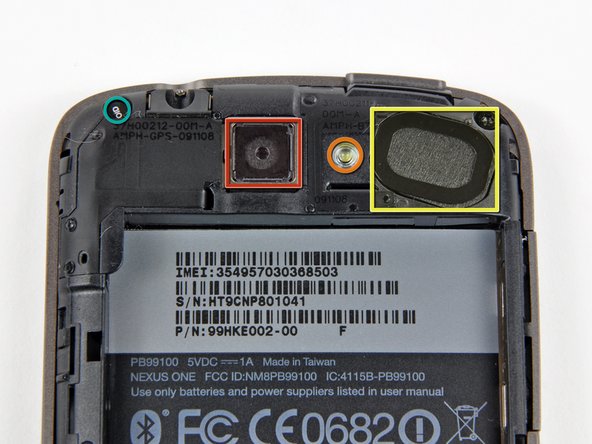
Inside the battery compartment you can see:
-
The 5MP camera lens
-
LED flash bulb
-
External speaker
-
The warranty-killing VOID sticker
クリエイティブコモンズのオープンソース著作権のもと、あなたの投稿は著作権の対象となります。