メインコンテンツにスキップ

Desmontaje Huawei Mate 20 X 5G

英語
スペイン語

手順 3を翻訳中

手順3
Huawei Mate 20 X 5G Teardown: 手順 0、 3の画像 1 Huawei Mate 20 X 5G Teardown: 手順 0、 3の画像 2 Huawei Mate 20 X 5G Teardown: 手順 0、 3の画像 3
  • Though this Mate is only rated IP53, the SIM card tray is equipped with a rubber gasket—something we usually see on "waterproof" smartphones these days.

  • Slot 1 of this SIM tray is reserved for 5G cards, whereas slot 2 only accepts up to 4G cards.

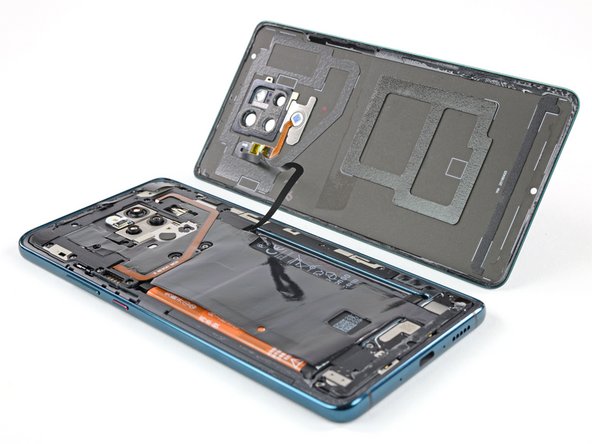
  • To our surprise, we get the glued-down back cover off lickety-split—no heat required! A suction handle and a halberd spudger separates everything nicely.

  • Adhesives can harden with age, so maybe next time won't be so easy—but our fresh-from-the-factory unit was very cooperative.

  • A generously proportioned fingerprint flex cable keeps the back cover tethered for now, but it's such a long leash that we don't mind. On to the next layer.

Aunque este Mate sólo tiene el grado de protección IP53, la bandeja de la tarjeta SIM está equipada con una junta de goma, algo que vemos habitualmente en los smartphones ''resistentes al agua'' de hoy en día.

La ranura 1 de esta bandeja SIM está reservada para tarjetas 5G, mientras que la ranura 2 sólo acepta tarjetas 4G.

Para nuestra sorpresa, conseguimos que la tapa trasera encolada se separe sin necesidad de calor. Una manija de succión y un halberd spudger separan todo muy bien.

Los adhesivos pueden endurecerse con el tiempo, así que tal vez la próxima vez no sea tan fácil, pero nuestra unidad recién salida de la fábrica fue muy cooperativa.

Un cable flexible para huellas dactilares de generosas proporciones mantiene la tapa trasera atada por ahora, pero es una correa tan larga que no nos importa. A la siguiente capa.

クリエイティブコモンズのオープンソース著作権のもと、あなたの投稿は著作権の対象となります