
iPod Nano 7th Generation フロントガラス/デジタイザの交換

はじめに
手順 1 に進むこの修理ガイドを使って、iPod Nano 7th Generationの壊れたスクリーンの交換もしくはタッチ機能の回復を行います。


-
-
鍋を十分な量のお湯で満たして、iOpener を完全に沈めます。
-
お湯を沸かして熱くなったら火を止めます。
-
iOpenerを熱湯の中に約2−3分間沈めます。iOpener全体が完全に浸かっているか確認してください。
-
トングなどを浸かって、温まったiOpenerをお湯から取り出します。
-
タオルでiOpener全体を拭き取ります。
-
iOpenerの準備は整いました。iOpenerを再度温める必要がある場合は、お湯を沸騰させて、火を止めてからiOpenerを2-3分間浸してください。
-
-
-
-
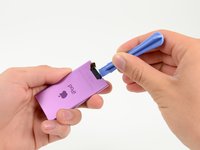
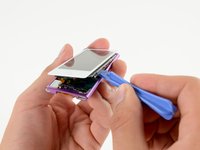
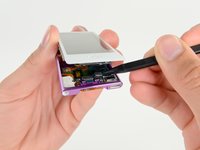
ホームボタン左側のメタル製ミッドフレームとディスプレイの下に、スパッジャーを差し込みます。
-
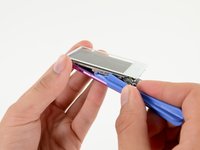
ホームボタン周辺からフロントパネルにかけてスパッジャーを回転させ、ディスプレイを固定している接着剤をはがします。
-
-
-
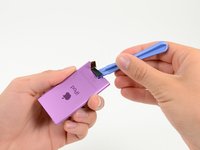
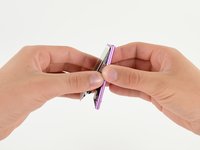
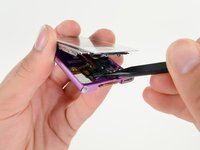
スパッジャーの平面側先端で、ホームボタンのガスケットをボタンの中心に向かって押し、軽く接着剤を乖離してください。
-
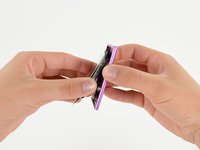
このようにして、ホームボタンをフロントガラスから簡単に取り外せるようになるまで、ホームボタンの周囲を作業します。
-


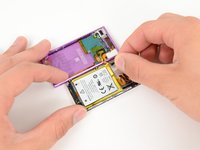


デバイスを再組み立てする際は、これらの手順を逆の順番に従って作業を進めてください。
デバイスを再組み立てする際は、これらの手順を逆の順番に従って作業を進めてください。
29 の人々がこのガイドを完成させました。
以下の翻訳者の皆さんにお礼を申し上げます:
100%

これらの翻訳者の方々は世界を修理する私たちのサポートをしてくれています。 あなたも貢献してみませんか?
翻訳を始める ›


10 件のコメント
Tried everything to loosen the adhesive around the metal midframe... Nothing worked, and finally (after a lot of prying) I managed to get it out... only to have damaged the lcd digitizer underneath the screen!
If you're going to attempt this, have a spare digitizer nearby, and be willing to fail. After spending $60+ on parts and tools, i'm worse off then where I started.
I have no idea how this is considered moderate, meanwhile the Classic is considered very difficult.
Hi! Where can I find in US a front glass replacement for my iPod Nano 7th? Do you know a website to get it? Please write me to tavoacevedom@yahoo.es. Thks.
did you find a glass? I am also looking for one.... hbsamat@yahoo.com
So far, so bad. I left the iopener on there for 90 seconds. Not loose at all. Heated it again a little longer and left on for a little longer. Still not loose at all. Pried and pried and BROKE THE BLUETOOTH ANTENNA!!!! Still soldiering on, but the front part is not coming loose either. Beginning to regret the attempt big time.