はじめに
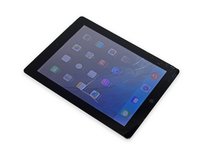
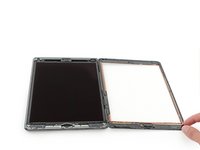
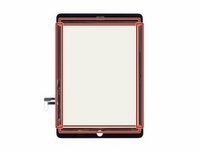
iPad Airセルラーモデルのフロントガラスとデジタイザーアセンブリを交換するにはこのガイドをご利用ください。例えば、フロントガラスにひびがはいったり、タッチ機能に反応しない場合、ご利用できます。もし実際のディスプレイを交換する必要がある場合は、こちらの修理ガイドを参照してください。
このガイドで使用されているパーツはWi-Fiモデルのものです。Wi-FiモデルとLTEモデルの内部パーツは若干異なりますが、どちらのモデルも作業手順は同じです。
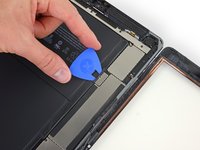
ご注意: バッテリーの絶縁ピックもしくはバッテリーブロッカーの使用は、バッテリーを絶縁させるための古いやり方となりつつあります。ロジックボードの下にあるバッテリーピンにダメージを与えてしまうリスクがあるためです。この方法をとる場合は、ロジックボードの方向に慎重にまっすぐ差し込んでください。コネクタの端から端をスイングしたりひねったりしないでください。
必要な工具と部品
-
-
鍋を十分な量のお湯で満たして、iOpener を完全に沈めます。
-
お湯を沸かして熱くなったら火を止めます。
-
iOpenerを熱湯の中に約2−3分間沈めます。iOpener全体が完全に浸かっているか確認してください。
-
トングなどを浸かって、温まったiOpenerをお湯から取り出します。
-
タオルでiOpener全体を拭き取ります。
-
iOpenerの準備は整いました。iOpenerを再度温める必要がある場合は、お湯を沸騰させて、火を止めてからiOpenerを2-3分間浸してください。
-
-
-
ディスプレイガラスにひびが入ってしまった場合、割れてしまった部分が広がらないようにガラス表面上にクリアテープを貼るなどして、怪我がないようご注意ください。
-
iPadディスプレイ上にクリアタイプのテープを何重にも貼り、全体を覆います。
-
ここに書かれている手順にできるだけ従ってください。しかしながら、ガラスが一旦割れてしまうと、作業を続けていくにつれてひびが広がってしまう可能性があります。この場合、ガラスを取り出すためにはメタル製工具を使用する必要があります。
-
-
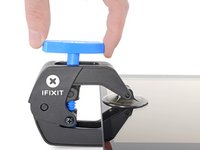
この手順で使用する道具:Clampy - Anti-Clamp$24.95
-
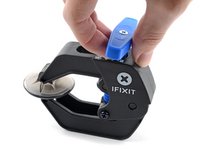
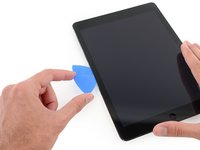
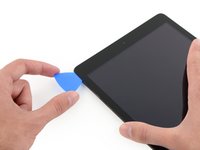
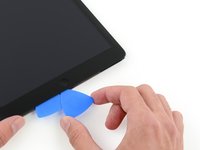
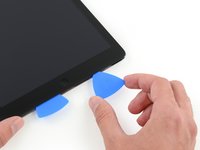
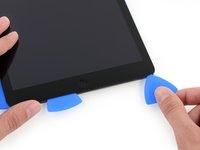
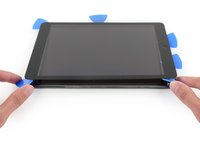
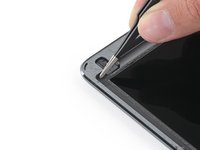
青いハンドルを後方に引き、リバースクランプのアームのロックを解除します。
-
青いハンドルをヒンジ側に引くと、オープニングモードが解除されます。
-
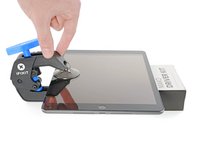
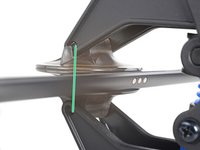
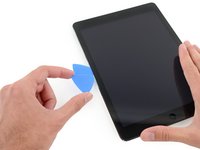
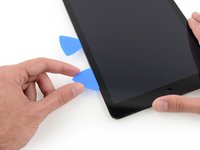
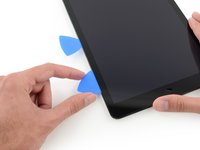
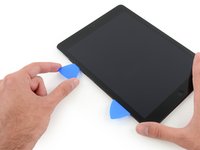
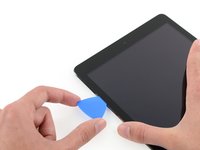
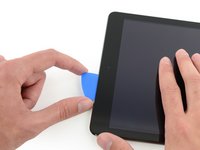
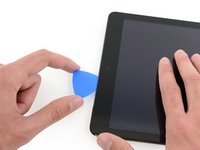
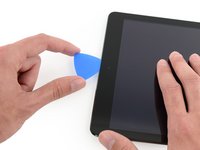
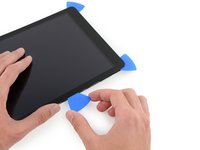
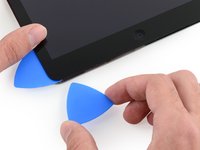
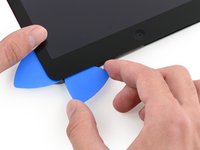
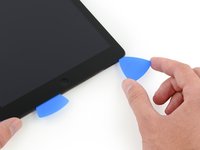
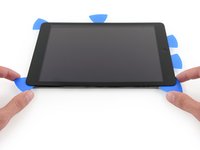
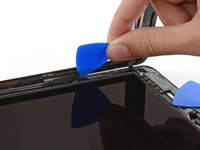
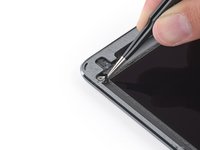
吸盤を左端の中央付近に配置し、上下に1つずつ装着します。
-
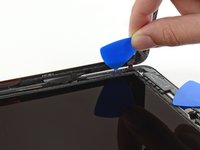
リバースクランプの下部をしっかりと固定し、上部カップをしっかりと押し下げて吸盤を装着ます。
-
-
-
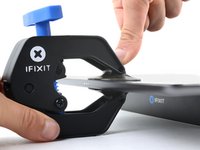
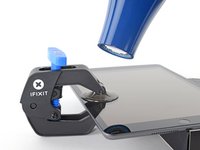
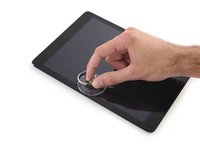
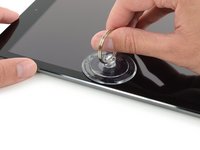
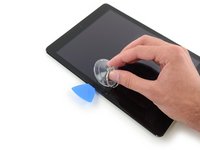
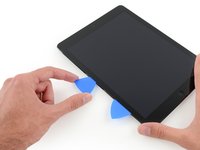
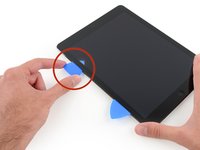
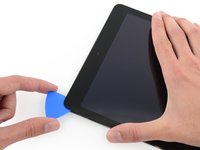
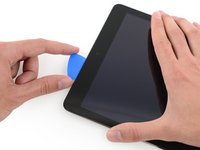
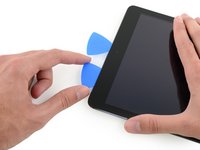
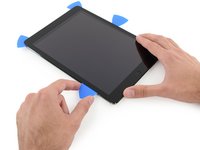
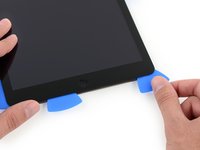
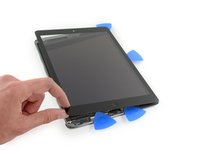
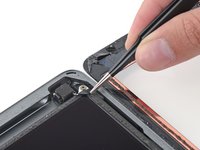
温めた側の真ん中から少し上辺りに、吸盤カップを取り付けます。
-
しっかりと吸盤がスクリーンに装着されるにはカップがスクリーン上に完全に平らに付いているか確認してください。
-
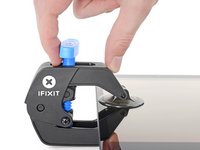
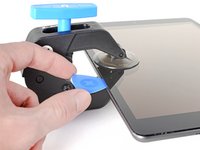
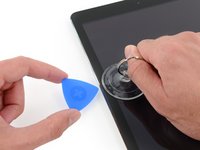
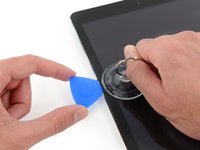
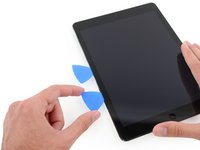
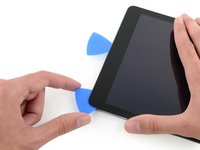
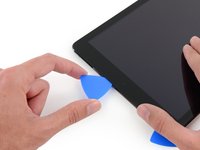
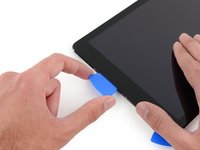
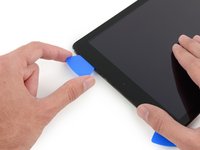
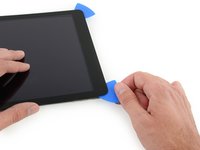
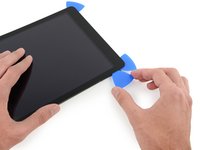
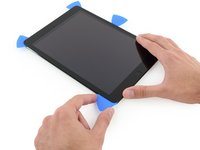
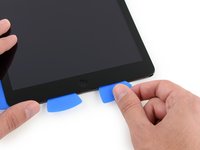
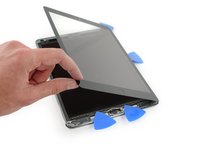
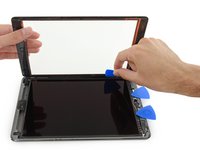
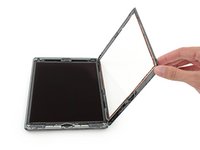
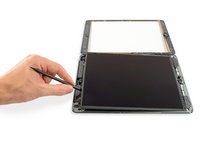
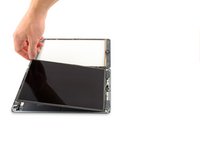
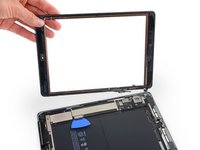
iPadを片手で押さえながら、背面ケースをフロントパネルのガラスから離すために吸盤カップを上部に向けて引っ張りあげます。
-
iPadのスクリーンの破損がひどい場合は、透明なパッキングテープで表面を覆うと、吸盤がうまく接着します。 または、強力なテープ(ダクトテープなど)を使用して、ハンドルに折りたたんでください。
-
-


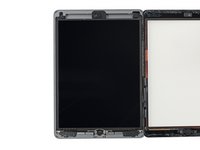


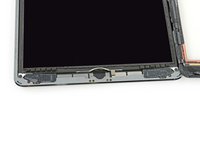


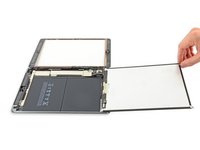


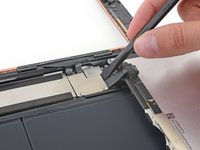
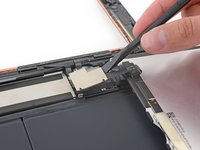


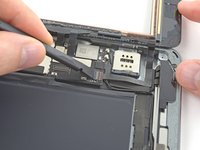


デバイスを再組み立てする際は、これらのインストラクションを逆の順番に従って作業を進めてください。
デバイスを再組み立てする際は、これらのインストラクションを逆の順番に従って作業を進めてください。
141 の人々がこのガイドを完成させました。
以下の翻訳者の皆さんにお礼を申し上げます:
100%

これらの翻訳者の方々は世界を修理する私たちのサポートをしてくれています。 あなたも貢献してみませんか?
翻訳を始める ›


18 件のコメント
Definitely not for the weak of heart, especially if your screen lost all its integrity when it shattered. You'll be scraping glass splinters off the frame for an hour. Tip: Make sure to scrape off all the black adhesive from the frame of the iPad (and I mean every speck) before putting the new screen down. I apparently missed a spot, and I can't get the screen to seat perfectly within the frame (but close enough; I'm not going back in there). Also, I didn't have much luck with the microwavable tube for softening the adhesive, but I was fortunate to have a heat gun that helped quite a bit.
I love the ifixit guides and this one is up to their consistently high standards, have to concur with the previous comment though, if your customer brings you a completely trashed digitizer a good number of the steps become obsolete and its down to brute force to remove the adhesive even if you've taped the screen, picks become redundant. One piece of advice that could be incorporated is if the digitizer is beyond repair, just cut the ribbon and be done with it, opening a trashed screen 'like a book' is not necessary, otherwise spot on guys and thanks for making my day easier!
I agree with the previous two comments—this guide (or a separate one) should be changed to show to replace a cracked/shattered digitizer. I quickly learned that using the picks was a lost cause and following the guide was near pointless until I got to removing the display.
Pro-tip: don't even bother with the heat gun if the digitizer is shattered. Take the iPad outside, put on a pair of goggles, and just wedge a spudger/tweezers between the adhesive and the glass. Don't worry about damaging the home button or cables, your replacement digitizer probably has them pre-installed...just worry about the camera and not nicking the display. It's going to make a huge mess, but that's why you're outside. Heat it if you want, but I didn't find it necessary.
Before you proceed with this — especially if your digitizer is shattered — read through the comments under each step for some helpful hints. Also, one thing that isn't mentioned: DO NOT ATTEMPT TO CLEAN THE INSIDE OF THE DIGITIZER AFTER YOU REMOVE THE PROTECTIVE FILM. From what I can tell, only the outside of the digitizer is made of gorilla glass, and the inside will lightly scratch no matter how soft and clean your cleaning cloth is.
I found the guide easy to follow, I completed the repair in half an hour. I found the repair easy to complete BUT i recommend that you use a heat gun over the iOpener tool, as the heat gun is more affective at softening the adhesive making it easier to pull out the little shards of glass. I recommend you update your guide to show a realistic repair with an iPad with a horribly cracked screen.