はじめに
2012-2015 iMacのディスプレイを取り外すには、スクリーン周囲の接着剤を切断する必要があります。粘着剤を切断した後は、ディスプレイの再シールには使用できません。
このガイドに従って、新しい粘着ストリップを貼り付けてください。
粘着ストリップには、2012-2015粘着剤と2012-2019粘着剤の2種類があります。2012-2015年版粘着剤には、下部ストリップに沿ってマイクの切り込みがないため、2012-2015年版iMacにのみご使用ください。
必要な工具と部品
-
この手順で使用する道具:Tweezers$4.99
-
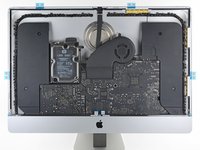
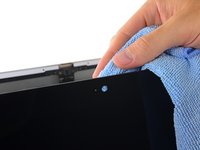
既存のディスプレイを再利用する場合は、ディスプレイ裏面の古い接着剤も剥がす必要があります。
-
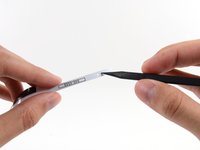
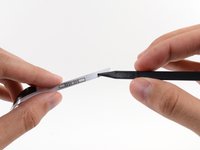
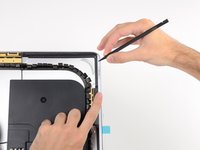
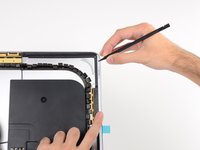
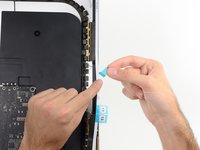
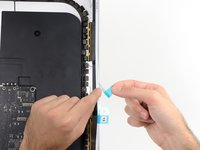
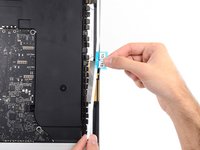
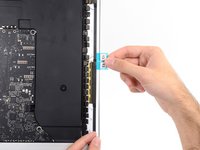
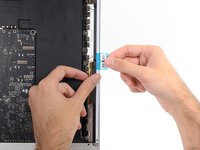
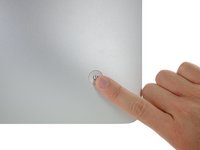
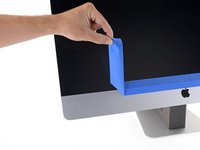
ピンセットや指を使って接着ストリップをはがします。下部からデバイスの上部に向かってはがします。
-
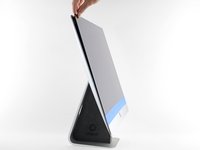
古い接着剤をすべて取り除いた後、90%(またはそれ以上)のイソプロピルアルコールと糸くずの出ない布で表面を丁寧にクリーニングします。拭く時は一方向に拭くようにして、往復させないようにして下さい。
-
-
-
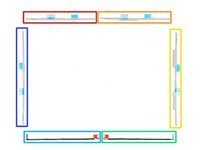
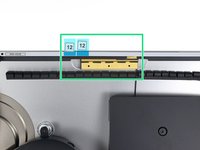
誤って間違った場所にストリップを取り付けることがないように、あらかじめ接着剤ストリップを並べておきましょう。
-
左上にストリップ11
-
右上にストリップ12
-
右側縦にストリップ13
-
右下にストリップ14(黒い色側を上に)
-
左下にストリップ15(黒い色側を上に)
-
左側縦にストリップ16
My Strips that came are numbered altogether different. YOU NEED TO FIX THIS
Hi Stephen! I think you may have gotten the newer adhesive strips. Please see step one of this guide to determine which strips you have, and to follow the right guide for your strips.
-
-
-
-
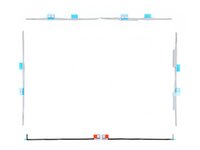
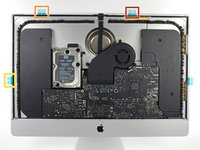
iMacの周囲を反時計回りに作業し、同じように粘着ストリップを3本追加します。
-
右上にストリップ12
-
左上にストリップ11
-
左側縦にストリップ16
-
iMac Intel 27インチRetina 5Kディスプレイでは、右上のストリップの青いタブが、5K非対応モデルと同じように上部のアンテナに揃いません。これはまったく問題なく、ストリップやアンテナの性能に影響を与えることはありません。
-
-
-
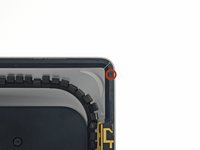
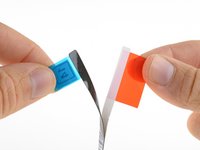
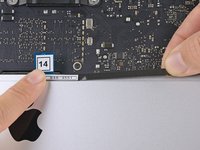
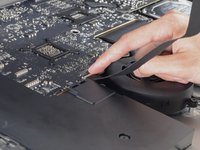
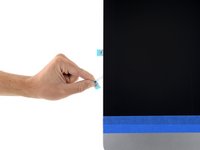
ストリップ14の赤いプルタブをつかみ、引っ張ってストリップからバッキングを取り外します。
-
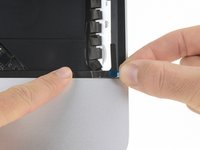
背面エンクロージャーの下端にあるストリップを、その端にある中 央のネジの真右側に合わせます。
-
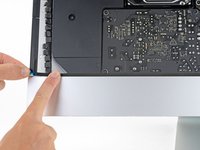
粘着ストリップの長さに沿って指を動かし、ストリップがまっすぐでシワがないことを確認します。
Note this important point from the next step, which I believe should appear in this step as well, with respect to the right vertical adhesive..
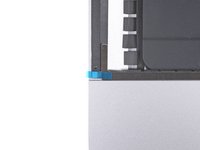
The strip should be positioned such that the L-bend sits next to the left vertical adhesive. The L-bend should not overlap the left vertical adhesive.
Thanks for the comment! I added the note you pointed out into the step.
-
-
-
iMacが正常に動作することを確認済みで、密封する準備が整っている場合は、手順18に進んでください。
-
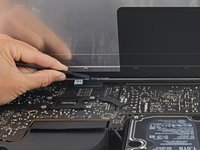
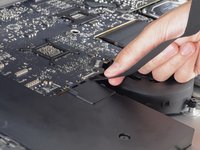
ディスプレイデータのコネクタをロジック・ボードのソケットにゆっくりと挿入します。ソケットにまっすぐ押し込み、完全に差し込んでください。
-
ディスプレイデータコネクタのロックを下にしてソケットにはめ込みます。
-
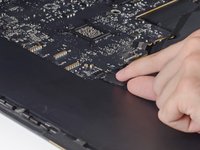
ディスプレイ電源コネクタをロジックボードのソケットに挿入します。
-
-
-
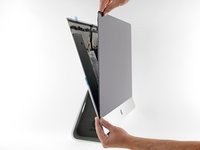
iMacが正常に機能することを確認したら、ディスプレイケーブルを外し、ディスプレイを慎重に前方に傾けます。
-
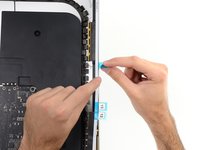
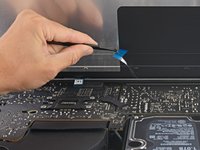
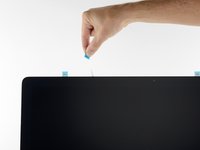
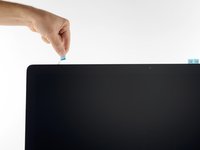
ピンセットで上方から手を伸ばし、青いタブをディスプレイの下端からまっすぐ上に引っ張り、2つのボトムストリップからフィルムを剥がします。
This step should specify removing the film from strip 15, such that repeating the step again for strip 14 in the next step isn’t confusing. Or this step could specify both strip 14 and 15 and step 19 could be deleted entirely.
Good point! I’ll adjust the steps to implement what you suggested.
-
-
-
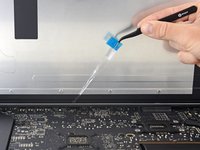
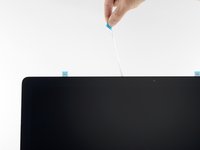
前の手順を繰り返し、残りの粘着ストリップ(ラベル 11、12、13)から保護フィルムを剥がします。
-
-
-
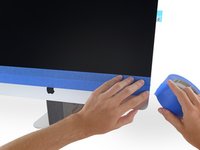
強力に接着するため、iMacを注意深く平らに倒し(スクリーンがまっすぐ上を向くように)、ディスプレイの四隅を注意深く、しっかりと押します。
-
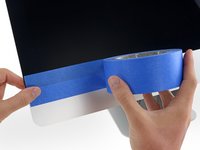
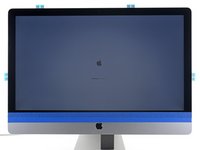
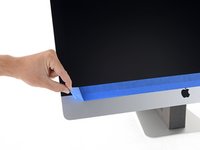
ディスプレイを後部筐体に固定しているテープを剥がします。
Great guide. I just yesterday did my first iMac SSD upgrade and this certainly helped. The strips having glue on both sides were harder to handle than shown but then it was my first time. It’ll be easier next time. The old glue was a little more difficult to remove than suggested but after a number of years setting up I was expecting that. All things considered, this a very good and useful guide. No complaints really; nothing now days is ever 100% as it seems. Biggest lesson was don’t fear doing this. If you’re worked inside computers of any kind you very likely have the necessary skills. I wish I’d swapped the HDD for an SSD a lot sooner.
Great Guide! Just did it! :)
-


37 の人々がこのガイドを完成させました。
以下の翻訳者の皆さんにお礼を申し上げます:
100%

これらの翻訳者の方々は世界を修理する私たちのサポートをしてくれています。 あなたも貢献してみませんか?
翻訳を始める ›


2 件のコメント
Great guide, thanks!
Pro tip: don’t forget to plug in the 2 cables before you close the screen.. not that I had to cut open the iMac and replace the stickers again or something :-).
Well done!
It helped me 100% to avoid doing it a second time!
Thank You very Much!