はじめに
このガイドを参照して、iMac Intel 21.5" Retina 4K Display 2019のRAMを交換/アップグレードをします。
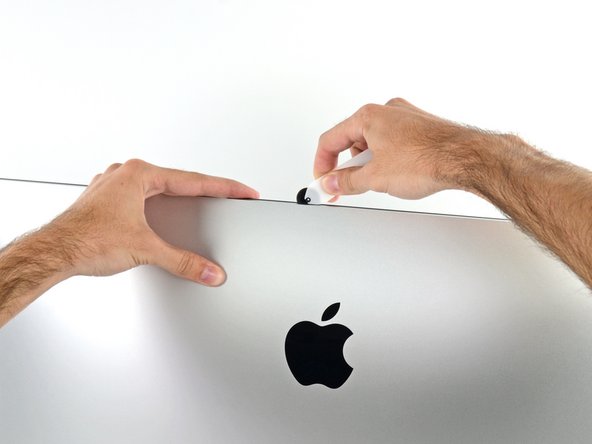
このガイド中の画像で、旧モデルのiMacが使用されているものが複数かります。外見上の若干の違いはありますが、作業に影響はありません。
このガイドでは、大型コンデンサを含む電源を取り扱います。 iMacのプラグを抜き、電源ボタンを10秒以上長押しして、コンデンサを放電します。 電源ボードの端を持ち、表面のコンポーネントに触れないでください。
必要な工具と部品
-
-
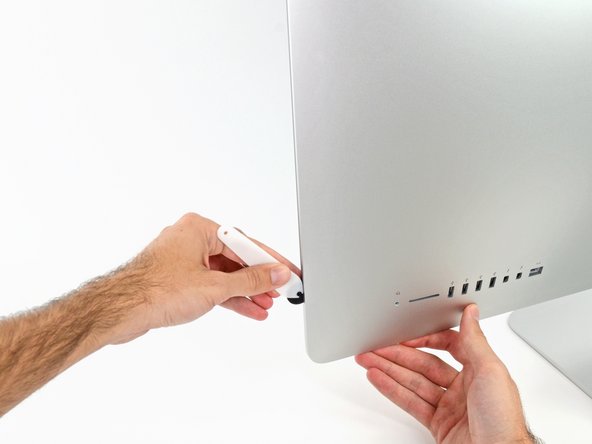
ヒンジを外すと、iMacはバランスが取れなくなり、作業が難しくなります。iMac Service Wedgeがあれば修理作業は素早く、簡単ですが、なくても対応できます。
-
-
-
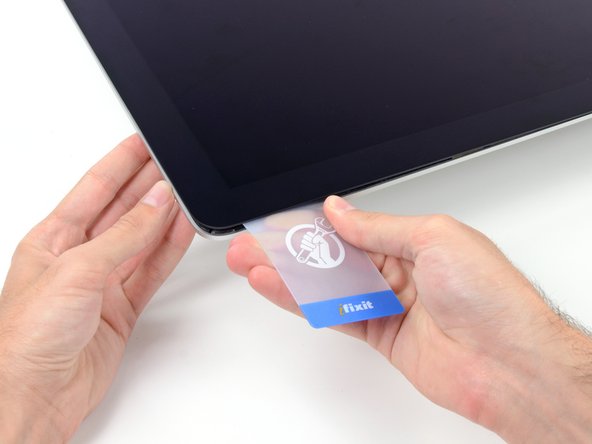
ピザカッターのようにツールを使いますー隙間に沿ってスライスしながら、フォーム製接着剤を切り込んでください。
-
ツールをディスプレイの左側に沿って下側から上部に向けてスライスします。
-
-
-
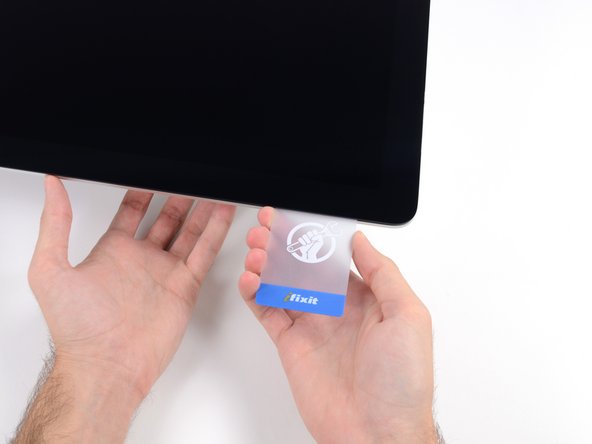
ディスプレイとフレームの間に隙間を作るように、丁寧にプラスチックを外側に向けてひねります。
-
ディスプレイのガラスに圧力がかからないように注意しながら、ゆっくりと動かします。約6mm程度の隙間ができれば十分です。
-
-
-
コーナー付近に差し込んだ2枚のプラスチックカードを手に取り、ディスプレイとケースの間の隙間を広げるようにカードを外側に向けてツイストします。
-
フレームからディスプレイ上部を持ち上げます。
Ich habe den unteren Klebestreifen gar nicht gelöst! --> Monitor (Glasscheibe) nach vorne auf ein dickes Kissen gelegt - so dass das Glas nur ca. 80° Winkel nach vorne zu liegen kommt und dann habe ich die Festplatte getauscht! So konnte ich die untere Klebeleiste wieder verwenden und hatte genügend Platz um die senkrechten und oberen Leisten zu verkleben!
Tip: Klebestreifen zuerst auf dem Alugehäuse befestigen...... -
-
-
ディスプレイを片手で持ちながら、もう一方の手でディスプレイパワーケーブルの接続を外します。
Can this cable be replaced? I am worried mine is damaged. I have no display after the screen fell and stressed the display flex cables following an SSD upgrade.
This step should be done with extreme caution and care, as this step 19 is not described in great detail (sorry, author).
The first (most outward) cable will slide out by gently pulling it by its tabs. The second (inner) cable is more tricky, as the locking lever must be moved backward first, before gently pulling backward on the cable connector. The angled tweezers are useful here, to help lift that locking lever, because fingers are too big for this.
I found the best way to unplug this display power cable was to use my right hand, and the fingernails of my index finger and thumb to grab the ends of the tabs on either side of the connector, squeeze, and pull the connector out gently.
i think the cable nearest the case edge is held in by friction and can be gently pulled, maybe with fingernails or a spudger. The next cable is held by a wire lever clip as described above it unlocks so the cable can be removed. These cables are also fiddly to re-insert, I didn't get one of them home and had no display after power-up, so at the end, don't re-seal the screen until tested.
-
-
-
引き続きディスプレイを片手で固定しながら、ディスプレイデータケーブル上にあるメタル製固定ブラケットを裏返します。
-
ロジックボード上のソケットから、ディスプレイデータケーブルをゆっくりと引っ張ります。
Cannot seem to find a replacement cable for this, as I suspect mine is damaged. Can’t even find a part number. Anyone know what it might be?
https://www.amazon.com/gp/product/B08TTL...
That's the part I ordered for mine and it seems to work ok. I did make a point of contacting the seller and advising them of my requirement and they ensured I got the right part and it matches the description of the link. Bear in mind I bear no responsibility if yours does not work since I am just sharing what I did and what I ordered. Thanks.
I also need that cable.
cameronjpu - 返信
It's a little difficult to tell... but looking at the connection to the logic board on the video data cable, are the pins faced up or down?
On the display, same question since it appears you have to "twist" the cable during the reconnection step.
For this particular cable, take a good look before pulling on anything. Plug is locked on its socket with a bracket. You can lift this bracket by holding the small, flat black plastic handle that is attached to it. If you're struggling to grab it, use the end of the pizza roller handle to lift it, or the tweezers. Cable then comes off by pulling parallel to the main board.
How can I tell if either of this cable is bad? My iMac display won't turn on after reconnecting it. I'm using an external display and everything is working except for the iMac display. If I go to settings - display the built-in display is recognize. But again nothing shows up in the screen - not even the apple logo when turning it on.
-
-
-
ディスプレイを左右均等に持ち上げます。
I was fretting that i would break my screen, it's really hard to see what is holding the screen in place and i was ready for it to snap the last 1/2 inch or 12mm of the glass I worked slowly and as you say, keep lifting and working it gently until you can see and cut the remaining adhesive.
-
-
The bottom adhesive strips have small tags at a 90 degree angle that can be used as handles to strip them out at this point. https://d3nevzfk7ii3be.cloudfront.net/ig...
-
-
-
下部サポートブラケットを固定している次のネジを5本外します。
-
3.2 mmネジー4本
-
1.7 mmネジー1本
These screws are VERY small and very easy to lose. Ideally you use a magnetized screw driver to help here.
-
-
-
iMacエンクロージャーから下部サポートブラケット(別名:顎ストラップ)を外します。
The 'chin strap' is very easily bent, which makes it difficult to put the very small screws back in place.
Questa staffa a cosa serve ?
Non rimetterlo che cosa comporta?
-
-
-
iMacにハードドライブブラケットを固定しているT10トルクスネジを外します。
-
21 mm ネジー2本
-
9 mmネジー1本
-
27 mmネジー1本
At step 26, when reassembling, it's super easy to over-tighten the 9mm screw and strip the brass ferrule out of its hole in the plastic bracket (%#*@).
Mine has 4 different length screws, the two red colored 21mm screws in this guide are actually two differ lengths
buongiorno, l'imac del 2019, non monta alcuna ssd, ma monta una m2 direttamente sulla scheda madre!
pertanto nella guida andrebbe aggiunto il cavo sata con sensore temperatura da aggiungere sulla scheda madre, per poter collegare un nuovo hd ssd altrimenti rimarrete come me bloccati con un imac aperto e non assemblato, in attesa di ricevere il cavo acquistato su internet da amazon o terze parti.
vi consiglio inoltre di aggiungere una foto reale del ò'imac 2019 nella guida in cui manca l'ssd, renderà subito la problematica che avranno in molti!
Hi, mine doesn’t HAVE an HD/SSD to remove, the bay is empty (yes it was fully working yesterday. So what do we do ? I see someone else with the sane issue above….
-
-
-
スパッジャーの先端を使って、パワーボタンケーブルコネクタの両側を抑えて、丁寧にソケットから外します。
I would advise that before removing the PSU unit and all other components from the bottom of the case that you remove the 5 screws at the bottom of the display which hold an insulation strip in place.
The guide shows this piece removed, but does not tell you how to remove it.
There will be 5, small J1000 screws. The middle one, which goes over Apple Logo is the shorter one of the 5, all others are the same length. Once this piece is gone removing the components is much easier, and chance of damage lessened.
Added to the guide. Thanks for the tip!
No need to remove power board and logic board and all other components, just remove the fan and it is quite "easily" accessable to change the RAM. Just need to use the tools to remove the old RAM and carefully install the new RAM.
I just did it without removing the logic or power board
could you elaborate a little more, I would love to skip the rest of these steps. How did you accomplish this?
ej P -
Oleksandr Trokhymchuk,
Thank you! You just saved me so much time! I wouldn’t call this “easy” but it saved me a lot of time and effort.
ej P: remove the fan assembly first. Then remove the connector that runs from the iSight camera to the logic board on the left.
the RAM is located right near that cable. It’s tricky to remove but you can pop open the connectors with a black nylon stick and the RAM chip will pop up at 45 degrees. Make a mental note on which way you will need to install the new ram as it’s tough to see. For the Crucial memory I got it was label side facing away you (facing towards rear metal enclosure).
the second chip has a plastic adhesive piece on it that you should probably attach to the new ram.
remove both chips then install the new ram in sequence from the board out.
In the photo for Step 28, the power button cable connector is placed around the power board screw hole on the top left of the power board.
However, on the iMac I upgraded, the power button cable connector was “fed” through the power power screw hole on the top left of the power board. The cable was too short to run around and below the hole.
Hence, I had to ensure the cable was “fed” through the hole during re-assembly and the screw carefully screwed back through the hole.
I guess every iMac is assembly just a bit differently, just to make repairs that much more fun.
Tim Telcik - 返信
This is not correct and may have been assembled incorrectly during a previous repair.
Just replaced the hard drive and RAM with SSD and 16GB respectively and did NOT remove the power supply or logic board. Tricky is a word to describe putting the RAM in without removing the logic board. You work in the dark with little room to get your fingers in between the logic board and the back of the case. I put the first RAM chip in without a problem (the one next to the logic board), but the second to four tries and dropped it behind the logic board three times before finally getting it to position correctly. Just impossible to see and must work but feel. Still it was faster than removing all the components… though did remove the fan (needed cleaning anyway). All in all I can’t say enough about the help the guide was through the upgrade ! Thanks !
I found this connector to be very tight and was afraid of breaking it off. I just kept slowly working on it—it did eventually come out.
I did try to sneak the RAM in without removing the logic board but my fingers were too big. I found it too difficult and just continued on with this guide.
I was not able to install the memory without removing all the components. My fingers are too big and I could barely get in that tight spot to swap out the memory. The hardest part about the power supply is that one connector under the chin next to the Apple logo. Once it is out, you are home free because it is so easy to plug it back in when you are putting it all back together again. Ridiculous that Apple did not put a simple access door behind those memory slots because they are on the backside of the Mac! They did an access door on the PowerBooks and it did not ruin the appearance. They could have designed a cool looking pop out door that only had a thin seam around it so it would still look good. Then you could remove the access door to upgrade the memory easily.
Does anyone know if this is the same situation as in the 2017 model? I just changed RAM in the 2017 version and also skipped taking out the logic board. I just bent a pair of tweezers and put some tape around the tips to make them less scratchy and used them to place the RAM modules into the slots. Worked supereasy and much much quicker than performing the complete tear down of the whole machine.
Nils Witte - 返信
This step is impossible!
@wizdomonwheels, I don’t see how I can get the RAM shield off of the logic board to access the RAM without removing the logic board. What am I missing?? I’m guessing that those of you that are suggesting this technique are working on older iMac models that don’t have the RAM shield.
Yes, you are correct. It is likely the various steps are a bit different on each model. If I recall I was likely working on a 2015 or older system. If there’s a shield in the way, I can’t think of a way you could get around it without pulling the logic board.
-
-
-
リアエンクロージャーにパワーサプライを固定している7.2 mm T10トルクスネジを2本、外します。
-
再組み立ての際は、ボード裏の電源ボタンワイヤを切断しないようにご注意ください。
In my case, the left side corner of the PS was caught against the Lower Support Bracket, and I had to remove the LSB in order to get the PS freed and out.
I think the author Walter Galan should put this in the main section of his instructions. I have TWO identical iMac 14,1 / i5 2.7GHz / 21 Inch Late 2013 / Order ME086LL/A. They both required removing the LSB. Thank you very much Walter Galan & others for your contributions.
Those screws were definitely not T10 but T9 on my unit
Those screws were T8 on my unit.
c'est du torx 08
-
-
-
パワーサプライを前側に倒します。
When replacing the PSU (on the re-build) take care not to trap the power button cable behind it - I did...
-
-
-
パワーサプライをわずかに引き上げて、リアエンクロージャーから取り出します。
-
パワーサプライを反時計回りに回転させて、向かって右側を左側より約2㎝程度高く上げてください。
In my case, the left side corner of the PS was caught against the Lower Support Bracket, and I had to remove the LSB in order to get the PS freed and out.
I think the author Walter Galan should put this in the main section of his instructions. I have TWO identical iMac 14,1 / i5 2.7GHz / 21 Inch Late 2013 / Order ME086LL/A. They both required removing the LSB. Thank you very much Walter Galan & others for your contributions.
-
-
-
DCパワーケーブルコネクタの裏側にあるタブをつまんで、ロジックボード裏のソケットからまっすぐ引き抜きます。
when pulled the cable, even slightly, the actual female piece that connects to the logic board came off. am i screwed?
Repairing sockets that come off the logic board is possible, but very specialised work. Unless you have a magnifying lamp and the necessary desoldering and soldering skills, it will be difficult but not impossible.
I could not disconnect this cable without fear of breaking something (as previous posters did). I found that I could skip this and the next step by wrapping the power supply in a couple layers of a small towel (to prevent shorting with any other metal surfaces), and laying the power supply on the aluminum face of the iMac near the Apple logo. This got it out of the way enough to do what I needed on the logic board (changing PRAM battery) after completing removal of the other items in this guide.
-
-
-
スパッジャーの平面側先端を使って、ACインレットケーブルコネクタの側面にあるクリップを内側に押します。
-
リリース用のクリップをスパッジャーで押しながら、ACインレットケーブルを摘んで、ソケットからコネクタをまっすぐ引き出します。
I didn't disconnect the input cable to the power supply. Because I had the machine lying on its back throughout, I placed it on to the metal bit at the bottom of the machine instead (with a cloth to stop the metal getting scratched). The AC inlet cable was pretty tricky to get un-locked, and the PSU sat on the case fine. It didn't hinder anything else throughout the guide.
I thought from Dave’s comment that I could leave the power supply completely in place, but I was mistaken. In order to remove the hard drive assembly after you remove the center screw in it, you’ll need to at least unscrew it and the HD assembly will slip out. Like Dave said, you don’t need to unplug the AC or PSU, which I left hanging.
Getting power supply to the logic board unplugged is also tricky without unscrewing the two bottom screws. They didn’t make this part easy.
I would like to thanks Dave Hallett for his tip of not removing the AC inlet connector of the power supply. I simply wrapped the board in bubble wrap and taped to the iMac case, out of the way, thus giving access to the remaining disconnection procedures and preventing the board from scratching to the iMac case. It also made reassembly much simpler.
Yeah, that AC inlet plug was a nasty one to unplug, mainly because I was trying not to bump the solder joints on the PSU. After a few wiggles and pulls while manipulating the spudger tool to release the clip, it finally unplugged. Made it easier by removing the PSU completely so you don’t have to worry about it. Don’t worry, plugging it back in is a breeze!
With the right tool this plug comes out very easily. Forget about your tiny computer tools, go to the garage and grab a regular old needle nose pliers. Grab the clip and the plug at the same time. The plug will come right out.
Carin Ann— The most helpful comment on this procedure. After reading what you wrote I maneuvered the board, grabbed the clip with my left hand (a little awkward because of the cooling enclosure), squeezed the front of the plug, and got it out.
-
-
-
ファンとリアエンクロージャーを固定している10mmT10トルクスネジを3本外します。
In this photo the hard drive brackets and tray are fully assembled. But, you’ve just dismantled about half of it already in early steps. This photo is apt to confuse you a bit when you’re doing everything in reverse order.
Another way to say what Tim said above:
For reassembly, this picture, showing the hard drive brackets back in place, is misleading. Leave them off still.
IF, at this stage, you reinstall the hard drive brackets, when you get to the time to reinstall the power supply, you will have to backtrack and take the brackets off.
Tech Medic - 返信
-
-
-
iMacからファンを取り外します。
For reassembly, this picture, showing the hard drive brackets back in place, is misleading. Leave them off still.
IF, at this stage, you reinstall the hard drive brackets, when you get to the time to reinstall the power supply, you will have to backtrack and take the brackets off.
Tech Medic - 返信
-
-
-
ロジックボードに一番近い端からハードドライブを持ち上げて、角からわずかに引き出します。
The newer drives have rubber ends and an adhesive side, be careful removing them if replacing the drive and be sure they are securely pushed back into the holder
-
-
-
スパッジャーを使って、大型のプラスチックコネクタをゆっくりと押しながらハードドライブから離して、単一のSATA電源とデータコンボケーブルを外します。
When reconnecting the SATA cable, there is nothing to make the connector hold still, and it is hard to reach, so it took several tries. I ended up taking off the rubber baby buggy bumpers to get more room, and then jamming them back on after getting the SATA connector snugged up.
If by rubber baby buggy bumper, you mean left speaker, then yes, I agree. Reinstall the hard drive before the left speaker.
Kudo to @jerrid_foiles! I was going crazy trying to attach the SATA cable until I took the two screws out of the left speaker and slid the top end of it aside by about 3/4 inch. Make the whole process SO MUCH easier!!
We solved this by removing the hard drive tray screw, then inserting the cable into the SATA hard drive. Then hold the hard drive a bit out of the way to insert the 7.3mm hard drive tray screw.
Agree with this method, found it an impossible task to reconnect the SATA connector until removed the tray screw, then it was relatively easy to reconnect and then replace the tray screw.
Also agree with this method!
-
-
-
ハードドライブのアセンブリをiMacから取り出します。
When reassembling, I found it easier to loosen the HD tray screw from Step 48 and pull the tray outwards from the left side in order to plug the SATA cable in more easily.
Thanks! I, too, had a hard time reconnecting the SATA cable.
I found this helpful too!
Anwar -
I did loosen the speaker so I could get a tool behind the SATA cable to push it on to the SSD drive. Otherwise hard to align cable.
I found the easiest way to connect the SATA cable was to not screw the plastic hard drive tray down until you plug the drive in. That way you can easily push the connector in and due to the cable you’ve got some wiggle room. You can position the tray then just lift one end of the drive up and secure the screw. Then just push the drive down.
This was the step that I had the most trouble with. I’m used to replacing a hard drive in a MacBook Pro, where the “plug” that you plug the drive into is a rigid thing that you can firmly press the hard drive into.
With the iMac, the plug is situated on the end of a non-rigid cord, so the plug moves back when you try to snap a drive into it. Also, those two rubber gasket things that you adhere to the side of the drive really make it difficult to maneuver the now-overly-chubby drive towards the plug.
After must frustration/concern, what I ended up doing was temporarily removing the rubber gasket things, using the “spudger” as kind of a lever behind the “plug on a cord” so that it didn’t move as much, and then pushed the gasket-less SSD into the plug.
Once I got it connected, I put the rubber gaskets back on the sides of the SSD and kind of coaxed it down into place, using the pointy end of the spudger to get the chubby corner pieces to “sit” correctly in the rigid plastic tray that the SSD kind of rests in.
-
-
-
AirPort/Bluetoothアンテナコネクタを固定している、4.0mm T5トルクスネジを2本外します。
On my A2116 iMac19,2 3.0 GHz i5, these two screws were T4 Torx (same as the T4s securing the RAM cover in step 62) not T5 Torx.
-
-
-
背面エンクロージャーとロジックボードを固定している7.3mm T8トルクスネジを4本外します。
On my 2019 A2116 (i3), there is a black vinyl sticker over the lower left screw, possibly a tamper-detection sticker like the ones on the CPU bracket on the 2013 Mac Pro.
-
-
-
サーマルパッドが交換用RAMに付いている場合は、裏張りを剥がして、オリジナルRAMスティックから交換用RAMに移してから、下のスロットに取り付けます。
I did this! and changed the HD to SSD. And it works much faster than before. I chose to just use some painters tap to temporarily hold the glass display in place while I tested the computer to make sure it worked fine. The only problem Ive had is some lagging and occasional temporary drops (a second at most) by the mouse. Could this be the result of anything I did? Maybe the antenna? My keyboard seems fine, so that seems to rule out a problem with the antenna, unless the mouse and keyboard use different parts of the antenna. Getting the antenna wires back onto those sockets before attaching the bracket was more difficult than these instructions make it seem.
-


オリジナルのパーツと交換用パーツをよく見比べてください。交換用パーツに付いていない残りのコンポーネントや接着シールなどは、インストールする前に新パーツに移植する必要があります。
このデバイスを再組み立てするには、インストラクションを逆の順番に従って作業を進めてください。
e-wasteを処理する場合は、認可済みリサイクルセンターR2を通じて廃棄してください。
修理が上手く進みませんか?ベーシックなトラブルシューティングのページを参照するか、このモデルのアンサーコミュニティに尋ねてみましょう。
オリジナルのパーツと交換用パーツをよく見比べてください。交換用パーツに付いていない残りのコンポーネントや接着シールなどは、インストールする前に新パーツに移植する必要があります。
このデバイスを再組み立てするには、インストラクションを逆の順番に従って作業を進めてください。
e-wasteを処理する場合は、認可済みリサイクルセンターR2を通じて廃棄してください。
修理が上手く進みませんか?ベーシックなトラブルシューティングのページを参照するか、このモデルのアンサーコミュニティに尋ねてみましょう。
34 の人々がこのガイドを完成させました。
以下の翻訳者の皆さんにお礼を申し上げます:
100%

Midori Doiさんは世界中で修理する私たちを助けてくれています! あなたも貢献してみませんか?
翻訳を始める ›

21 件のコメント
I attempted this upgrade myself because iFixit labeled this as Moderate difficulty. The entire process took me seven hours from start to finish, and when I was done my computer would not turn on. I tried to do this repair myself because my local computer company wanted $400 to do this upgrade using Apple RAM, and I couldn’t afford that at the time. I had to take the iMac in to be serviced when it wouldn’t turn on, and the computer company just quoted me a price of $600 for a new logic board if it was damaged during the upgrade.
I am posting this to warn anyone else who is considering doing this upgrade to hire a certified technician. Do not go by iFixit’s difficulty rating. If you do, you may risk even greater expense if something goes wrong, like it did with my own attempt.
Perhaps iFixit should consider changing the rating on this task to Extremely Difficult, or Advanced, or LOL DON’T EVEN TRY IT to warn any other unsuspecting customers who are looking to save a little money.
It is very likely you just missed plugging in the cable from the power button to the power supply. Very easy to do and very easy for the very small cable to slip behind the power supply and you never notice.
Always a good idea to check each step as you go and read the whole guide from start to finish before you start and also in the process of reassembly.
I did this in about 3-4 hours over a Saturday afternoon. I had previously done hard rive upgrades in a 2009 iMac and a 2012 MBP. I was encouraged by a tech friend and pored over the guide for a few times to get my courage up and then discussed the step by step with him first on a zoom call. The courage is required to remove the screen. After that the guide is very solid and clear and the steps are easy to comprehend though removing the power supply is a bit tricky and the microphone cable can be elusive. The only mistake I made is when reapplying the screen, having already checked function, I got into a sweat and banged to sick it on with the VDU cables not properly connected. I would recommend have some help for the screen re application and talk it through so you avoid that kind of schoolboy error. Having removed the screen and re-applied it I am very happy. A great guide.
Jon H Smith
Sehr gute Beschreibung, jedoch stellt sich mir eine Frage nach dem Wieder zusammen setzen benötige ich doch einen Vergleichsweisen Kleber der meinen Bildschirm auf den Rahmen setzt. Damit er nicht herunter fällt. Gibt es da welche zu kaufen oder hält das wieder von alleine?
Ich habe einen IMAC 4k 21´Zoll 2019 und möchte gerne Arbeitsspeicher und CPU tauschen.
id did it in 3,5 hours, no problems at all, everything works as described.
I used this instructions to upgrade my iMac with 32Gbytes RAM and 1Tbyte SSD. Everything went well in about 4 hours of hard work. You’ll need the right tools, adhesives to put the screen back and, above all, be very careful with the cables and the logical board, otherwise you’ll have a huge problem! May God bless who created this tutorial!!!! Thank you very much. By the way, fusion drive sucks!
Hey Othon, I also want to upgrade the hard drive to SSD because I have the fusion drive. Did you use another guide from this website?
Possibly a sad story, possibly a happy ending. I upgraded my iMac with an Intel i9 9000 CPU, 32 GB of ram and a 1Tb SSD - Not too difficult apart from the microphone cable which is a b*gg*r. I did shut down the computer (and disconnect the power supply 24 hours before attempting the upgrade. Knowing how one can ‘miss something, I initially assembled the computer screen and held it is place with masking tape so that I could check everything out. Started up first time and ran as sweet as a nut. Good - I obtained the official adhesive strips and this afternoon installed the screen permanently. Now it will not switch on (the computer starts OK with the Apple Hmmm sound). I have been really gentle with the display cables and now I am at a loss of how to proceed. Taking it to a local repair shop next week.
Reseat the cables, they can take an extra (very careful) nudge to really seat home and square.
Hey Rod, I'm looking to do all 3 for the upgrade as well. Was the other two guides (SSD & CPU) on here as well?
Great guide! I replaced the fusion drive with an SSD in while I was in there, and this was a really pleasant repair. Having the ifixit opening tools and guide made it all go very smoothly. Thanks!
Successfully used this guide, after using similar guides for a 2017 version of this iMac to replace both RAM and hard drive in both models. SATA SSD drive greatly improves speed of the machine. Having done this sequence of steps multiple times now, it does get easier each time. I have it down to about 1.5-2 hours now. I was a bit surprised, however, to find the RAM shield on this model (not present on the 2017 model), mostly because the tool required to remove it was not listed in the required tool list. Luckily I did have a T4 Torx in my toolbox so it did not cause a delay in completing the fix. (Tried to add it, not sure if my edit saved or not.) Thank you for this guide!
After having seen this very well illustrated guide and watched the very good video from OWC, what I can say is: God! Why the heck couldn't Apple's designers just provide a backdoor on the iMac to make upgrading RAM easier (like on some older iMacs)? We're talking about... RAM upgrade, not CPU upgrade! We miss those old Steve Jobs days so much!
What kind of ram needs the Mac to upgrade it? Now I have 2x4GB but I want to upgrade to 16 or 32 because Photoshop doesn't run good with 8gb
I try with crucial 2x16GB and corsair 2x32GB they are labled as mac memory. Owc is good choce too.
Like first comment I made a mistake and my iMac not started .Re assembled it again 15 times changing ram in one place to other, old one, new one.Only original moduls working and top one .At last it was that slot near pcb was to tide and ram partly fitted. Even it locks at place needed some force to get inside. Finlay started and everything is ok. Just you may advise to look how deep is module inserted in slot.
What type of thermal pad is used between ram modules?
cumledomla - 返信
Hole saw drill bit, I can cut the time down to minutes. Great guide, looking forward to replacing my clunky HDD.
This project is a bear; not for the faint-of-heart. But, doable. Haven taken apart iMac screens before, that part was not difficult. The things to watch for are: grouping and labeling every screw/bolt you take out (I stuck them in PostIt notes), and detaching/reattaching all the tiny, delicate little cables.
If you have it, I'd recommend jeweler's magnifying glasses and some tweezers to help re-attach cables. And keep in mind the more stuff you pull apart, the more risk you incur. Though the odds are in your favor if careful, be prepared to potentially have a useless brick at the end of the process if something goes wrong (or require expensive professional help).
I thought it would have taken longer. But I managed to do it in about an hour. And I had no experience working on these iMacs. Most pleased I broke nothing and it works great! Guide was most helpful in knowing what step was next and where each screw went going back.
Maybe your directions should suggest fixers to buy RAM cards in pairs. I wanted 32 Gig of RAM, and I bought and installed one 32 G RAM and while it seems fine, one source told me it would be 5-10% faster if I had put in two 16 RAM cards. Is that accurate?
BRUCE CLARKE - 返信
it would at least be that much faster, in theory some applications should run twice as fast
blakebest -