手順 14を翻訳中


-
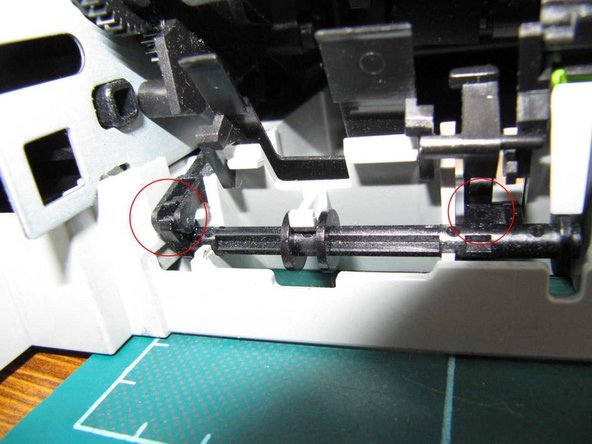
The entire print mechanism can be removed from the base. First, release a lever at the left hand side of the back of the printer from its clip on a spindle. You may have to gently press on a tab near the other end of the spindle in order to bring the clip forwards so as to be able to release the lever.
-
The print mechanism can now be lifted out. It may take some jiggling to release the metal mechanism frame from the plastic base at a point close to the clip which retains the aforementioned lever.
-
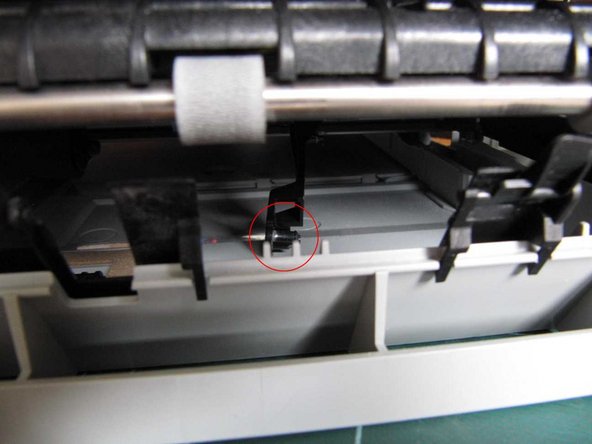
On reassembly (or if you set the mechanism down on the bench) be sure to check that the lever and roller which press down on the paper in the tray is angled backward. If not, the weight of the mechanism will bend the lever and possibly break it or push off the roller (as has happened in the 2nd photo).
-
On order to be able to position the print mechanism correctly you will need to lift the lever which fits into the clip on the spindle, so that it is positioned to do so.
クリエイティブコモンズのオープンソース著作権のもと、あなたの投稿は著作権の対象となります。