
Wii U GamePad Battery Replacement
はじめに
手順 1 に進むIn order to remove the battery, you will need the tool PH0. (small scredriver) This guide will help you to remove the battery and be able to remove the Nintendo's case.
必要な工具と部品


-
-
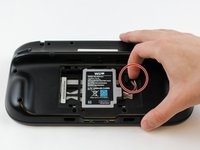
Place Gamepad face down and remove the two 4.7 mm screws with a Phillips size #00 screwdriver.
-
-


To reassemble your device, follow these instructions in reverse order.
To reassemble your device, follow these instructions in reverse order.
26 の人々がこのガイドを完成させました。
チーム

USF Tampa, Team 1-6, Sullivan Spring 2016 USF Tampa, Team 1-6, Sullivan Spring 2016人のメンバー
USFT-SULLIVAN-S16S1G6
4 メンバー
40のガイドは作成済み
3 件のコメント
I'm trying to put in the new battery, but the connector won't snap in even with larger amounts of force. The original battery, on the other hand, snaps right in.
I have the same issue. The connector on the new battery does not snap in. Does anyone know how to fix this issue and ger the connector to snap into place?
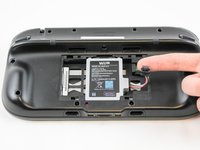
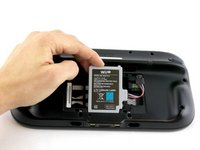
It takes a significant amount of pressure (in my opinion) to get the ifixit wii u gamepad battery to snap into place. When I successfully installed this battery, I laid the wii u gamepad screen down with the top of the gamepad facing me. Then I took the flat end of my ifixit spudger, and while pressing down on the battery connector at a 45 degree angle, I pushed the battery connector into the port. You'll be able to tell when the battery is connected all the way. However, this battery does NOT make a snap or click sound to let you know it's connected all the way.
Link to the spudger I used: Spudger
RakmanII -