
Wii U GamePadバッテリーの交換
はじめに
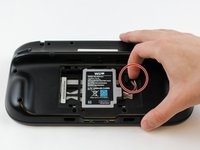
手順 1 に進むバッテリーを交換するには、PH0(小サイズのドライバー)が必要です。このガイドではバッテリーを取り出したり、任天堂のケースを取り出します。
必要な工具と部品


デバイスを再組み立てする際は、これらのインストラクションを逆の順番に従って作業を進めてください。
デバイスを再組み立てする際は、これらのインストラクションを逆の順番に従って作業を進めてください。
26 の人々がこのガイドを完成させました。
以下の翻訳者の皆さんにお礼を申し上げます:
100%

これらの翻訳者の方々は世界を修理する私たちのサポートをしてくれています。 あなたも貢献してみませんか?
翻訳を始める ›
チーム

USF Tampa, Team 1-6, Sullivan Spring 2016 USF Tampa, Team 1-6, Sullivan Spring 2016人のメンバー
USFT-SULLIVAN-S16S1G6
4 メンバー
40のガイドは作成済み
3 件のコメント
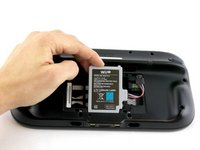
I'm trying to put in the new battery, but the connector won't snap in even with larger amounts of force. The original battery, on the other hand, snaps right in.
I have the same issue. The connector on the new battery does not snap in. Does anyone know how to fix this issue and ger the connector to snap into place?
It takes a significant amount of pressure (in my opinion) to get the ifixit wii u gamepad battery to snap into place. When I successfully installed this battery, I laid the wii u gamepad screen down with the top of the gamepad facing me. Then I took the flat end of my ifixit spudger, and while pressing down on the battery connector at a 45 degree angle, I pushed the battery connector into the port. You'll be able to tell when the battery is connected all the way. However, this battery does NOT make a snap or click sound to let you know it's connected all the way.
Link to the spudger I used: Spudger
RakmanII -