メインコンテンツにスキップ

Toshiba Satellite C55-A5310 Optical Drive Replacement

必要な工具と部品

  1. Toshiba Satellite C55-A5310 Optical Drive Replacement, Battery: 手順 1、 3の画像 1 Toshiba Satellite C55-A5310 Optical Drive Replacement, Battery: 手順 1、 3の画像 2 Toshiba Satellite C55-A5310 Optical Drive Replacement, Battery: 手順 1、 3の画像 3
    • Push the left tab with your left hand.

    • Then push the right tab with your right hand.

    • While your right hand is still pushing, remove the battery with your left hand.

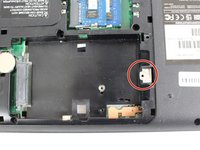
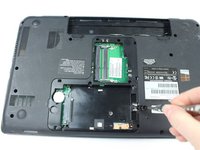
  2. Toshiba Satellite C55-A5310 Optical Drive Replacement, Optical Drive: 手順 2、 2の画像 1 Toshiba Satellite C55-A5310 Optical Drive Replacement, Optical Drive: 手順 2、 2の画像 2
    • Remove one screw with a JIS #000 screwdriver.

    • This screw does not come completely out, but you will still be able to get the panel off.

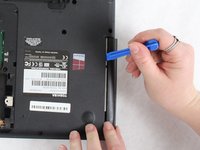
  3. Toshiba Satellite C55-A5310 Optical Drive Replacement: 手順 3、 1の画像 1
    • Use the plastic opening tool to pry open the back panel. Make sure to loosen all four sides then lift up.

  4. Toshiba Satellite C55-A5310 Optical Drive Replacement: 手順 4、 2の画像 1 Toshiba Satellite C55-A5310 Optical Drive Replacement: 手順 4、 2の画像 2
    • Remove a .5mm screw with a JIS #000 screwdriver.

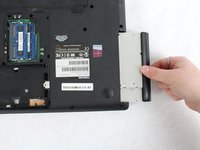
  5. Toshiba Satellite C55-A5310 Optical Drive Replacement: 手順 5、 2の画像 1 Toshiba Satellite C55-A5310 Optical Drive Replacement: 手順 5、 2の画像 2
    • Using a plastic opening tool, pry open the disk drive. Once it has loosened it will pull out.

終わりに

To reassemble your device, follow these instructions in reverse order.

作成者

1人の作成者と共同作成されました。

Kari Rodgers

メンバー登録日: 02/08/18

482 ポイント

4のガイドは作成済み

チーム

Sam Houston State, Team S16-G1, Nardone Spring 2018 Sam Houston State, Team S16-G1, Nardone Spring 2018人のメンバー

SHSU-NARDONE-S18S16G1

5 メンバー

15のガイドは作成済み

0 件のコメント

コメントを追加

統計データ:

過去 24時間: 0

過去 7 日: 3

過去 30 日: 6

今までの合計 322