メインコンテンツにスキップ

Sony Xperia XA Ultra Battery Replacement

必要な工具と部品

  1. Sony Xperia XA Ultra Battery Replacement, Motherboard: 手順 1、 2の画像 1 Sony Xperia XA Ultra Battery Replacement, Motherboard: 手順 1、 2の画像 2
    • Carefully remove the back panel of the phone with a plastic spudger, or other flat and thin wedge tool. Work your way around the perimeter of the case, loosening and prying gently, until there is sufficient distance between the panel and phone.

  2. Sony Xperia XA Ultra Battery Replacement: 手順 2、 2の画像 1 Sony Xperia XA Ultra Battery Replacement: 手順 2、 2の画像 2
    • Remove all 9 black 4mm T5 screws.

    • Remove all 8 silver 3mm T3 screws.

    • Make sure to carefully place each screw in a secure location to avoid losing any.

  3. Sony Xperia XA Ultra Battery Replacement: 手順 3、 3の画像 1 Sony Xperia XA Ultra Battery Replacement: 手順 3、 3の画像 2 Sony Xperia XA Ultra Battery Replacement: 手順 3、 3の画像 3
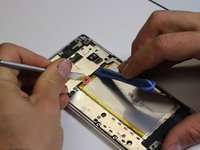
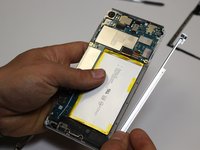
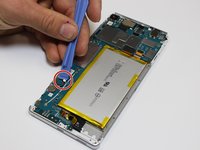
    • Near the top of the battery (area closest to camera) press the small latch in the highlighted area, push the latch away from the metal casing with the metal spudger.

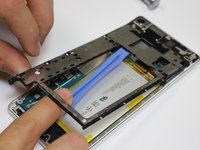
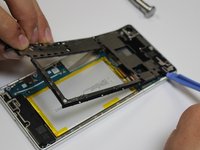
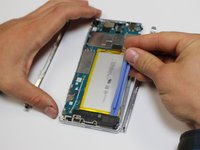
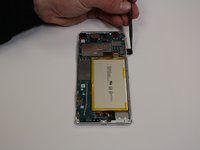
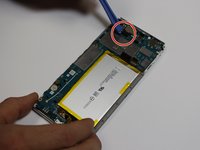
    • Use the plastic opening tool to pry off the metal case. Be sure to carefully pry the casing slowly and at multiple angles and directions to insure nothing is damaged.

    • Be careful when prying near the top of the device. The metal casing can be easily bent.

  4. Sony Xperia XA Ultra Battery Replacement: 手順 4、 2の画像 1 Sony Xperia XA Ultra Battery Replacement: 手順 4、 2の画像 2
    • Remove the side bezels from each side, and remove the sim card cover.

  5. Sony Xperia XA Ultra Battery Replacement: 手順 5、 2の画像 1 Sony Xperia XA Ultra Battery Replacement: 手順 5、 2の画像 2
    • Using the plastic opening tool, gently pry off the black charge port plate, located near the bottom of the phone.

    • Remove the sim card from sim card slot using fingernail or small plastic spudger.

  6. Sony Xperia XA Ultra Battery Replacement: 手順 6、 3の画像 1 Sony Xperia XA Ultra Battery Replacement: 手順 6、 3の画像 2 Sony Xperia XA Ultra Battery Replacement: 手順 6、 3の画像 3
    • Disconnect all four of the shown electrical connectors by gently prying up with the plastic opening tool.

  7. Sony Xperia XA Ultra Battery Replacement: 手順 7、 2の画像 1 Sony Xperia XA Ultra Battery Replacement: 手順 7、 2の画像 2
    • Working from bottom to top, gently pry the motherboard off of the phone .

    • The camera is connected to the motherboard. Be extremely careful when removing it to avoid damage.

  8. Sony Xperia XA Ultra Battery Replacement, Battery: 手順 8、 1の画像 1
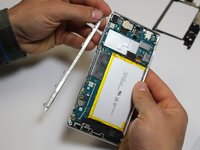
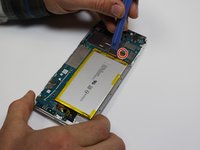
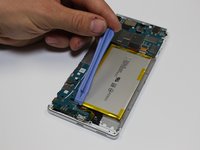
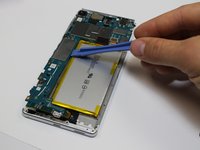
    • Using a plastic spudger, carefully pry off the battery you intend to replace.

    • To make this step easier, we recommend applying a heat source such as a hairdryer to the battery area to loosen the glue. Be sure not to let the battery become too hot to touch.

    • Place new battery in the battery space.

終わりに

To reassemble your device, follow these instructions in reverse order.

作成者

1人の作成者と共同作成されました。

Walter Lackey

メンバー登録日: 09/22/17

419 ポイント

3のガイドは作成済み

チーム

0 件のコメント

コメントを追加

統計データ:

過去 24時間: 1

過去 7 日: 5

過去 30 日: 14

今までの合計 4,646