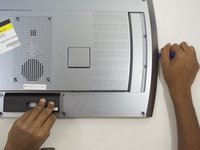
メインコンテンツにスキップ

Sony PlayStation 3D Display Side Speakers Replacement

必要な工具と部品

  1. Sony PlayStation 3D Display Side Speakers Replacement, Rear Case: 手順 1、 2の画像 1 Sony PlayStation 3D Display Side Speakers Replacement, Rear Case: 手順 1、 2の画像 2
    • Remove the base by pushing in the button and sliding out the unit.

  2. Sony PlayStation 3D Display Side Speakers Replacement: 手順 2、 3の画像 1 Sony PlayStation 3D Display Side Speakers Replacement: 手順 2、 3の画像 2 Sony PlayStation 3D Display Side Speakers Replacement: 手順 2、 3の画像 3
    • Remove USB port cover from back plate with a metal spudger.

    • This will prevent the cover from falling under the back plate once it is removed.

  3. Sony PlayStation 3D Display Side Speakers Replacement: 手順 3、 2の画像 1 Sony PlayStation 3D Display Side Speakers Replacement: 手順 3、 2の画像 2
    • With the Phillips #02 screwdriver, remove the six 6 mm length x 6 mm head screws from the back plate.

    • With the Phillips #02 screwdriver, remove the ten 6 mm length x 8 mm head screws from the back plate.

    • These screws have different threads and need to be kept separate.

  4. Sony PlayStation 3D Display Side Speakers Replacement: 手順 4、 3の画像 1 Sony PlayStation 3D Display Side Speakers Replacement: 手順 4、 3の画像 2 Sony PlayStation 3D Display Side Speakers Replacement: 手順 4、 3の画像 3
    • Remove back plate with a plastic opening tool by slowing prying around the entire plate.

    • Be gentle to avoid breaking the plastic clips which hold the plate.

    • Once separated the plate easily lifts off.

  5. Sony PlayStation 3D Display Side Speakers Replacement, Side Speakers: 手順 5、 3の画像 1 Sony PlayStation 3D Display Side Speakers Replacement, Side Speakers: 手順 5、 3の画像 2 Sony PlayStation 3D Display Side Speakers Replacement, Side Speakers: 手順 5、 3の画像 3
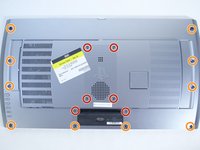
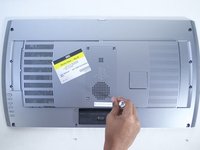
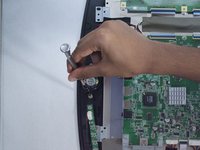
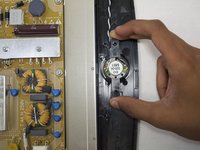
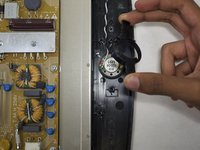
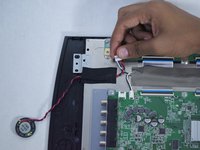
    • With the Phillips #01 screwdriver, remove the four 5 mm length x 7 mm head screws from the assembly (two for each side speaker).

  6. Sony PlayStation 3D Display Side Speakers Replacement: 手順 6、 3の画像 1 Sony PlayStation 3D Display Side Speakers Replacement: 手順 6、 3の画像 2 Sony PlayStation 3D Display Side Speakers Replacement: 手順 6、 3の画像 3
    • Remove the plastic plate covering the speaker.

    • When reassembling, make sure the arrow on the plastic plate is facing up.

    • Lift the speaker out of its holding tray.

  7. Sony PlayStation 3D Display Side Speakers Replacement: 手順 7、 2の画像 1 Sony PlayStation 3D Display Side Speakers Replacement: 手順 7、 2の画像 2
    • Remove the speaker by depressing the white tab on the speaker wire connector.

終わりに

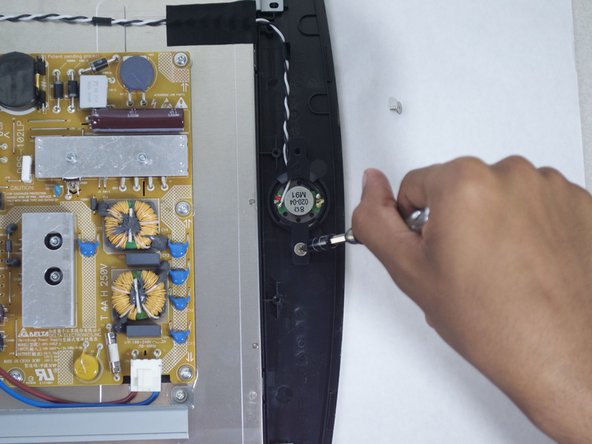
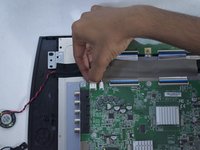
To reassemble your device, follow these instructions in reverse order.

3 の人々がこのガイドを完成させました。

作成者

5人の作成者と共同で作成されました。

viharim

メンバー登録日: 10/22/15

200 ポイント

1ガイドが承認済み

チーム

Cal Poly, Team 12-16, Maness Fall 2015 Cal Poly, Team 12-16, Maness Fall 2015人のメンバー

CPSU-MANESS-F15S12G16

4 メンバー

8のガイドは作成済み

コメント 1 件

Speakers in this page are out of stock, do you think these will work? https://www.amazon.com/Speaker-Speakers-...

Ferserk - 返信

コメントを追加

統計データ:

過去 24時間: 0

過去 7 日: 3

過去 30 日: 8

今までの合計 2,519