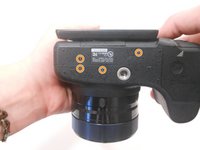
メインコンテンツにスキップ
Sony Cyber-shot DSC-HX100V Viewfinder Replacement

Sony Cyber-shot DSC-HX100V Viewfinder Replacement

DaQuawn

DaQuawn とその他 4 人の作成者

最終更新日: January 15, 2021

10分
簡単
アクションショット

If you have a faulty viewfinder and would like to know how to replace it yourself, this guide will show you how to do just that. By following these 6 simple steps, you will have your camera repaired within a few minutes and you will also save a couple of bucks.

必要な工具と部品

ツール

  • Phillips #00 Screwdriver
    Phillips #00 Screwdriver
  • Spudger
    Spudger
  1. Sony Cyber-shot DSC-HX100V Viewfinder Replacement, Viewfinder: 手順 1、 1の画像 1
    • Make sure camera is turned off.

    • Press the ON/Off button to turn off the camera.

    • WARNING: Data may be lost if the camera remains on.

  2. Sony Cyber-shot DSC-HX100V Viewfinder Replacement: 手順 2、 3の画像 1 Sony Cyber-shot DSC-HX100V Viewfinder Replacement: 手順 2、 3の画像 2 Sony Cyber-shot DSC-HX100V Viewfinder Replacement: 手順 2、 3の画像 3
    • Use the Phillips screwdriver size #00 to remove the 1.59mm #00 screws.

    • Remove 2 screws from the side of the camera.

    • Remove 4 screws on the bottom of the camera.

    • Remove 1 screw next to the eyepiece.

  3. Sony Cyber-shot DSC-HX100V Viewfinder Replacement: 手順 3、 1の画像 1
    • Flip the screen back to reveal 2 hidden screws.

    • Remove the two 1.59mm #00 screws on the left with the Phillips #00 screwdriver.

  4. Sony Cyber-shot DSC-HX100V Viewfinder Replacement: 手順 4、 1の画像 1
    • Pull the back panel of the camera upward.

    • Use a spudger to help pry open the back panel.

  5. Sony Cyber-shot DSC-HX100V Viewfinder Replacement: 手順 5、 1の画像 1
    • Open the back panel to view the inside of the camera.

    • If the orange ribbon cable disconnects from its designated port, do not panic. The cable is easy to reinsert.

  6. Sony Cyber-shot DSC-HX100V Viewfinder Replacement: 手順 6、 3の画像 1 Sony Cyber-shot DSC-HX100V Viewfinder Replacement: 手順 6、 3の画像 2 Sony Cyber-shot DSC-HX100V Viewfinder Replacement: 手順 6、 3の画像 3
    • Carefully pull out the the eyepiece.

    • Detach the orange ribbon cable that connects it to the green panel by carefully pulling outwards.

終わりに

To reassemble your device, follow these instructions in reverse order.

ある他の人がこのガイドを完成しました。

作成者

4人の作成者と共同で作成されました。

DaQuawn

メンバー登録日: 03/05/15

254 ポイント

2のガイドは作成済み

チーム

Sam Houston State, Team 11-3, Blackburne Winter 2015 Sam Houston State, Team 11-3, Blackburne Winter 2015人のメンバー

SHSU-BLACKBURNE-W15S11G3

3 メンバー

8のガイドは作成済み

1件のガイドコメント

Thank you very much for the importent articles made for us. If I can please put , how to replace the flasher as well.

Satsara Gunaratne - 返信

コメントを追加

統計データ:

過去 24時間: 0

過去 7 日: 0

過去 30 日: 9

今までの合計 995