Samsung Galaxy Tab Pro 10.1 Battery Replacement
はじめに
手順 1 に進むThis guide will show you how to replace the battery on the Samsung Galaxy Tab Pro 10.1. First, the process will involve removing the rear panel of the device which will allow access to the interior where the battery is located. Then, the steps to remove the battery for replacement will be outlined.
必要な工具と部品
パーツ
ツール
もっと見る
-
-
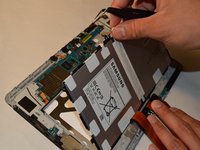
Insert a plastic opening tool into the crevice between the screen and the side of the tablet.
-
Go around the entire crevice with the plastic opening tool.
-
Set aside the separated front and rear panels of the device.
-
-
-
-
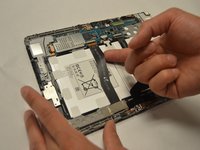
Remove the tape that runs along the length of the battery.
-
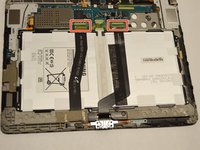
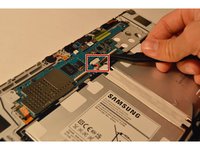
Lift the retaining flaps of the ZIF connectors on each side of the battery connector.
-
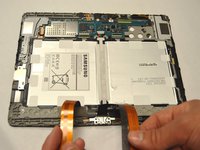
Remove the two ribbon cables that lie across the width of the battery and are connected to the motherboard. Place your finger underneath the ribbon cable and gently lift the cable upwards and off.
-
To reassemble your device, follow these instructions in reverse order.
To reassemble your device, follow these instructions in reverse order.
21 の人々がこのガイドを完成させました。
8ガイドコメント
My Samsung Galaxy Tab Pro sm-t520 screen pooped up from the base where the plugin for charging, only partly, and the screen is pretty much bowed up what can I do and the home button is very loose just happened by itself heard a pop like plastic sound and then looked and now Where home button is screen bowed up slightly how can that happen, I use the charger etc that came with my tablet and what would it cost to fix around figure possibly can a battery go bad even when I have not charged it in a long time, have not even been playing on it for several weeks. Please help ty
Oh it was a loud snap sound.
Well can't open it cause have not the right tools.
I would invest in a Opening Tools
like the one from ifixit so you can open the tablet. You need to see how it looks inside to know if you can repair and how.
Claes -


