メインコンテンツにスキップ

Samsung Galaxy A10 Motherboard Cover Replacement

必要条件のみ
この修理ガイドは、他のガイドの前提条件として使用されます。それ自体は不完全で、単独で使用されることはありません。

必要な工具と部品

  1. Samsung Galaxy A10 Motherboard Cover Replacement, Samsung Galaxy A10 SIM Tray Replacement: 手順 1、 2の画像 1 Samsung Galaxy A10 Motherboard Cover Replacement, Samsung Galaxy A10 SIM Tray Replacement: 手順 1、 2の画像 2
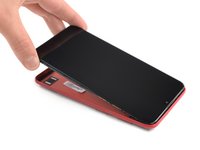
    • Insert a SIM card eject tool, a SIM eject bit or a straightened paper clip into the hole on the SIM tray located at the left side of the phone.

    • Press firmly to eject the tray.

  2. Samsung Galaxy A10 Motherboard Cover Replacement: 手順 2、 2の画像 1 Samsung Galaxy A10 Motherboard Cover Replacement: 手順 2、 2の画像 2
    • Remove the SIM card tray.

    • When reinserting the cards, make sure to properly orient them in the tray.

  3. Samsung Galaxy A10 Motherboard Cover Replacement, Back Cover: 手順 3、 2の画像 1 Samsung Galaxy A10 Motherboard Cover Replacement, Back Cover: 手順 3、 2の画像 2
    • The back cover is held in place by plastic clips.

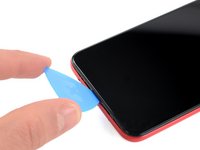
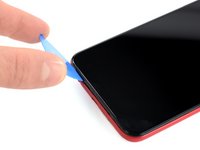
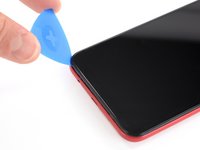
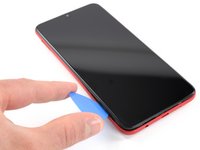
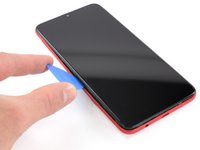
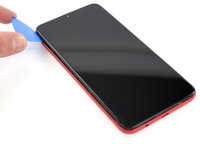
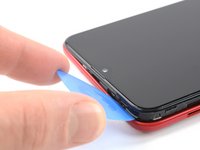
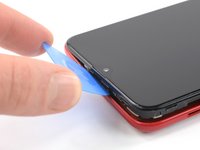
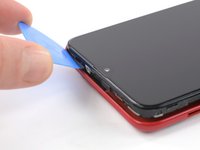
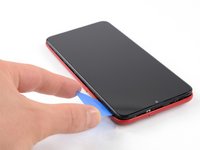
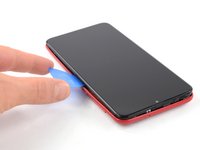
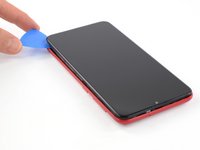
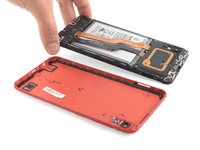
    • Insert an opening pick between the screen and the back cover on the bottom of the phone where the charging port is located.

  4. Samsung Galaxy A10 Motherboard Cover Replacement: 手順 4、 3の画像 1 Samsung Galaxy A10 Motherboard Cover Replacement: 手順 4、 3の画像 2 Samsung Galaxy A10 Motherboard Cover Replacement: 手順 4、 3の画像 3
    • Slide the opening pick to the bottom left corner to release the clips.

  5. Samsung Galaxy A10 Motherboard Cover Replacement: 手順 5、 3の画像 1 Samsung Galaxy A10 Motherboard Cover Replacement: 手順 5、 3の画像 2 Samsung Galaxy A10 Motherboard Cover Replacement: 手順 5、 3の画像 3
    • Slide the opening pick along the left edge to the top left corner of the phone, to release the clips.

  6. Samsung Galaxy A10 Motherboard Cover Replacement: 手順 6、 3の画像 1 Samsung Galaxy A10 Motherboard Cover Replacement: 手順 6、 3の画像 2 Samsung Galaxy A10 Motherboard Cover Replacement: 手順 6、 3の画像 3
    • Slide the opening pick from the top left corner to the top right corner to release the plastic clips.

  7. Samsung Galaxy A10 Motherboard Cover Replacement: 手順 7、 3の画像 1 Samsung Galaxy A10 Motherboard Cover Replacement: 手順 7、 3の画像 2 Samsung Galaxy A10 Motherboard Cover Replacement: 手順 7、 3の画像 3
    • Slide the opening pick from the top left corner to the bottom right corner to release the remaining clips.

  8. Samsung Galaxy A10 Motherboard Cover Replacement: 手順 8、 2の画像 1 Samsung Galaxy A10 Motherboard Cover Replacement: 手順 8、 2の画像 2
    • Remove the back cover.

  9. Samsung Galaxy A10 Motherboard Cover Replacement, Samsung Galaxy A10 Motherboard Cover Replacement: 手順 9、 1の画像 1
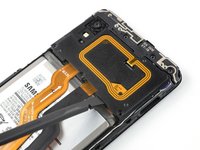
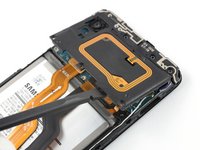
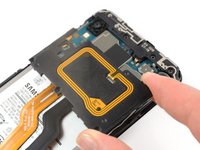
    • Remove the three Phillips #00 screws (3 mm length).

  10. Samsung Galaxy A10 Motherboard Cover Replacement: 手順 10、 3の画像 1 Samsung Galaxy A10 Motherboard Cover Replacement: 手順 10、 3の画像 2 Samsung Galaxy A10 Motherboard Cover Replacement: 手順 10、 3の画像 3
    • Use the flat end of a spudger to pry up the motherboard cover to release the plastic clips which hold the cover in its place.

    • The clips can be a bit resistive. If you're having trouble prying up the motherboard cover, twist the spudger to make the process easier.

    • Remove the motherboard cover.

    • The remaining plastic clips should release during this process or can be unhinged easily by hand.

ゴール

作成者

1人の作成者と共同作成されました。

Adriana Zwink

メンバー登録日: 12/18/19

48,256 ポイント

167のガイドは作成済み

チーム

iFixit iFixit人のメンバー

Staff

135 メンバー

16,817のガイドは作成済み

0 件のコメント

コメントを追加

統計データ:

過去 24時間: 0

過去 7 日: 0

過去 30 日: 0

今までの合計 113