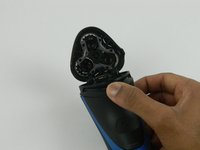
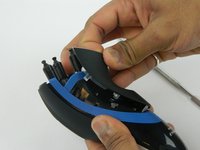
メインコンテンツにスキップ
Philips Norelco Shaver 2100 Casing Replacement

Philips Norelco Shaver 2100 Casing Replacement

Jose Moya

Jose Moya とその他 3 人の作成者

最終更新日: July 16, 2024

10 - 15 分
簡単

This guide will show the steps required to open the shaver and replace the casing. Useful if you have an extra shaver.

必要な工具と部品

ツール

  1. Philips Norelco Shaver 2100 Casing Replacement, Casing: 手順 1、 1の画像 1
    • Remove the single screw on the back casing using a T8 Torx screwdriver.

  2. Philips Norelco Shaver 2100 Casing Replacement: 手順 2、 2の画像 1 Philips Norelco Shaver 2100 Casing Replacement: 手順 2、 2の画像 2
    • Turn the shaver so that it is facing you.

    • Press the button on the shaver head to open it.

  3. Philips Norelco Shaver 2100 Casing Replacement: 手順 3、 1の画像 1
    • Remove the two 10.1 mm screws inside the shaver head using a T8 Torx screwdriver.

  4. Philips Norelco Shaver 2100 Casing Replacement: 手順 4、 2の画像 1 Philips Norelco Shaver 2100 Casing Replacement: 手順 4、 2の画像 2
    • Lift the shaver head off of the casing.

  5. Philips Norelco Shaver 2100 Casing Replacement: 手順 5、 3の画像 1 Philips Norelco Shaver 2100 Casing Replacement: 手順 5、 3の画像 2 Philips Norelco Shaver 2100 Casing Replacement: 手順 5、 3の画像 3
    • Gently pull the black and blue casing apart using a metal spudger.

  6. Philips Norelco Shaver 2100 Casing Replacement: 手順 6、 3の画像 1 Philips Norelco Shaver 2100 Casing Replacement: 手順 6、 3の画像 2 Philips Norelco Shaver 2100 Casing Replacement: 手順 6、 3の画像 3
    • Pry the remaining casing open using a metal spudger.

    • Be careful using a metal spudger, as it may result in damaging the case.

終わりに

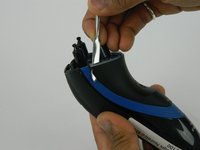
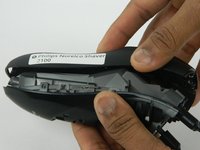
To reassemble your device, follow these instructions in reverse order.

ある他の人がこのガイドを完成しました。

作成者

3人の作成者と共同で作成されました。

Jose Moya

メンバー登録日: 10/30/17

194 ポイント

1ガイドが承認済み

チーム

USF Tampa, Team S1-G4, Thompson Fall 2017 USF Tampa, Team S1-G4, Thompson Fall 2017人のメンバー

USFT-THOMPSON-F17S1G4

3 メンバー

10のガイドは作成済み

0 件のコメント

コメントを追加

統計データ:

過去 24時間: 1

過去 7 日: 1

過去 30 日: 14

今までの合計 1,143