
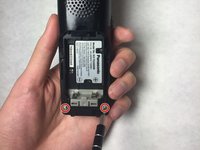
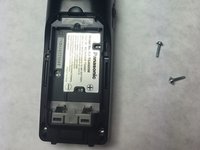
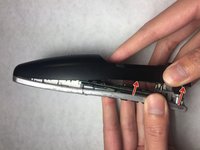
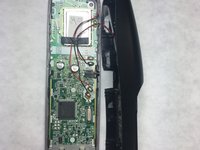
Panasonic KX-TG6021M Back Speaker Replacement
30 - 40 分
難しい
作成途中
空欄の手順
より良い紹介部分


もう少しです!
To reassemble your device, follow these instructions in reverse order.
終わりに
To reassemble your device, follow these instructions in reverse order.
ある他の人がこのガイドを完成しました。
チーム

IUPUI, Team 3-1, Baechle Fall 2016 IUPUI, Team 3-1, Baechle Fall 2016人のメンバー
IUPUI-BAECHLE-F16S3G1
4 メンバー
14のガイドは作成済み