メインコンテンツにスキップ
Panasonic ARC ES-LT3N Back Casing Replacement

Panasonic ARC ES-LT3N Back Casing Replacement

Andrew Trainor

Andrew Trainor とその他 2 人の作成者

最終更新日: July 13, 2024

5分
とても簡単
必要条件のみ
この修理ガイドは、他のガイドの前提条件として使用されます。それ自体は不完全で、単独で使用されることはありません。

This repair guide will show you the best step by step procedure of how to replace your back casing on your Panasonic ARC ES-LT3N. The process is very easy!

必要な工具と部品

ツール

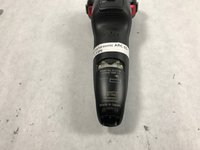
  1. Panasonic ARC ES-LT3N Back Casing Replacement, Back Casing: 手順 1、 2の画像 1 Panasonic ARC ES-LT3N Back Casing Replacement, Back Casing: 手順 1、 2の画像 2
    • Flip the razor over so the back is facing you.

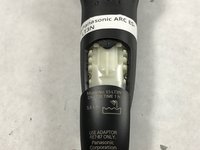
  2. Panasonic ARC ES-LT3N Back Casing Replacement: 手順 2、 2の画像 1 Panasonic ARC ES-LT3N Back Casing Replacement: 手順 2、 2の画像 2
    • Using a Phillips #00 screwdriver, remove the 6 mm screw just above the charger port.

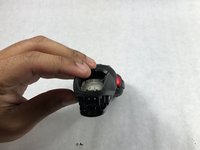
  3. Panasonic ARC ES-LT3N Back Casing Replacement: 手順 3、 2の画像 1 Panasonic ARC ES-LT3N Back Casing Replacement: 手順 3、 2の画像 2
    • Slide the plastic cover at the bottom of the razor downward to remove.

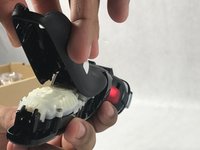
  4. Panasonic ARC ES-LT3N Back Casing Replacement: 手順 4、 2の画像 1 Panasonic ARC ES-LT3N Back Casing Replacement: 手順 4、 2の画像 2
    • Lift up the rear casing from the bottom of the razor.

    • This may require you to gently pry it apart with you fingers.

    • Lift up the rear casing from the sides of the razor.

    • Pull rear casing up and off razor.

    • Be careful not to break any plastic!

終わりに

To reassemble your device, follow these instructions in reverse order.

作成者

2人の作成者と共同で作成されました。

Andrew Trainor

メンバー登録日: 03/05/17

648 ポイント

5のガイドは作成済み

チーム

UMass Dartmouth, Team S8-G3, Catania Spring 2017 UMass Dartmouth, Team S8-G3, Catania Spring 2017人のメンバー

UMASSD-CATANIA-S17S8G3

3 メンバー

10のガイドは作成済み

0 件のコメント

コメントを追加

統計データ:

過去 24時間: 0

過去 7 日: 0

過去 30 日: 4

今までの合計 50