メインコンテンツにスキップ

OnePlus 8 Light Sensor Replacement

必要な工具と部品

  1. OnePlus 8 Light Sensor Replacement, Heat the rear glass: 手順 1、 1の画像 1
    • Power off your phone and unplug any cables.

    • Heat an iOpener and apply it to the rear glass for two minutes.

    • You can also use a hair dryer, heat gun, or hot plate—but extreme heat can damage the display and internal battery, so proceed with care.

  2. OnePlus 8 Light Sensor Replacement, Insert an opening pick: 手順 2、 3の画像 1 OnePlus 8 Light Sensor Replacement, Insert an opening pick: 手順 2、 3の画像 2 OnePlus 8 Light Sensor Replacement, Insert an opening pick: 手順 2、 3の画像 3
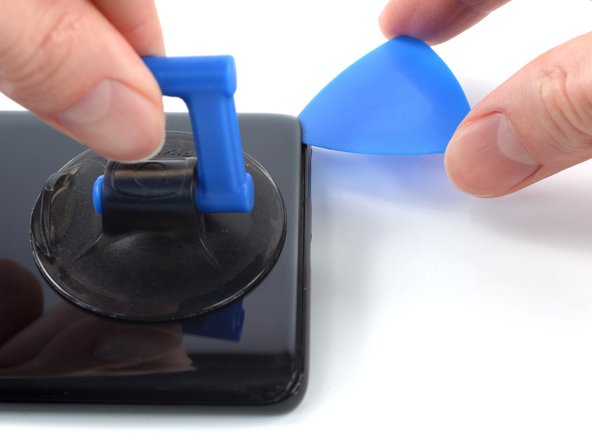
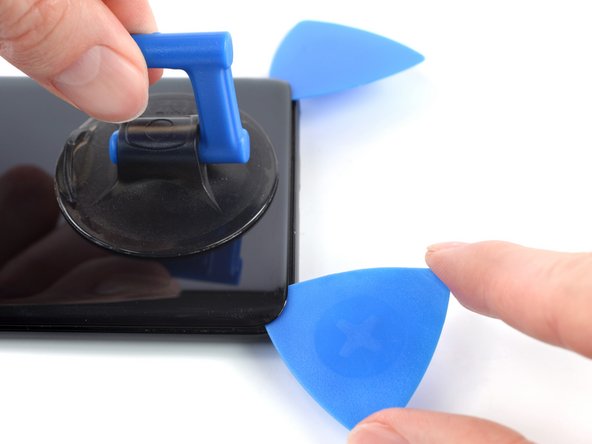
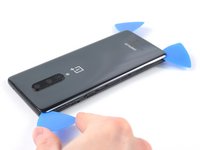
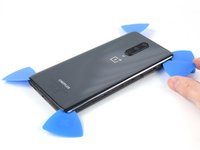
    • Apply a suction handle to the center of the bottom edge of the rear glass, as close to the edge as possible.

    • If your display is badly cracked, cover it with a layer of clear packing tape to help the suction cup adhere. Alternatively, you can pull using very strong tape instead of a suction cup. If all else fails, try supergluing the suction cup to the broken screen.

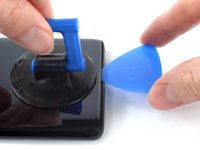
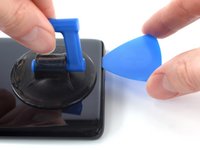
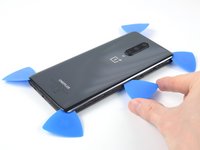
    • Pull up on the suction handle with strong, steady force to create a gap between the rear glass and frame.

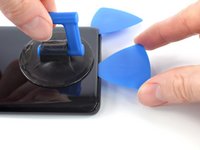
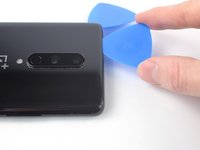
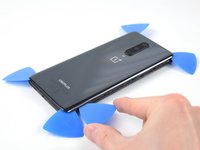
    • Insert an opening pick into the gap.

  3. OnePlus 8 Light Sensor Replacement, Slice the bottom edge adhesive: 手順 3、 3の画像 1 OnePlus 8 Light Sensor Replacement, Slice the bottom edge adhesive: 手順 3、 3の画像 2 OnePlus 8 Light Sensor Replacement, Slice the bottom edge adhesive: 手順 3、 3の画像 3
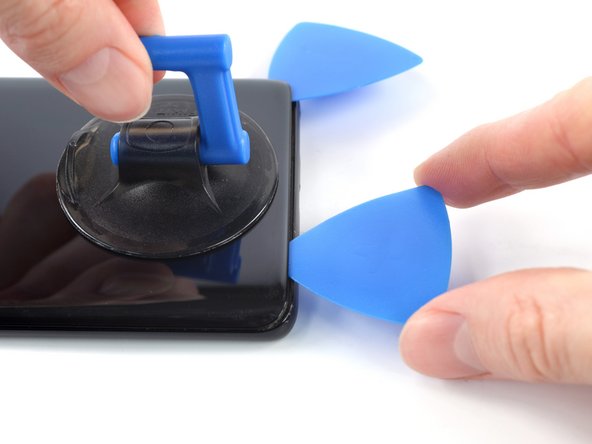
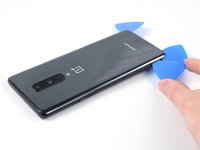
    • Slide the opening pick to the bottom right corner to slice the adhesive securing the rear glass.

    • Leave the opening pick in the bottom right corner to prevent the adhesive from resealing.

  4. OnePlus 8 Light Sensor Replacement: 手順 4、 3の画像 1 OnePlus 8 Light Sensor Replacement: 手順 4、 3の画像 2 OnePlus 8 Light Sensor Replacement: 手順 4、 3の画像 3
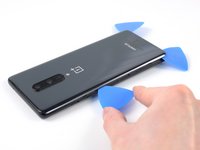
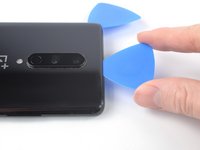
    • Insert a second opening pick under the bottom edge of the rear glass, into the gap you just created.

    • Slide the opening pick to the bottom left corner to slice the adhesive.

    • Leave the opening pick in the bottom left corner to prevent the adhesive from resealing.

  5. OnePlus 8 Light Sensor Replacement, Slice the left edge adhesive: 手順 5、 3の画像 1 OnePlus 8 Light Sensor Replacement, Slice the left edge adhesive: 手順 5、 3の画像 2 OnePlus 8 Light Sensor Replacement, Slice the left edge adhesive: 手順 5、 3の画像 3
    • If you have trouble slicing, reheat the iOpener and apply it to the edge for two minutes to soften the adhesive.

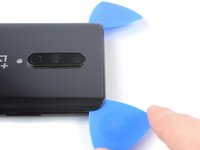
    • Insert a third opening pick under the bottom left corner of the rear glass.

    • Slide the opening pick up the left edge to slice the adhesive.

    • Leave the opening pick in the top left corner to prevent the adhesive from resealing.

  6. OnePlus 8 Light Sensor Replacement, Slice the top edge adhesive: 手順 6、 3の画像 1 OnePlus 8 Light Sensor Replacement, Slice the top edge adhesive: 手順 6、 3の画像 2 OnePlus 8 Light Sensor Replacement, Slice the top edge adhesive: 手順 6、 3の画像 3
    • Insert a fourth opening pick under the top left corner of the rear glass.

    • Slide the opening pick along the top edge to slice the adhesive.

    • Leave the opening pick in the top right corner to prevent the adhesive from resealing.

  7. OnePlus 8 Light Sensor Replacement, Slice the right edge adhesive: 手順 7、 3の画像 1 OnePlus 8 Light Sensor Replacement, Slice the right edge adhesive: 手順 7、 3の画像 2 OnePlus 8 Light Sensor Replacement, Slice the right edge adhesive: 手順 7、 3の画像 3
    • Insert a fifth opening pick under the top right corner of the rear glass.

    • Slide the opening pick down the right edge to slice the remaining adhesive.

  8. OnePlus 8 Light Sensor Replacement, Remove the rear glass: 手順 8、 3の画像 1 OnePlus 8 Light Sensor Replacement, Remove the rear glass: 手順 8、 3の画像 2 OnePlus 8 Light Sensor Replacement, Remove the rear glass: 手順 8、 3の画像 3
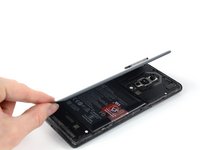
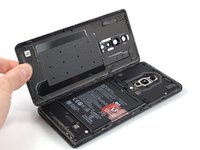
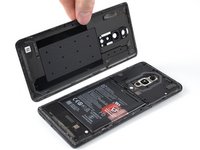
    • Remove the rear glass.

    • If the rear glass still feels stuck to the frame, slide an opening pick around the entire perimeter until the rear glass separates completely.

    • During reassembly:

    • Secure the rear glass with pre-cut adhesive or double-sided adhesive tape.

    • After installing the rear glass, apply strong, steady pressure to your phone for several minutes to help the adhesive form a good bond.

  9. OnePlus 8 Light Sensor Replacement, Unfasten the motherboard cover: 手順 9、 1の画像 1
    この手順で使用する道具:
    Tweezers
    $4.99
    • A white sticker may cover a screw on the right edge of the motherboard cover. Pierce through it with the tip of your screwdriver or use tweezers to remove it.

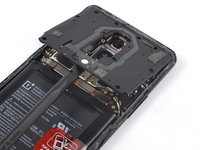
    • Use a Phillips screwdriver to remove the eleven 3.3 mm-long screws securing the motherboard cover.

  10. OnePlus 8 Light Sensor Replacement, Pry up the motherboard cover: 手順 10、 3の画像 1 OnePlus 8 Light Sensor Replacement, Pry up the motherboard cover: 手順 10、 3の画像 2 OnePlus 8 Light Sensor Replacement, Pry up the motherboard cover: 手順 10、 3の画像 3
    • The motherboard cover is secured by tight clips.

    • Insert the flat end of a spudger under the center of the motherboard cover's bottom edge.

    • Twist the spudger to release the clips.

    • Lever the motherboard cover up until you can grip it with your fingers.

  11. OnePlus 8 Light Sensor Replacement, Remove the motherboard cover: 手順 11、 2の画像 1 OnePlus 8 Light Sensor Replacement, Remove the motherboard cover: 手順 11、 2の画像 2
    • Remove the motherboard cover.

  12. OnePlus 8 Light Sensor Replacement, Disconnect the battery cable: 手順 12、 2の画像 1 OnePlus 8 Light Sensor Replacement, Disconnect the battery cable: 手順 12、 2の画像 2
    • Use a spudger to disconnect the battery cable by prying the connector straight up from its socket on the bottom left corner of the motherboard.

    • To re-attach press connectors like this one, carefully align and press down on one side until it clicks into place, then repeat on the other side. Don't press down in the middle. If the connector is misaligned, the pins can bend and cause permanent damage.

  13. OnePlus 8 Light Sensor Replacement, Rear Camera: 手順 13、 2の画像 1 OnePlus 8 Light Sensor Replacement, Rear Camera: 手順 13、 2の画像 2
    • Disconnect the antenna cable connector on the right, using tweezers.

    • Disconnect the antenna cable connector on the left using tweezers.

  14. OnePlus 8 Light Sensor Replacement: 手順 14、 3の画像 1 OnePlus 8 Light Sensor Replacement: 手順 14、 3の画像 2 OnePlus 8 Light Sensor Replacement: 手順 14、 3の画像 3
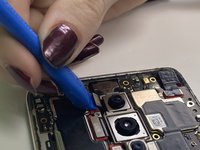
    • Use an opening tool to gently pry and disconnect the three camera press connectors.

  15. OnePlus 8 Light Sensor Replacement: 手順 15、 1の画像 1
    • Remove the rear camera.

  16. OnePlus 8 Light Sensor Replacement, Motherboard: 手順 16、 2の画像 1 OnePlus 8 Light Sensor Replacement, Motherboard: 手順 16、 2の画像 2
    • Use an opening tool to pry up and disconnect the front camera press connector.

    • Remove the front camera.

  17. OnePlus 8 Light Sensor Replacement: 手順 17、 3の画像 1 OnePlus 8 Light Sensor Replacement: 手順 17、 3の画像 2 OnePlus 8 Light Sensor Replacement: 手順 17、 3の画像 3
    • Use an opening tool to pry up and disconnect each of the three press connectors attached to the motherboard.

  18. OnePlus 8 Light Sensor Replacement: 手順 18、 1の画像 1
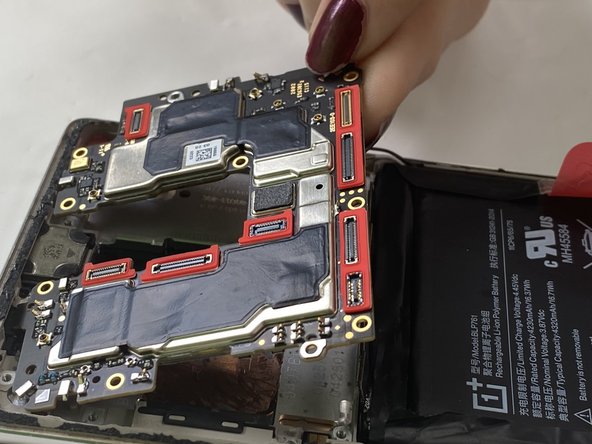
    • Remove the motherboard by carefully pryinng it out with the opening tool, lifting the battery out to make removal easier.

  19. OnePlus 8 Light Sensor Replacement, Light Sensor: 手順 19、 1の画像 1
    • Insert an opening tool into the gap between the light sensor and chassis.

    • Pry the light sensor up and out.

終わりに

To reassemble your device, follow the above steps in reverse order.
Take your e-waste to an R2 or e-Stewards certified recycler.
Repair didn’t go as planned? Try some basic troubleshooting or ask our Answers community for help.

ある他の人がこのガイドを完成しました。

作成者

1人の作成者と共同作成されました。

Jose Reyes

メンバー登録日: 09/19/24

73 ポイント

1ガイドが承認済み

チーム

University of North Texas, Team 2-3, Coppersmith Fall 2024 University of North Texas, Team 2-3, Coppersmith Fall 2024人のメンバー

UNT-COPPERSMITH-F24S2G3

4 メンバー

4のガイドは作成済み

0件のガイドコメント

コメントを追加

統計データ:

過去 24時間: 2

過去 7 日: 3

過去 30 日: 9

今までの合計 141