メインコンテンツにスキップ

Nokia N900 Slider Assembly Replacement

必要な工具と部品

  1. Nokia N900 Slider Assembly Replacement, Slider Assembly: 手順 1、 1の画像 1
    • Turn the phone over so the screen is face down.

  2. Nokia N900 Slider Assembly Replacement: 手順 2、 2の画像 1 Nokia N900 Slider Assembly Replacement: 手順 2、 2の画像 2
    • Remove the back cover by locating the slit on the bottom of the phone and lifting up.

  3. Nokia N900 Slider Assembly Replacement: 手順 3、 1の画像 1
    • Remove the battery by lifting it out of the device.

  4. Nokia N900 Slider Assembly Replacement: 手順 4、 2の画像 1 Nokia N900 Slider Assembly Replacement: 手順 4、 2の画像 2
    • Remove the two "L-shaped" antennas by unscrewing the following screws:

    • Four screw M1 .4x5.0

    • Two screw RF1 .4x4

    • In addition to unscrewing the screws, remove the B-Cover (which will fall right out without the screws).

  5. Nokia N900 Slider Assembly Replacement: 手順 5、 1の画像 1
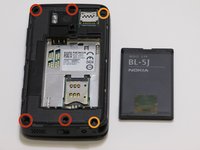
    • Turn the back of the phone over so the keyboard is face up. You should then have two halves of the phone.

    • To locate the slider, find the "black tape" on the screen half of the phone.

    • Weave the "slider tape" through the orange slot on the keyboard half of the phone.

    • Once you have completed these steps your phone should be able to slide up and down with ease.

終わりに

To reassemble your device, follow these instructions in reverse order.

ある他の人がこのガイドを完成しました。

作成者

3人の作成者と共同で作成されました。

Troy Posey

メンバー登録日: 03/13/14

349 ポイント

2のガイドは作成済み

チーム

New Mexico State, Team 1-4, Easley Spring 2014 New Mexico State, Team 1-4, Easley Spring 2014人のメンバー

NMSU-EASLEY-S14S1G4

4 メンバー

4のガイドは作成済み

0 件のコメント

コメントを追加

統計データ:

過去 24時間: 0

過去 7 日: 1

過去 30 日: 6

今までの合計 857