メインコンテンツにスキップ

Nokia 6102i Outside Display Screen Replacement

必要な工具と部品

  1. Nokia 6102i Outside Display Screen Replacement, Remove Inside Display Screen: 手順 1、 3の画像 1 Nokia 6102i Outside Display Screen Replacement, Remove Inside Display Screen: 手順 1、 3の画像 2 Nokia 6102i Outside Display Screen Replacement, Remove Inside Display Screen: 手順 1、 3の画像 3
    • This step does not require much force.

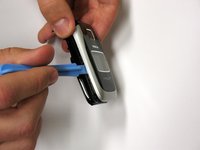
    • Use the plastic opening tool to pry between the seam of the black phone cover which is located at the base of the screen.

  2. Nokia 6102i Outside Display Screen Replacement, Remove Phone Case Screws.: 手順 2、 2の画像 1 Nokia 6102i Outside Display Screen Replacement, Remove Phone Case Screws.: 手順 2、 2の画像 2
    • Have a container ready to keep track of small parts.

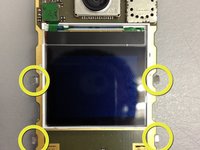
    • Use the t6 screwdriver to remove the two visible screws that are immediately below the screen.

  3. Nokia 6102i Outside Display Screen Replacement, Remove silver and black phone case: 手順 3、 2の画像 1 Nokia 6102i Outside Display Screen Replacement, Remove silver and black phone case: 手順 3、 2の画像 2
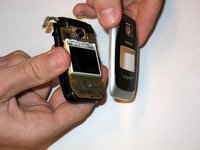
    • Keep the phone closed, and slide the Ipod tool between the the silver and black phone case. Use the tool to slide all the way around the case to release the catches.

  4. Nokia 6102i Outside Display Screen Replacement, Unplug and Remove Circuit Board: 手順 4、 2の画像 1 Nokia 6102i Outside Display Screen Replacement, Unplug and Remove Circuit Board: 手順 4、 2の画像 2
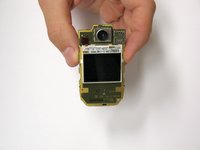
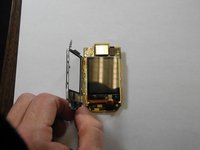
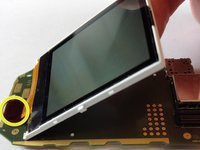
    • Pull out the circuit board, which will remove it completely from the case

  5. Nokia 6102i Outside Display Screen Replacement, Remove Display Screen: 手順 5、 3の画像 1 Nokia 6102i Outside Display Screen Replacement, Remove Display Screen: 手順 5、 3の画像 2 Nokia 6102i Outside Display Screen Replacement, Remove Display Screen: 手順 5、 3の画像 3
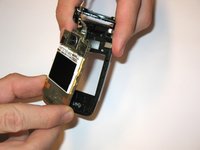
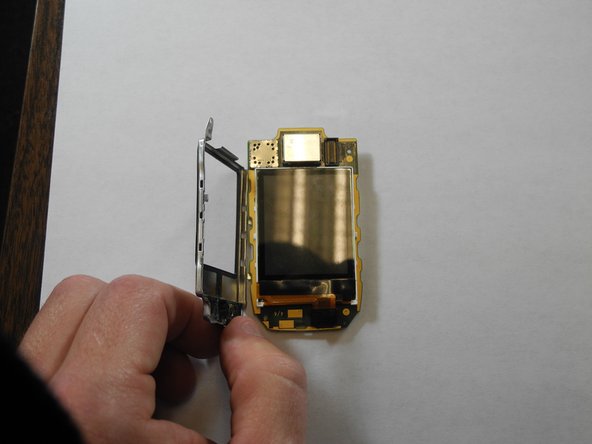
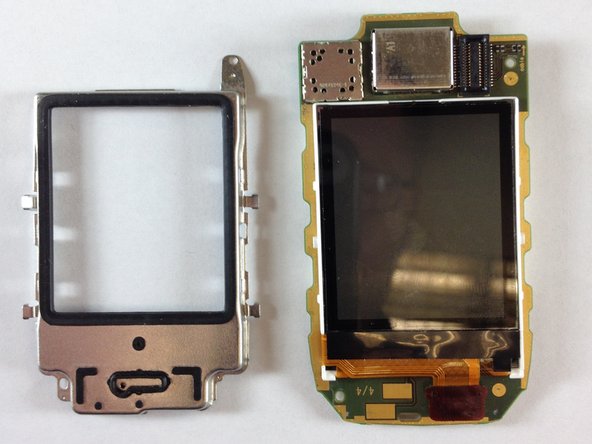
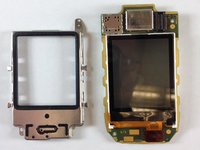
    • If the metal case is not already free, simultaneously release the metal tabs on both sides of the metal casing to remove the display screen.

  6. Nokia 6102i Outside Display Screen Replacement, Disconnect Interior Display Screen from circuit board.: 手順 6、 2の画像 1 Nokia 6102i Outside Display Screen Replacement, Disconnect Interior Display Screen from circuit board.: 手順 6、 2の画像 2
    • Be gentle when pulling off the display screen. If pulled too hard, the orange connecting ribbon will rip.

    • Lift off the display screen and disconnect it from the circuit board.

終わりに

To reassemble your device, follow these instructions in reverse order.

作成者

6人の作成者と共同で作成されました。

Jonathan Brophy

メンバー登録日: 04/14/10

1 ポイント

3のガイドは作成済み

チーム

Cal Poly, Team 23-78, Johann Spring 2010 Cal Poly, Team 23-78, Johann Spring 2010人のメンバー

CPSU-JOHANN-S10S23G78

4 メンバー

5のガイドは作成済み

0 件のコメント

コメントを追加

統計データ:

過去 24時間: 0

過去 7 日: 1

過去 30 日: 2

今までの合計 2,683