メインコンテンツにスキップ

Mr. Coffee BVMC-SJX33GT Power Cord Replacement

必要な工具と部品

  1. Mr. Coffee BVMC-SJX33GT Power Cord Replacement, Base: 手順 1、 1の画像 1
    • Turn your coffee maker over so that the base is facing up.

  2. Mr. Coffee BVMC-SJX33GT Power Cord Replacement: 手順 2、 2の画像 1 Mr. Coffee BVMC-SJX33GT Power Cord Replacement: 手順 2、 2の画像 2
    • Locate the seven 13.5mm screws securing the base to the coffee maker.

    • Unscrew the screws using a #2 Phillips head screwdriver.

    • Use a screwdriver with a magnetic tip to more easily remove the three screws in the back and two in the middle.

  3. Mr. Coffee BVMC-SJX33GT Power Cord Replacement, security screws: 手順 3、 1の画像 1
    • Also the front two screws are safety screws: they have a 6 sided star shape with a raised dimple in the center to prevent homebodies from casually opening the machine. (probably from the Sunbeam’s (owns Mr. Coffee) legal dept.) Anyway you will need a security bit to remove the screws and not a phillips screw driver.

  4. Mr. Coffee BVMC-SJX33GT Power Cord Replacement: 手順 4、 1の画像 1
    • Lift base to remove.

    • If the base sticks along one edge, do not pull at an angle. Gently tug straight up while sliding a finger along the edge in order to pop the clips.

  5. Mr. Coffee BVMC-SJX33GT Power Cord Replacement, Rubber Hose: 手順 5、 3の画像 1 Mr. Coffee BVMC-SJX33GT Power Cord Replacement, Rubber Hose: 手順 5、 3の画像 2 Mr. Coffee BVMC-SJX33GT Power Cord Replacement, Rubber Hose: 手順 5、 3の画像 3
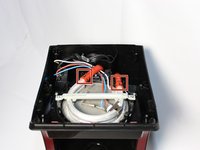
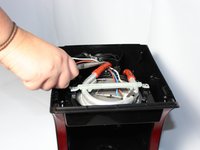
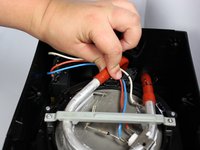
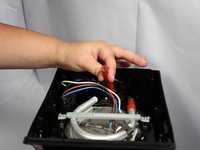
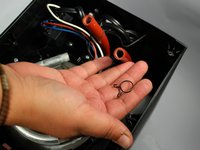
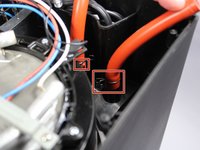
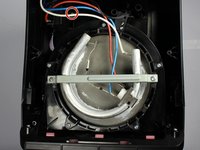
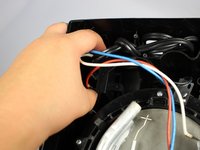
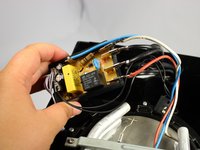
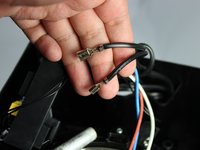
    • Locate the metal clamps.

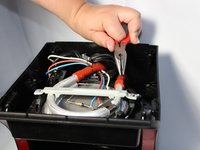
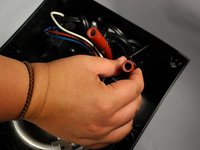
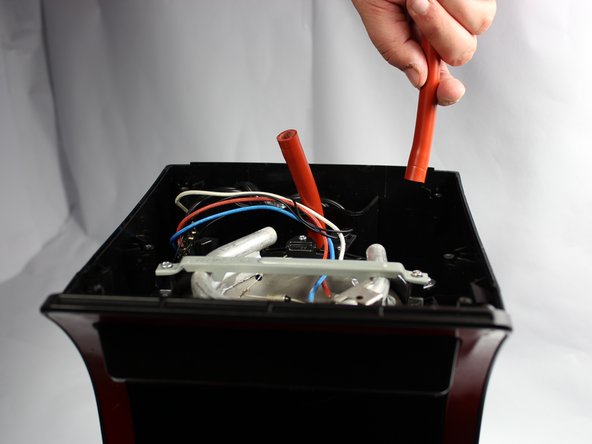
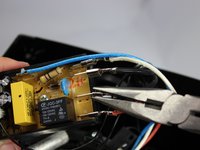
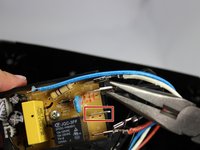
    • Using a pair of pliers or your fingers, slide clamps away from tube opening.

    • All following steps regarding the rubber hoses should be completed for both hoses.

  6. Mr. Coffee BVMC-SJX33GT Power Cord Replacement: 手順 6、 3の画像 1 Mr. Coffee BVMC-SJX33GT Power Cord Replacement: 手順 6、 3の画像 2 Mr. Coffee BVMC-SJX33GT Power Cord Replacement: 手順 6、 3の画像 3
    • Using a plastic opening tool, loosen rubber hose from metal tubing.

    • Once loosened, grip the hose and pull it from the metal tubing.

  7. Mr. Coffee BVMC-SJX33GT Power Cord Replacement: 手順 7、 2の画像 1 Mr. Coffee BVMC-SJX33GT Power Cord Replacement: 手順 7、 2の画像 2
    • Slide metal clamps off hoses.

  8. Mr. Coffee BVMC-SJX33GT Power Cord Replacement: 手順 8、 2の画像 1 Mr. Coffee BVMC-SJX33GT Power Cord Replacement: 手順 8、 2の画像 2
    • Locate the other set of metal clamps.

    • Using needle nose pliers or your fingers remove these clamps by pinching the clamps and sliding them up the tubes.

  9. Mr. Coffee BVMC-SJX33GT Power Cord Replacement: 手順 9、 2の画像 1 Mr. Coffee BVMC-SJX33GT Power Cord Replacement: 手順 9、 2の画像 2
    • Grip the hoses and pull them straight up and out.

  10. Mr. Coffee BVMC-SJX33GT Power Cord Replacement, Power Cord: 手順 10、 2の画像 1 Mr. Coffee BVMC-SJX33GT Power Cord Replacement, Power Cord: 手順 10、 2の画像 2
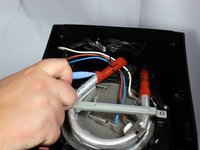
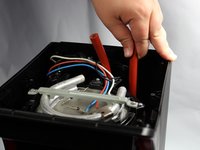
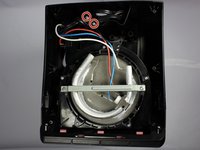
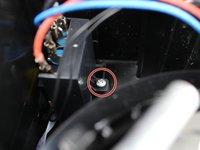
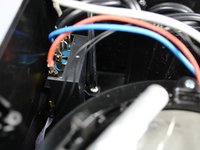
    • Locate the two 11.5mm screws securing the plastic bracket in place.

    • Unscrew the screws using a #2 Phillip's head screwdriver and remove the bracket.

  11. Mr. Coffee BVMC-SJX33GT Power Cord Replacement: 手順 11、 3の画像 1 Mr. Coffee BVMC-SJX33GT Power Cord Replacement: 手順 11、 3の画像 2 Mr. Coffee BVMC-SJX33GT Power Cord Replacement: 手順 11、 3の画像 3
    • Locate the 11.5mm screw below the white, red, and blue wires. The screw is along the side of the coffee maker about four inches deep from the edge of the base.

    • Unscrew the screw with a #2 Phillip's head screwdriver and remove.

    • Using a screwdriver with a magnetic tip will allow you to remove the screw more easily.

  12. Mr. Coffee BVMC-SJX33GT Power Cord Replacement: 手順 12、 2の画像 1 Mr. Coffee BVMC-SJX33GT Power Cord Replacement: 手順 12、 2の画像 2
    • Grip the connector box and pull it into view.

  13. Mr. Coffee BVMC-SJX33GT Power Cord Replacement: 手順 13、 3の画像 1 Mr. Coffee BVMC-SJX33GT Power Cord Replacement: 手順 13、 3の画像 2 Mr. Coffee BVMC-SJX33GT Power Cord Replacement: 手順 13、 3の画像 3
    • While maintaining a firm grip on the connector box, use needle nose pliers to pull the black wires free from the box.

    • Only place your pliers on the metal part of the connector, NOT the partially exposed wire.

    • Pull the connector straight out. If you pull at an angle, you risk breaking the connector or other components connected to it.The connector will stay attached to the electrical component of the coffee maker as indicated by the red box in the second photo.

  14. Mr. Coffee BVMC-SJX33GT Power Cord Replacement: 手順 14、 3の画像 1 Mr. Coffee BVMC-SJX33GT Power Cord Replacement: 手順 14、 3の画像 2 Mr. Coffee BVMC-SJX33GT Power Cord Replacement: 手順 14、 3の画像 3
    • Turn coffee maker around so that the back is facing you.

    • Pull the cord out through the back window.

終わりに

To reassemble your device, follow these instructions in reverse order.

作成者

1人の作成者と共同作成されました。

Mackenzie Aiken

メンバー登録日: 01/27/15

1,473 ポイント

6のガイドは作成済み

チーム

San Diego State, Team 1-4, Sheppard Winter 2015 San Diego State, Team 1-4, Sheppard Winter 2015人のメンバー

SDSU-SHEPPARD-W15S1G4

2 メンバー

6のガイドは作成済み

0 件のコメント

コメントを追加

統計データ:

過去 24時間: 1

過去 7 日: 7

過去 30 日: 46

今までの合計 2,657