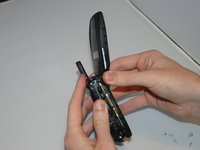
メインコンテンツにスキップ

Motorola i560 Screen Replacement

必要な工具と部品

  1. Motorola i560 Screen Replacement, Battery: 手順 1、 1の画像 1
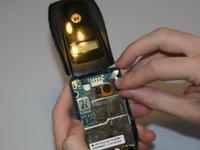
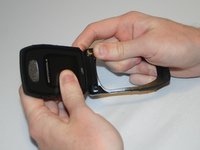
    • Place thumb on the rubber tab on the lower back of the phone.

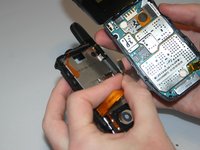
    • Push away from the phone to release back panel.

  2. Motorola i560 Screen Replacement: 手順 2、 1の画像 1
    • Lift the back panel of the phone to expose battery (not shown here).

  3. Motorola i560 Screen Replacement, Motherboard: 手順 3、 1の画像 1
    • Pull the antenna up to reveal two of the six screws.

  4. Motorola i560 Screen Replacement: 手順 4、 1の画像 1
    • Unscrew all six screws on the back side of the phone using a T-6 bit.

  5. Motorola i560 Screen Replacement: 手順 5、 2の画像 1 Motorola i560 Screen Replacement: 手順 5、 2の画像 2
    • Gently separate the front and back sides of the phone, as shown in the picture.

    • Be careful not to break or bend the ribbon cables.

  6. Motorola i560 Screen Replacement: 手順 6、 2の画像 1 Motorola i560 Screen Replacement: 手順 6、 2の画像 2
    • Detach the first ribbon cable by unplugging it from the motherboard.

  7. Motorola i560 Screen Replacement: 手順 7、 2の画像 1 Motorola i560 Screen Replacement: 手順 7、 2の画像 2
    • Detach the speaker ribbon cable from the motherboard.

  8. Motorola i560 Screen Replacement: 手順 8、 1の画像 1
    • Remove the motherboard from the front half of the phone by gently shaking it loose. It should come out with little to no trouble.

  9. Motorola i560 Screen Replacement, Keypad: 手順 9、 1の画像 1
    • Push lightly from the front of the keypad to remove it.

  10. Motorola i560 Screen Replacement, Screen: 手順 10、 2の画像 1 Motorola i560 Screen Replacement, Screen: 手順 10、 2の画像 2
    • By applying force, "pop" the screen out of the connecting hinge frame of the phone.

  11. Motorola i560 Screen Replacement: 手順 11、 2の画像 1 Motorola i560 Screen Replacement: 手順 11、 2の画像 2
    • Carefully slide the speaker ribbon cable through the slot in the front frame of the phone.

  12. Motorola i560 Screen Replacement: 手順 12、 1の画像 1
    • After sliding the ribbon cable through the front frame of the phone, the separated screen and phone frame will appear as shown.

終わりに

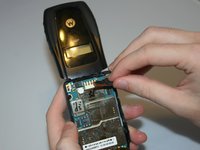
To reassemble your device, follow these instructions in reverse order.

作成者

4人の作成者と共同で作成されました。

Ariel

メンバー登録日: 03/11/13

19 ポイント

4のガイドは作成済み

チーム

Clemson, Team 13-6, Benson Spring 2013 Clemson, Team 13-6, Benson Spring 2013人のメンバー

CLEM-BENSON-S13S13G6

3 メンバー

10のガイドは作成済み

0 件のコメント

コメントを追加

統計データ:

過去 24時間: 0

過去 7 日: 1

過去 30 日: 1

今までの合計 155