メインコンテンツにスキップ
Motorola W315 Keypad Replacement

Motorola W315 Keypad Replacement

Justin Scott

Justin Scott とその他 4 人の作成者

最終更新日: December 27, 2017

見積もりなし
中レベル
高画質の画像が必要
多くの画像が必要
より良い紹介部分

必要な工具と部品

ツール

  1. Motorola W315 Keypad Replacement, Battery: 手順 1、 1の画像 1
    • Turn off the phone.

    • Turn the device over.

    • Remove the battery cover.

    • Insert thumb in the gap between the button and the battery and pry the battery upwards.

    • Pull the battery out of the phone.

  2. Motorola W315 Keypad Replacement: 手順 3、 1の画像 1
    • Insert the new battery.

  3. Motorola W315 Keypad Replacement, Rear Case: 手順 4、 1の画像 1
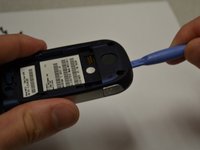
    • Four 5 mm screws are visible (circled in red).

    • Using the T6 tool, remove all four 5mm screws and set them aside.

  4. Motorola W315 Keypad Replacement: 手順 5、 3の画像 1 Motorola W315 Keypad Replacement: 手順 5、 3の画像 2 Motorola W315 Keypad Replacement: 手順 5、 3の画像 3
    • Insert the plastic opening tool between the front and back panels of the lower half of the device.

    • Slide the tool around the entire frame of the device until it has loosened.

    • Remove the back of the device.

  5. Motorola W315 Keypad Replacement, Circuit Board: 手順 6、 3の画像 1 Motorola W315 Keypad Replacement, Circuit Board: 手順 6、 3の画像 2 Motorola W315 Keypad Replacement, Circuit Board: 手順 6、 3の画像 3
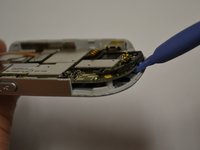
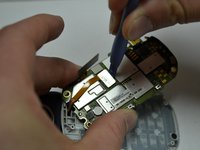
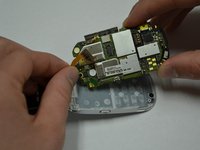
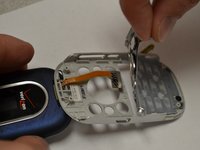
    • Using the plastic opening tool, gently lift the circuit board off of the four gray pegs that it rests upon.

  6. Motorola W315 Keypad Replacement: 手順 7、 3の画像 1 Motorola W315 Keypad Replacement: 手順 7、 3の画像 2 Motorola W315 Keypad Replacement: 手順 7、 3の画像 3
    • Use the plastic opening tool to remove the chip connected by magnetic strip to the screen.

    • Remove circuit board.

  7. Motorola W315 Keypad Replacement, Keypad: 手順 8、 3の画像 1 Motorola W315 Keypad Replacement, Keypad: 手順 8、 3の画像 2 Motorola W315 Keypad Replacement, Keypad: 手順 8、 3の画像 3
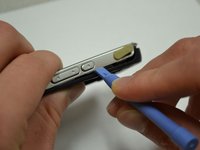
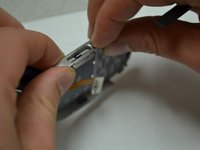
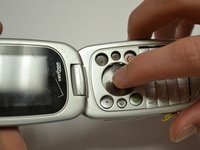
    • Apply pressure to the side buttons to remove them from the frame.

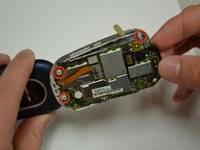
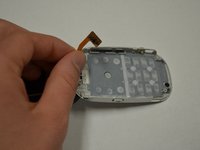
    • Turn the device over and push the keypad to loosen it from the frame.

    • Turn the device over again and gently pull the keypad away from the frame.

    • Warning: Keypad may not respond due to unclean button contacts, make sure the button contacts remain clean throughout the disassembly and reassembly of the phone.

終わりに

To reassemble your device, follow these instructions in reverse order.

Information on recycling/disposing of your electronic waste is located under Additional Information on the device page.

作成者

4人の作成者と共同で作成されました。

Justin Scott

メンバー登録日: 03/26/14

501 ポイント

5のガイドは作成済み

チーム

Clemson, Team 6-3, Benson Spring 2014 Clemson, Team 6-3, Benson Spring 2014人のメンバー

CLEM-BENSON-S14S6G3

3 メンバー

18のガイドは作成済み

0件のガイドコメント

コメントを追加

統計データ:

過去 24時間: 0

過去 7 日: 2

過去 30 日: 2

今までの合計 196