
MacBook Unibody Model A1278 Bluetooth Board Replacement

はじめに
手順 1 に進むThis guide will help you replace the Bluetooth Board


-
-
With the case closed, place the Unibody top-side down on a flat surface.
-
Depress the grooved side of the access door release latch enough to grab the free end. Lift the release latch until it is vertical.
-
-
-
Remove the following eight screws securing the lower case to the chassis:
-
One 3 mm Phillips screw.
-
Three 13.5 mm Phillips screws.
-
Four 3.5 mm Phillips screws.
-
-
-
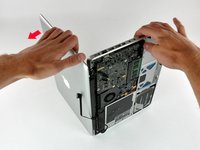
Disconnect the camera cable by pulling the male end straight away from its socket.
-
-
-
-
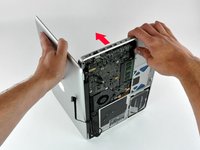
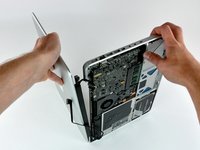
Grab the upper case with your right hand and rotate it slightly toward the top of the display so the upper display bracket clears the edge of the upper case.
-
Rotate the display slightly away from the upper case.
-
Lift the display away from the upper case, minding any brackets or cables that may get caught.
-
-
-
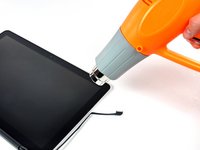
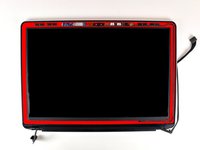
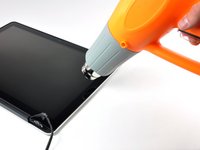
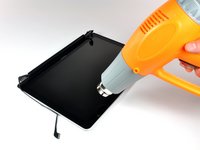
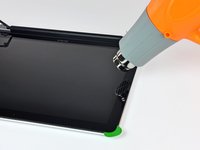
With the heat gun set to low, start by heating the outer black border near the upper right corner of the glass panel.
-
-
-
Gently lift the corner of the display glass enough to insert a spudger between it and the display assembly.
-
Use the flat end of a spudger to gently pry up the adhesive securing the front glass to the display.
-
Pry up the glass panel a few inches away from the upper right corner along the top and right edges of the display.
-
-
-
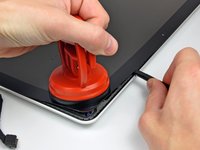
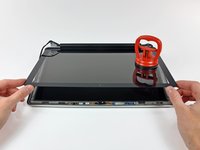
Use a heat gun to soften the adhesive under the black strip along the right side of the front glass panel.
-
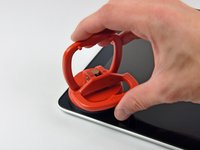
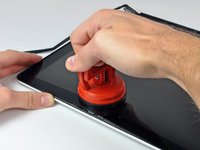
Attach a suction cup along the right side of the front glass panel.
-
Pull up on the glass panel while you use the flat end of a spudger to separate it from the rest of the display assembly.
-
Continue working along the right edge of the front display glass until it is separated from the display.
-
-
-
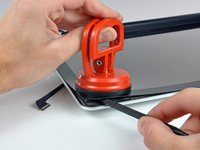
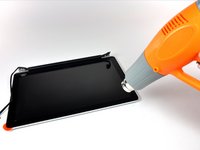
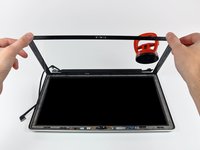
Use your heat gun to soften the adhesive under the black strip along the top edge of the glass display panel.
-
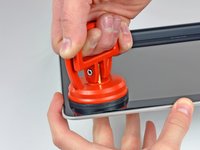
Attach a suction cup near the top edge of the glass display panel and use it to pull the glass panel up off the display.
-
Work along the top edge of the glass panel, carefully using the flat end of a spudger to separate the adhesive if necessary.
-
-
-
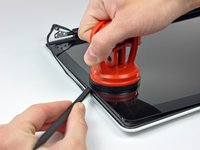
Use a heat gun to soften the adhesive under the black strip near the upper left corner of the glass display panel.
-
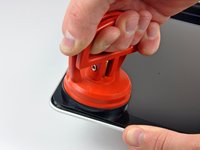
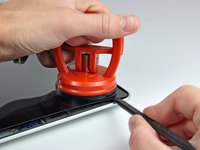
Attach a suction cup near the upper left corner of the glass display panel.
-
Pull up on the suction cup and use the flat end of a spudger to carefully pry the glass display panel out of the display assembly.
-
-
-
Use a heat gun to soften the adhesive under the black strip along the left side of the front glass panel.
-
Attach a suction cup along the left side of the front glass panel.
-
Pull up on the glass panel while you use the flat end of a spudger to separate it from the rest of the display assembly.
-
Continue working along the left edge of the front display glass until it is separated from the display.
-
-
-
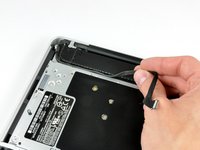
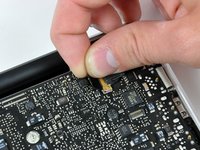
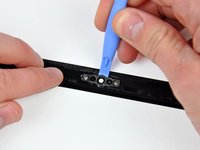
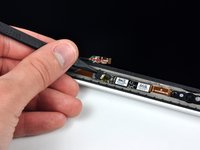
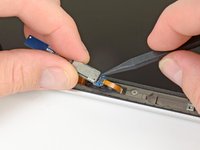
To reconnect the cable, first use the tip of a spudger to remove the piece of foam tape over the AirPort & iSight data cable ZIF socket.
-
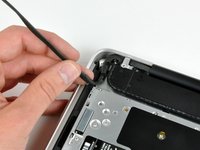
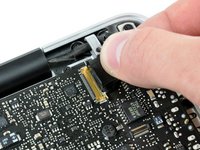
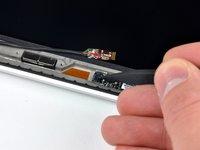
Use the tip of a spudger to flip up the ZIF cable retainer on the AirPort & iSight data cable socket.
-
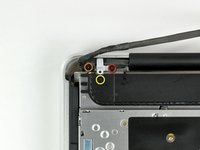
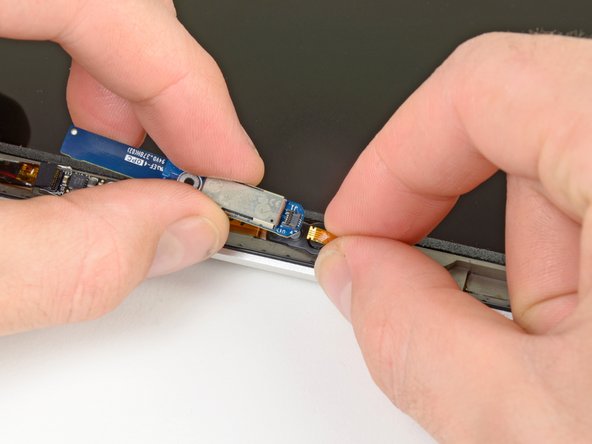
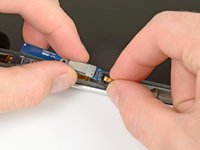
Insert the AirPort & iSight data cable into its socket on the camera board and use the tip of a spudger to snap down the ZIF cable retainer, locking the cable in place.
-
-
-
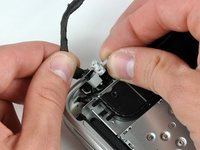
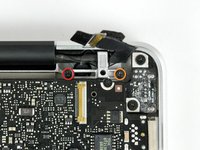
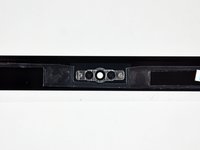
Remove the single 3 mm Phillips #00 screw securing the Bluetooth board to the display assembly.
-


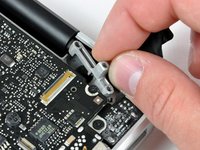


To reassemble your device, follow these instructions in reverse order.
To reassemble your device, follow these instructions in reverse order.
3 の人々がこのガイドを完成させました。
