
MacBook Pro 13" Unibody Late 2011ディスプレイの交換

はじめに
手順 1 に進むこのガイドを使って壊れたディスプレイアセンブリを交換します。


-
-
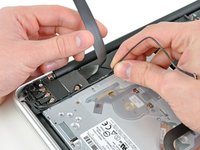
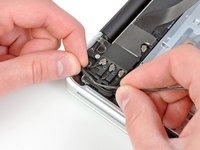
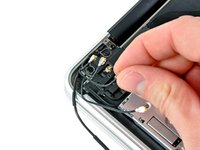
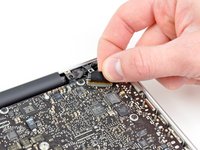
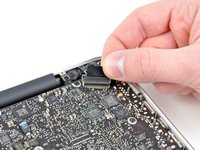
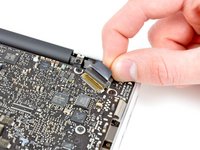
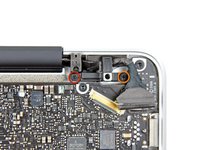
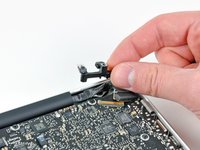
スパッジャーの平面側先端を使って、AirPort/Bluetoothリボンケーブルのコネクターをロジックボード上のソケットから上向きにして引き上げます。
-
-


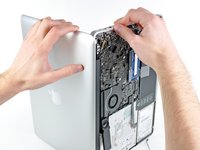
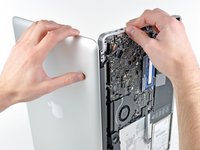
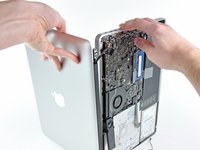
デバイスを再組み立てする際は、これらのインストラクションを逆の順番に従って作業を進めてください。
デバイスを再組み立てする際は、これらのインストラクションを逆の順番に従って作業を進めてください。
84 の人々がこのガイドを完成させました。
以下の翻訳者の皆さんにお礼を申し上げます:
100%

Midori Doiさんは世界中で修理する私たちを助けてくれています! あなたも貢献してみませんか?
翻訳を始める ›

8 件のコメント
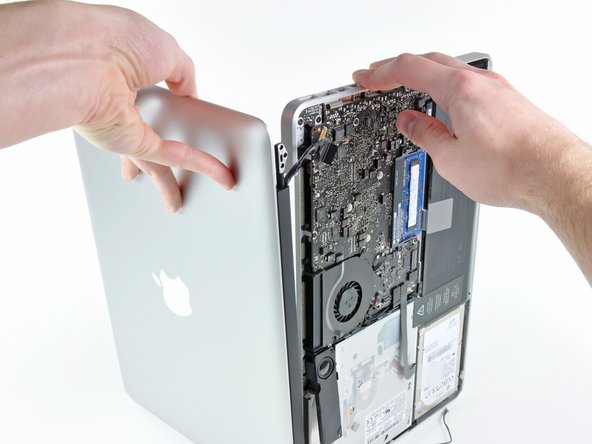
Step 18 and 19 is easier if you place the bottom keyboard down, with the display hanging over the edge of a table. This stabilizes the bottom assembly, making teardown and reassembly easier for one person
Fantastic tip - I placed it in front of me so the display rested on my thighs while the base was flat on the table - very safe, no fear of dropping/slipping.
Annette -
Thank you Phillip for providing this Guide. I used it to replace a bad LCD assembly after a water spill damaged it. The last Step 20 is very difficult. I had the worst time trying to separate the two parts after I removed the final Torex screw. It took a while, trying different angles, but I finally got it. Putting in the new one was a trivial exercise...
Phillip, thank you so much for this excellent guide. I have no technical background at all but I found it very easy to use - and it saved me hundreds of dollars on a professional repair job. Keep up the good work!
Thank you so much for going to the effort to explain the steps. It worked out perfect. I work as a Lean Engineer developing Standard Work, which is exactly what you have done. I couldnt have done it any better. Thank you if you ever come to Ireland I owe you a pint :)
Noel Kelly - 返信