はじめに
Follow this guide to replace a dead or worn-out battery in a MacBook Neo.
For your safety, discharge the battery below 25% before disassembly. This reduces the risk of a dangerous fire if the battery is accidentally damaged during the repair. If your battery is swollen, take appropriate precautions.
必要な工具と部品
-
-
Fully shut down the MacBook and close the lid. Keep the lid closed until you've physically disconnected the battery.
-
Disconnect any cables and accessories.
-
Flip the computer upside‑down on a clean work surface.
-
-
-
Use a P5 pentalobe driver to remove the eight screws securing the bottom cover:
-
Six 4.1 mm‑long screws
-
Two 4.5 mm‑long screws
-
-
-
Use your fingers to lift the top right corner of the bottom cover, near the USB‑C ports, until the clip along the right edge releases.
-
Repeat this process on the left side to release its clip.
-
-
-
Use a Torx Plus 3IP driver to remove the two 1.7 mm‑long screws securing the battery connector cover.
-
-
-
-
Use the flat end of a spudger to pry up and disconnect the battery press connector.
-
-
-
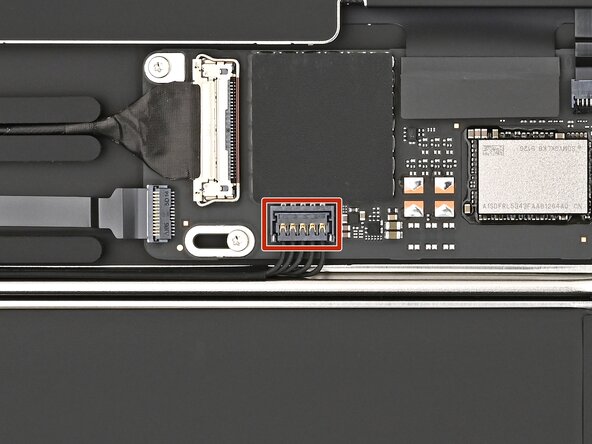
Insert the point of a spudger beneath the headphone jack connector, located on the right side of the logic board directly above the battery, and pry it straight up to disconnect it.
-
Repeat to disconnect the left speaker connector, adjacent to the headphone jack connector.
-
-
-
Disconnect the right speaker connector, located on the opposite end of the logic board.
-
-
-
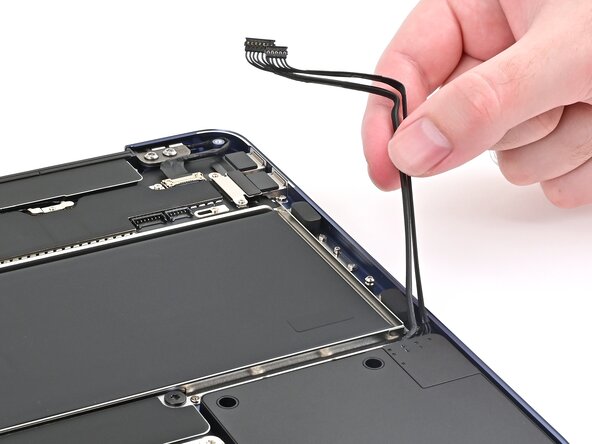
Gently lift the right speaker cable out of its channel around the battery.
-
-
-
Gently peel up the headphone jack cable and lift it out of its channel around the battery.
-
-
-
Use a Torx Plus 5IP driver to remove the eighteen 2.8 mm‑long screws securing the battery.
-
Don't remove the two 3IP screws marked in yellow.
-
-
-
Insert the flat end of a spudger beneath the battery's left edge and lift it until you can grab it with your fingers.
-


Compare the new replacement part to the original part—you may need to remove plastic liners from the new part before you install it.
To reassemble the MacBook, follow these instructions in reverse order.
Calibrate your newly installed battery after completing this guide.
Take your e-waste to an R2 or e-Stewards certified recycler.
Repair didn’t go as planned? Try some basic troubleshooting, or ask our Answers community for help.
ある他の人がこのガイドを完成しました。
