メインコンテンツにスキップ

Lenovo Thinkpad E585 Hard Drive Replacement

必要な工具と部品

  1. Lenovo Thinkpad E585 Hard Drive Replacement, Hard Drive: 手順 1、 1の画像 1
    • Remove the marked Screws.

    • Pry the backside of and put it aside.

  2. Lenovo Thinkpad E585 Hard Drive Replacement: 手順 2、 2の画像 1 Lenovo Thinkpad E585 Hard Drive Replacement: 手順 2、 2の画像 2
    • Pull gently on the marked pull tab. If it doesn't come out, pull harder.

    • After you pulled the Hard Drive Dummy out, remove the Connector.

  3. Lenovo Thinkpad E585 Hard Drive Replacement: 手順 3、 2の画像 1 Lenovo Thinkpad E585 Hard Drive Replacement: 手順 3、 2の画像 2
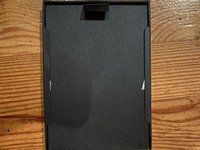
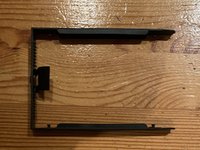
    • After the second step, you should have the dummy with the mounting hardware removed from the laptop.

    • Gently pull on the side until it comes off.

  4. Lenovo Thinkpad E585 Hard Drive Replacement: 手順 4、 1の画像 1
    • Put your hard drive in the middle of the mounting hardware and align the sides with the holes on the hard drive. Make sure the pull tab is on the upside.

    • Push on it.

  5. Lenovo Thinkpad E585 Hard Drive Replacement: 手順 5、 1の画像 1
    • Connect the connector.

    • Push on the ribbon cable to glue it to the underside.

  6. Lenovo Thinkpad E585 Hard Drive Replacement: 手順 6、 1の画像 1
    • Finally, align the hard drive and push on the marked end.

終わりに

To reassemble your device, follow these instructions in reverse order.

ある他の人がこのガイドを完成しました。

作成者

2人の作成者と共同で作成されました。

Karl-Frederik Schlüter

メンバー登録日: 12/24/20

290 ポイント

1ガイドが承認済み

0 件のコメント

コメントを追加

統計データ:

過去 24時間: 1

過去 7 日: 4

過去 30 日: 23

今までの合計 1,008