メインコンテンツにスキップ
LG K7 T-Mobile Rear Phone  Camera Replacement

LG K7 T-Mobile Rear Phone Camera Replacement

Salem Jean

Salem Jean とその他 人の作成者

最終更新日: December 11, 2021

20分
中レベル

Remove the battery before removing the back controls to avoid electric shock. Do not lose any screws or the middle button of the back controls.

必要な工具と部品

パーツ

ツール

  • Phillips #00 Screwdriver
    Phillips #00 Screwdriver
  • iFixit Opening Tool
    iFixit Opening Tool
  • Spudger
    Spudger

もっと見る

  1. LG K7 T-Mobile Rear Phone  Camera Replacement, Battery: 手順 1、 2の画像 1 LG K7 T-Mobile Rear Phone  Camera Replacement, Battery: 手順 1、 2の画像 2
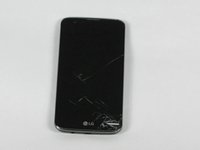
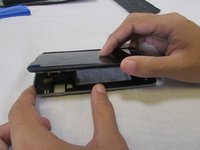
    • Flip the LG K7 over so that the back of the phone is facing up.

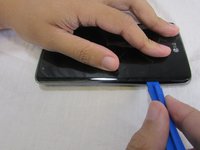
    • Locate the small notch on the bottom left side of the phone.

  2. LG K7 T-Mobile Rear Phone  Camera Replacement: 手順 2、 1の画像 1
    • Insert a plastic opening tool into the notch and lift the back cover upward while holding the bottom portion of the phone down to remove it.

  3. LG K7 T-Mobile Rear Phone  Camera Replacement: 手順 3、 1の画像 1
    • Remove the battery.

  4. LG K7 T-Mobile Rear Phone  Camera Replacement, Rear Phone  Camera: 手順 4、 2の画像 1 LG K7 T-Mobile Rear Phone  Camera Replacement, Rear Phone  Camera: 手順 4、 2の画像 2
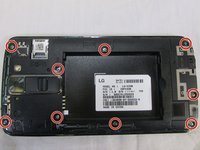
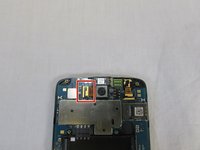
    • Located to nine 3.4 mm screws that keep that keep the phones rear housing in tacked.

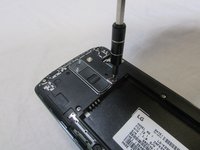
    • Using a Phillips 00 screwdriver remove all nine 3.4 mm screws.

  5. LG K7 T-Mobile Rear Phone  Camera Replacement: 手順 5、 3の画像 1 LG K7 T-Mobile Rear Phone  Camera Replacement: 手順 5、 3の画像 2 LG K7 T-Mobile Rear Phone  Camera Replacement: 手順 5、 3の画像 3
    • Turn the phone over so the screen is facing up

    • Insert your plastic opening tool between the midframe and front panel assembly on the side of the phone.

    • Slide the plastic opening tool down the seams carefully to separate the screen from the rest of the phone housing.

  6. LG K7 T-Mobile Rear Phone  Camera Replacement: 手順 6、 3の画像 1 LG K7 T-Mobile Rear Phone  Camera Replacement: 手順 6、 3の画像 2 LG K7 T-Mobile Rear Phone  Camera Replacement: 手順 6、 3の画像 3
    • Locate the ribbon cable that holds the camera's ribbon cable in place.

    • Carefully remove the camera's ribbon cable from the motherboard using the plastic removal tool.

    • Holding the camera ribbon you just released pull upwards and the camera should release from the case.

終わりに

To reassemble your device, follow these instructions in reverse order.

ある他の人がこのガイドを完成しました。

作成者

1人の作成者と共同作成されました。

Salem Jean

メンバー登録日: 09/28/17

216 ポイント

1ガイドが承認済み

チーム

USF Tampa, Team S2-G5, Nance Fall 2017 USF Tampa, Team S2-G5, Nance Fall 2017人のメンバー

USFT-NANCE-F17S2G5

3 メンバー

8のガイドは作成済み

0 件のコメント

コメントを追加

統計データ:

過去 24時間: 0

過去 7 日: 2

過去 30 日: 2

今までの合計 576