メインコンテンツにスキップ

JBL Flip 5 Battery Replacement

必要な工具と部品

  1. JBL Flip 5 Battery Replacement, Pry up the fabric cover: 手順 1、 3の画像 1 JBL Flip 5 Battery Replacement, Pry up the fabric cover: 手順 1、 3の画像 2 JBL Flip 5 Battery Replacement, Pry up the fabric cover: 手順 1、 3の画像 3
    • Before starting repairs, turn off your device and unplug any cables.

    • The fabric cover of the JBL Flip 5 is secured by plastic clips.

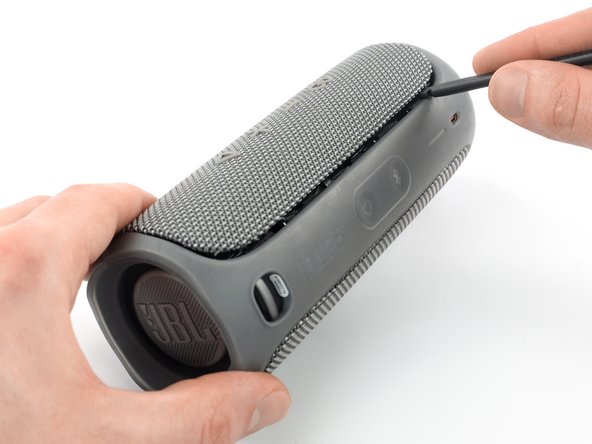
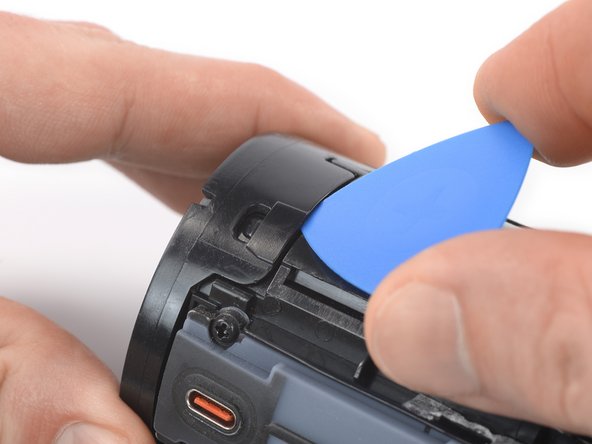
    • Insert the flat end of a spudger underneath a corner of the fabric cover.

    • Pry up to release the plastic clips securing the fabric cover.

  2. JBL Flip 5 Battery Replacement, Release the plastic clips: 手順 2、 3の画像 1 JBL Flip 5 Battery Replacement, Release the plastic clips: 手順 2、 3の画像 2 JBL Flip 5 Battery Replacement, Release the plastic clips: 手順 2、 3の画像 3
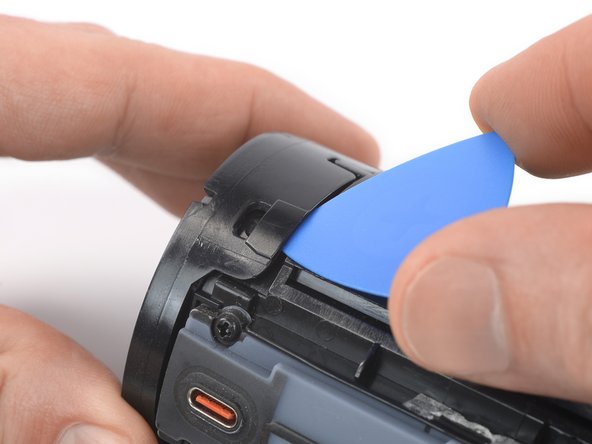
    • Slide the spudger along the edge of the fabric cover while prying up to continue to separate the plastic clips.

  3. JBL Flip 5 Battery Replacement, Loosen the fabric cover edge: 手順 3、 3の画像 1 JBL Flip 5 Battery Replacement, Loosen the fabric cover edge: 手順 3、 3の画像 2 JBL Flip 5 Battery Replacement, Loosen the fabric cover edge: 手順 3、 3の画像 3
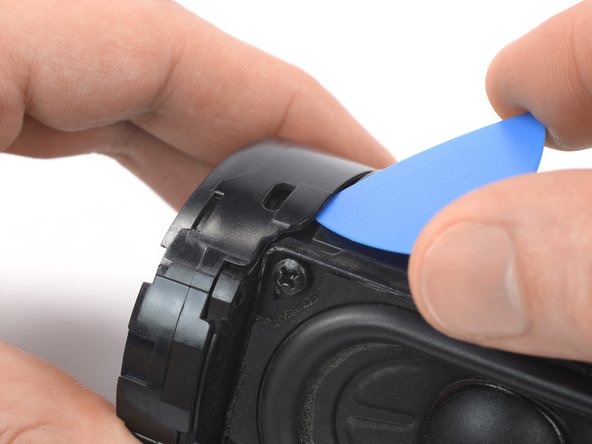
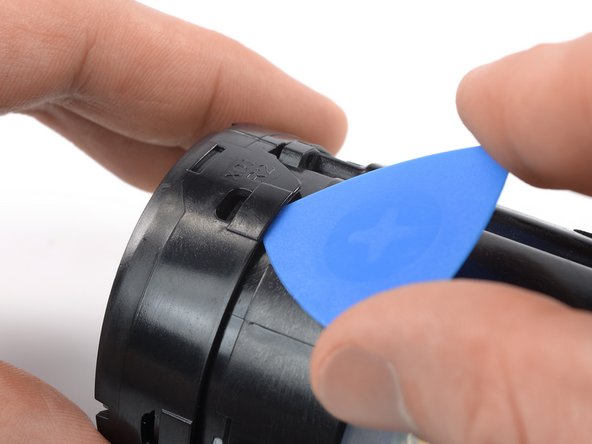
    • Release the remaining plastic clips to fully separate the fabric cover.

  4. JBL Flip 5 Battery Replacement, Release the plastic clips: 手順 4、 3の画像 1 JBL Flip 5 Battery Replacement, Release the plastic clips: 手順 4、 3の画像 2 JBL Flip 5 Battery Replacement, Release the plastic clips: 手順 4、 3の画像 3
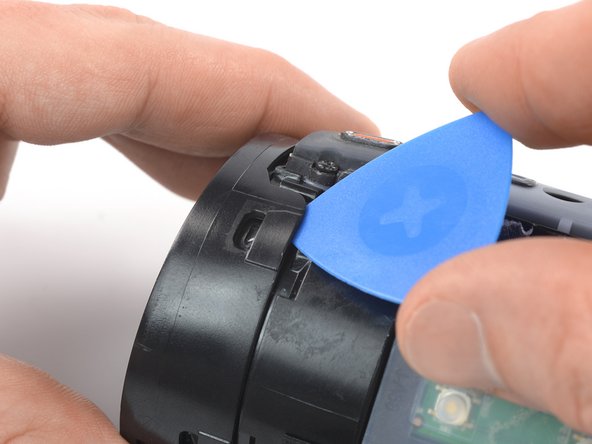
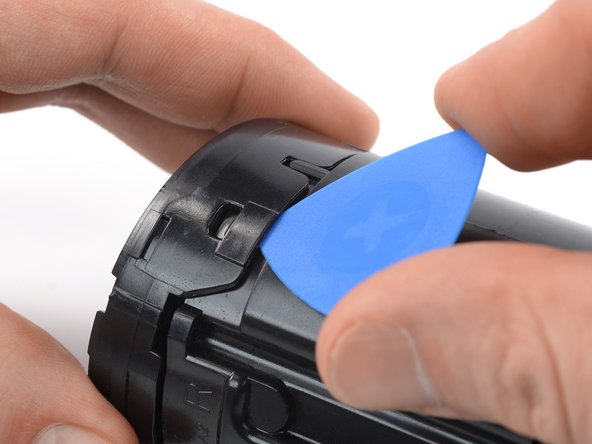
    • Repeat the previous steps to release the plastic clips and to fully separate the opposite edge of the fabric cover.

  5. JBL Flip 5 Battery Replacement, Remove the fabric cover: 手順 5、 3の画像 1 JBL Flip 5 Battery Replacement, Remove the fabric cover: 手順 5、 3の画像 2 JBL Flip 5 Battery Replacement, Remove the fabric cover: 手順 5、 3の画像 3
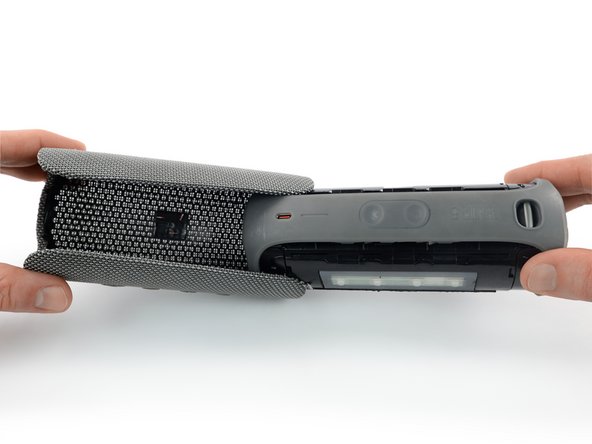
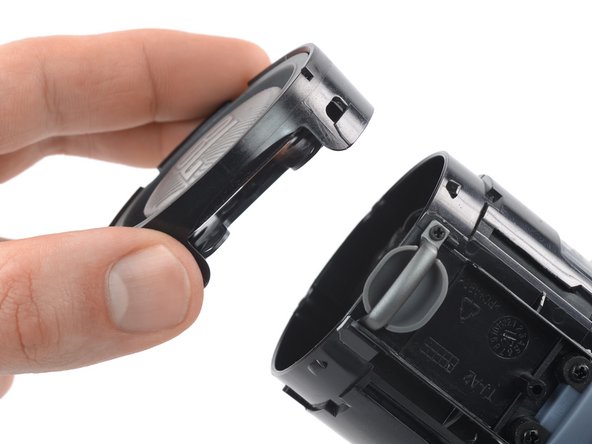
    • Use one hand to spread the edges of the fabric cover apart and your other hand to pull the speaker assembly away from the cover.

    • Remove the fabric cover.

    • During reassembly, this is a good point to power on your device and test your repair before reinstalling the fabric cover.

  6. JBL Flip 5 Battery Replacement, Unfasten the passive radiator bracket: 手順 6、 2の画像 1 JBL Flip 5 Battery Replacement, Unfasten the passive radiator bracket: 手順 6、 2の画像 2
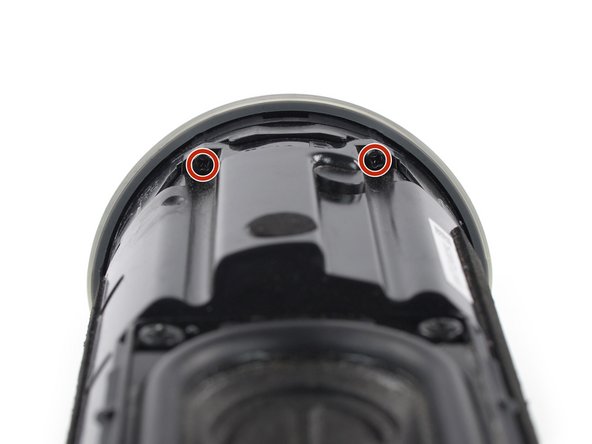
    • Use a Phillips screwdriver to remove the four 17 mm-long screws securing the passive radiator brackets.

  7. JBL Flip 5 Battery Replacement, Remove the passive radiator bracket: 手順 7、 3の画像 1 JBL Flip 5 Battery Replacement, Remove the passive radiator bracket: 手順 7、 3の画像 2 JBL Flip 5 Battery Replacement, Remove the passive radiator bracket: 手順 7、 3の画像 3
    • The passive radiator bracket is held in place by mild adhesive around its center. If you‘re having trouble removing it, you can prepare an iOpener and apply it to the bracket for one minute to soften the adhesive.

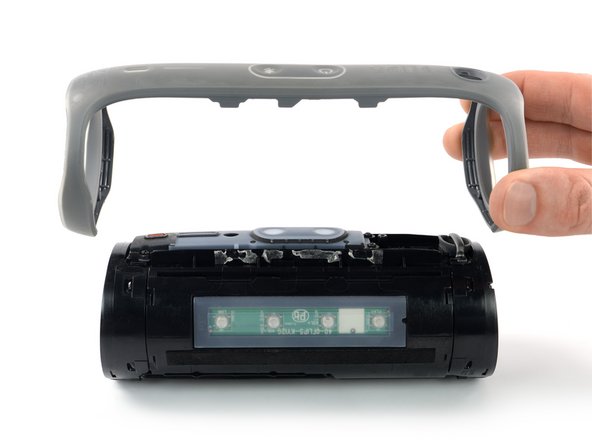
    • Peel the passive radiator bracket off of the speaker assembly and remove it.

  8. JBL Flip 5 Battery Replacement, Unclip the left passive radiator: 手順 8、 3の画像 1 JBL Flip 5 Battery Replacement, Unclip the left passive radiator: 手順 8、 3の画像 2 JBL Flip 5 Battery Replacement, Unclip the left passive radiator: 手順 8、 3の画像 3
    • The passive radiators are secured by plastic clips.

    • Insert an opening pick into the cutout next to the left passive radiator housing.

    • Push the opening pick underneath the passive radiator housing.

    • Pry upwards to release the plastic clip securing the passive radiator.

  9. JBL Flip 5 Battery Replacement: 手順 9、 3の画像 1 JBL Flip 5 Battery Replacement: 手順 9、 3の画像 2 JBL Flip 5 Battery Replacement: 手順 9、 3の画像 3
    • Repeat the prying procedure for the three remaining plastic clips securing the left passive radiator.

  10. JBL Flip 5 Battery Replacement, Remove the left passive radiator: 手順 10、 2の画像 1 JBL Flip 5 Battery Replacement, Remove the left passive radiator: 手順 10、 2の画像 2
    • Remove the left passive radiator.

  11. JBL Flip 5 Battery Replacement, Unclip the right passive radiator: 手順 11、 3の画像 1 JBL Flip 5 Battery Replacement, Unclip the right passive radiator: 手順 11、 3の画像 2 JBL Flip 5 Battery Replacement, Unclip the right passive radiator: 手順 11、 3の画像 3
    • Repeat the prying procedure for the four plastic clips securing the right passive radiator.

  12. JBL Flip 5 Battery Replacement, Remove the right passive radiator: 手順 12、 2の画像 1 JBL Flip 5 Battery Replacement, Remove the right passive radiator: 手順 12、 2の画像 2
    • Remove the right passive radiator.

  13. JBL Flip 5 Battery Replacement, Unfasten the woofer: 手順 13、 1の画像 1
    • Use a Phillips screwdriver to remove the four 9.6 mm-long screws securing the woofer.

  14. JBL Flip 5 Battery Replacement, Move the woofer: 手順 14、 3の画像 1 JBL Flip 5 Battery Replacement, Move the woofer: 手順 14、 3の画像 2 JBL Flip 5 Battery Replacement, Move the woofer: 手順 14、 3の画像 3
    • Don't try to remove the woofer all the way yet, as it‘s still connected to the motherboard.

    • The woofer cables are long enough allowing you to place the woofer outside the speaker assembly, but avoid straining or sharply folding the cables when you lift the woofer out of its recess.

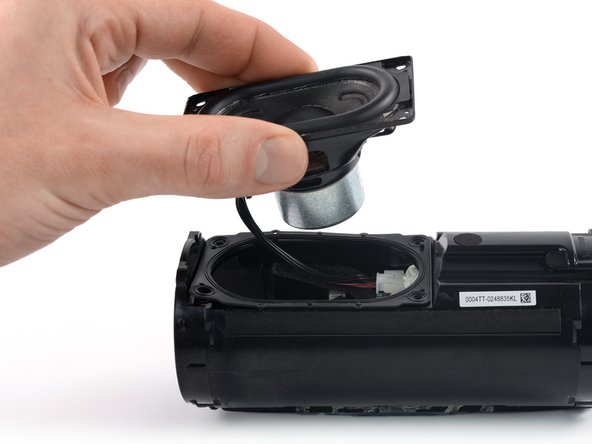
    • Lift the woofer out of its recess and place it next to the speaker assembly.

  15. JBL Flip 5 Battery Replacement, Disconnect the woofer: 手順 15、 2の画像 1 JBL Flip 5 Battery Replacement, Disconnect the woofer: 手順 15、 2の画像 2
    • Use the tip of a spudger to push the woofer JST connector straight out of its socket to disconnect it.

  16. JBL Flip 5 Battery Replacement, Remove the woofer: 手順 16、 1の画像 1
    • Remove the woofer.

  17. JBL Flip 5 Battery Replacement, Unlatch the power button cable ZIF connector: 手順 17、 2の画像 1 JBL Flip 5 Battery Replacement, Unlatch the power button cable ZIF connector: 手順 17、 2の画像 2
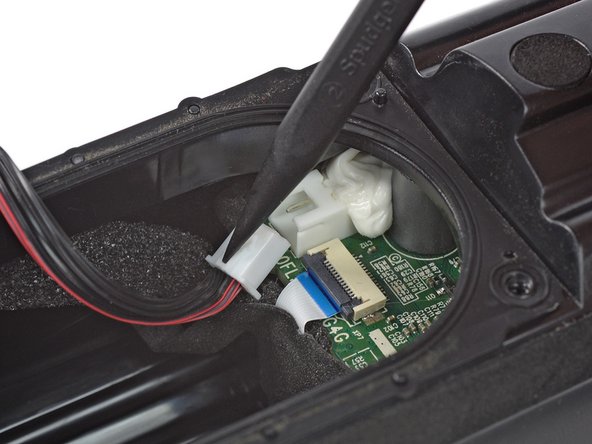
    • Use the tip of a spudger or your fingernail to flip up the small, hinged locking flap on the power button cable's ZIF connector.

  18. JBL Flip 5 Battery Replacement, Disconnect the power button cable: 手順 18、 2の画像 1 JBL Flip 5 Battery Replacement, Disconnect the power button cable: 手順 18、 2の画像 2
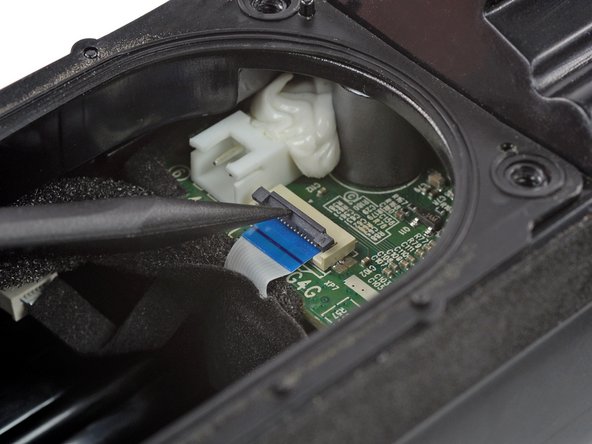
    • Use a pair of blunt nose tweezers to pull the power button cable straight out of the ZIF connector.

  19. JBL Flip 5 Battery Replacement, Disconnect the volume button cable: 手順 19、 2の画像 1 JBL Flip 5 Battery Replacement, Disconnect the volume button cable: 手順 19、 2の画像 2
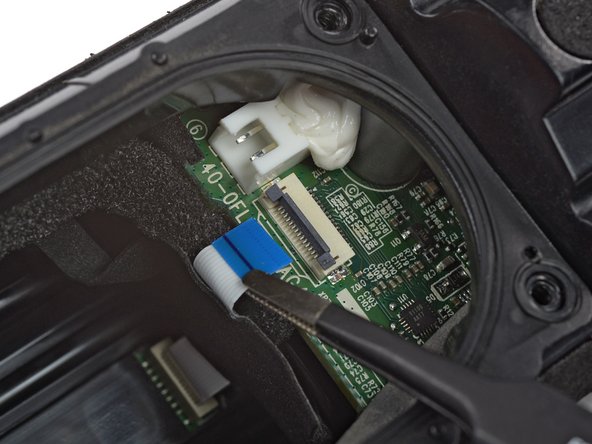
    • Use a pair of blunt nose tweezers to pull the volume button cable straight out of its connector to disconnect it.

  20. JBL Flip 5 Battery Replacement, Disconnect the charging cable: 手順 20、 2の画像 1 JBL Flip 5 Battery Replacement, Disconnect the charging cable: 手順 20、 2の画像 2
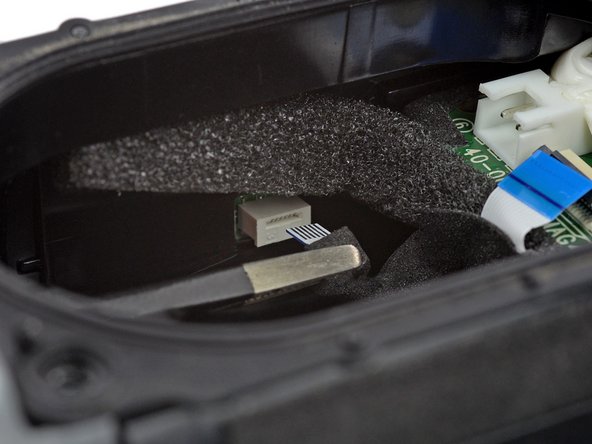
    • Use a spudger to push the charging cable connector straight out of its socket and disconnect it.

  21. JBL Flip 5 Battery Replacement, Detach the power button cable: 手順 21、 2の画像 1 JBL Flip 5 Battery Replacement, Detach the power button cable: 手順 21、 2の画像 2
    • The power button cable is lightly adhered to the motherboard with tape.

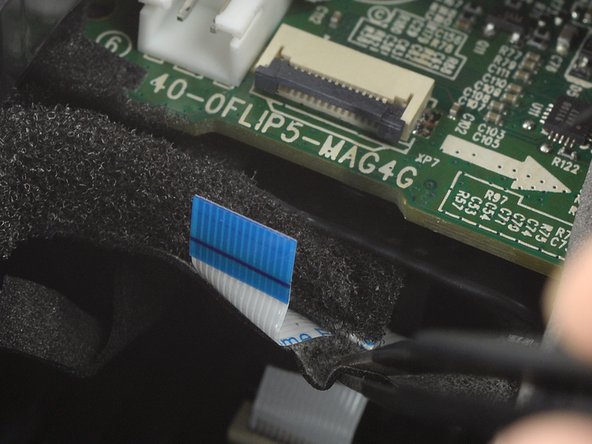
    • Use a pair of blunt nose tweezers to peel the fabric tape securing the power button cable off the motherboard‘s edge.

  22. JBL Flip 5 Battery Replacement, Move the motherboard: 手順 22、 2の画像 1 JBL Flip 5 Battery Replacement, Move the motherboard: 手順 22、 2の画像 2
    • The antenna cable is still connected to the motherboard, and the volume button cable is adhered to the speaker housing. Avoid straining or tearing them in the following step.

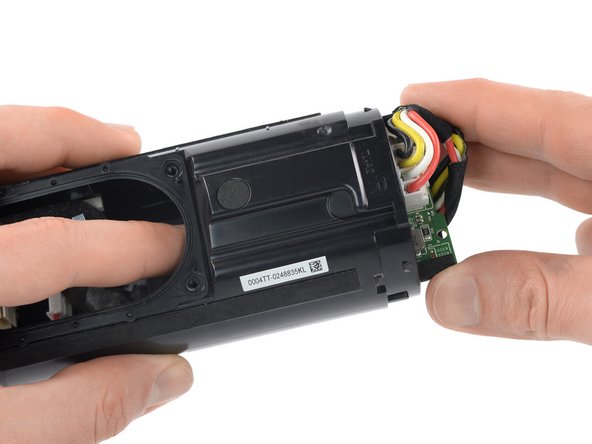
    • Push the motherboard out of the speaker assembly until you get free access to the battery connector.

  23. JBL Flip 5 Battery Replacement, Disconnect the battery: 手順 23、 3の画像 1 JBL Flip 5 Battery Replacement, Disconnect the battery: 手順 23、 3の画像 2 JBL Flip 5 Battery Replacement, Disconnect the battery: 手順 23、 3の画像 3
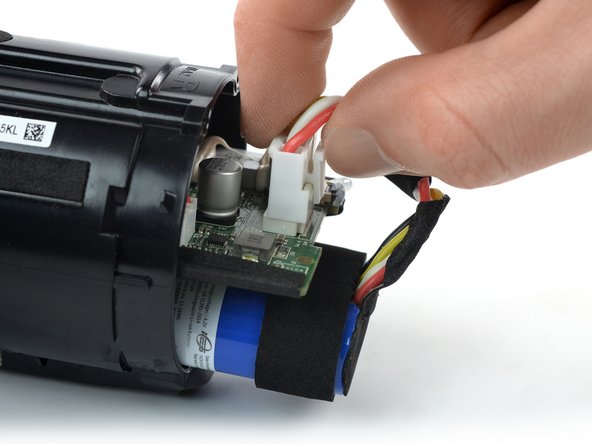
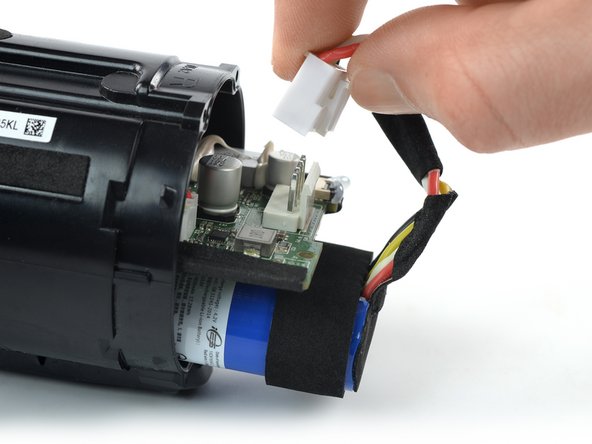
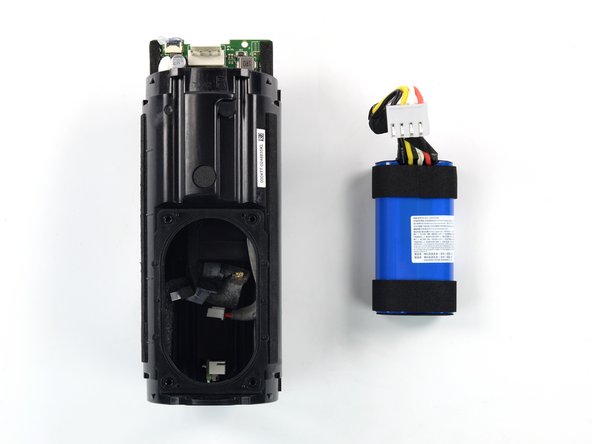
    • Squeeze the tab against the power cable connector, and pull the connector straight up from its socket to disconnect the battery.

  24. JBL Flip 5 Battery Replacement, Remove the battery: 手順 24、 3の画像 1 JBL Flip 5 Battery Replacement, Remove the battery: 手順 24、 3の画像 2 JBL Flip 5 Battery Replacement, Remove the battery: 手順 24、 3の画像 3
    • Pull the battery out of the speaker assembly and remove it.

終わりに

If possible, power on your device and test your repair before reassembly. For optimal performance, calibrate your newly installed battery after completing this guide.

To reassemble your device, follow these instructions in reverse order.

Take your e-waste to an R2 or e-Stewards certified recycler.

Repair didn’t go as planned? Try some basic troubleshooting, or ask our Answers community for help.

5 の人々がこのガイドを完成させました。

作成者

1人の作成者と共同作成されました。

Dominik Schnabelrauch

メンバー登録日: 11/23/16

203,632 ポイント

682のガイドは作成済み

チーム

iFixit iFixit人のメンバー

Staff

135 メンバー

17,157のガイドは作成済み

コメント 1 件

Excellent instructions! Nice clean photos. I had no problem at all getting the new battery put in. Well done!

Timmy Langdon - 返信

コメントを追加

統計データ:

過去 24時間: 10

過去 7 日: 125

過去 30 日: 619

今までの合計 5,879