
DualShock 4 CHU-ZCT2U アウターシェルの交換
はじめに
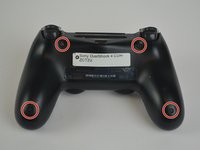
手順 1 に進むこのガイドは、DualShock 4のアウターシェルを取り外すための交換ガイドです。


デバイスを再組み立てする際は、これらの手順を逆の順番に従って作業を進めてください。
デバイスを再組み立てする際は、これらの手順を逆の順番に従って作業を進めてください。
7 の人々がこのガイドを完成させました。
以下の翻訳者の皆さんにお礼を申し上げます:
100%

これらの翻訳者の方々は世界を修理する私たちのサポートをしてくれています。 あなたも貢献してみませんか?
翻訳を始める ›
チーム

USF Tampa, Team S1-G5, Leahy Fall 2017 USF Tampa, Team S1-G5, Leahy Fall 2017人のメンバー
USFT-LEAHY-F17S1G5
3 メンバー
28のガイドは作成済み
コメント 1 件
FYI for anyone looking: re-shelling a v1 controller with v2 innards is possible but incredibly time consuming. My 20th anniversary controller died (v3 circuit board) so I transplanted all parts from a PS-Pro controller. It requires lots of cutting and trimming of the shell to match the inner profile of the newer shell to enable it to close up cleanly. There are no cuts or modifications needed to the V2 controller components however, but the new style light bar need migrating across.