
Dell XPS 15 9570 SSD Replacement
はじめに
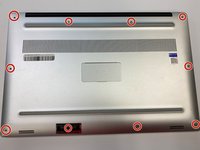
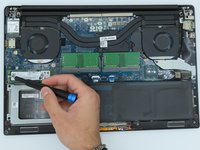
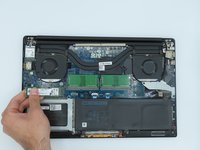
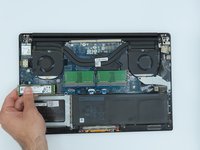
手順 1 に進むUse this guide to remove the SSD card in your Dell XPS 15 9570. An SSD, or solid state drive, is a type of computer storage device that uses electronic circuits to store and retrieve data. Unlike traditional hard disk drives (HDDs), SSDs have no moving parts, which makes them faster, quieter, more durable, and more energy-efficient. When an SSD stops working it may be impossible to store data into it. Before replacing an SSD, it's important to back up any important data that is stored on the drive. This is because replacing an SSD typically involves removing the old drive and installing a new one, which can result in the loss of any data stored on the old drive. Before continuing, ensure that your laptop is totally powered off and disconnected from any external power source.
必要な工具と部品
修理キット
キットには、この修理ガイドを完了するために必要な全ての部品とツールが含まれています。


パーツ


ツール


もっと見る


To reassemble your device, follow these instructions in reverse order.
To reassemble your device, follow these instructions in reverse order.
チーム

University of Kentucky, Team 1-1, Kaufmann Spring 2023 University of Kentucky, Team 1-1, Kaufmann Spring 2023人のメンバー
UKY-KAUFMANN-S23S1G1
2 メンバー
4のガイドは作成済み