
Dell Precision M4400 Hard Drive Replacement
7 - 15 分
簡単
コミュニティメンバーによる寄稿ガイド
必要な工具と部品

-
-
Slide the battery release latches to the open position. (The latches lock into place).
-
Grip the battery and slide it out of the battery bay.
-
-
-
-
Loosen the M2.5 x 5-mm captive screw.
-
Using the rubber feet for leverage, slide the bottom of the base assembly toward the front of the computer 1/8th inch, then lift to remove it.
-
-
-
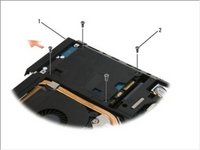
Remove the four M3 x 3-mm screws securing the hard drive. These screws are on the bottom of the base cover.
-
Slide the hard drive out of the computer.
-
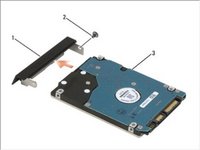
Remove the face plate screw and then the face plate from the hard drive.
-


もう少しです!
To reassemble your device, follow these instructions in reverse order.
終わりに
To reassemble your device, follow these instructions in reverse order.
チーム
