
Dell Latitude EG6510 Fan Replacement
5 - 10 分
中レベル
進行中
はじめに
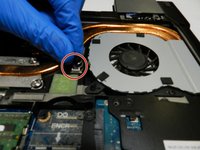
手順 1 に進むIf the laptop tends to overheat, this could be a result of the fan not functioning properly. The following is a step-by-step guide to remove and replace the fan in the Dell Latitude E6510.


もう少しです!
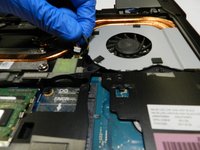
To reassemble your device, follow these instructions in reverse order.
終わりに
To reassemble your device, follow these instructions in reverse order.
ある他の人がこのガイドを完成しました。
チーム

The Citadel Military College of South Carolina, Team S2-G1, Eggleston Spring 2019 The Citadel Military College of South Carolina, Team S2-G1, Eggleston Spring 2019人のメンバー
CMCSC-EGGLESTON-S19S2G1
3 メンバー
3のガイドは作成済み