メインコンテンツにスキップ
Dell Latitude E7440 CMOS Battery Replacement

Dell Latitude E7440 CMOS Battery Replacement

Akash Kedia

Akash Kedia とその他 人の作成者

最終更新日: March 6, 2019

10分
簡単

If your laptop refuses to boot into the operating system following a BIOS update, your hard drive is reported as not found, or the time on your computer’s clock is always wrong after booting up, the battery powering the CMOS may be defective or out of charge. Thankfully, Dell has made replacing this battery on the Latitude E7440 easy. This guide will outline how to remove this battery for replacement.

必要な工具と部品

ツール

  • Phillips #0 Screwdriver
    Phillips #0 Screwdriver
  • Spudger
    Spudger
  1. Dell Latitude E7440 CMOS Battery Replacement, Prepare the laptop: 手順 1、 1の画像 1
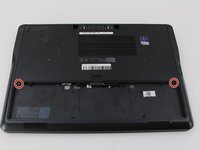
    • Power off your laptop before starting.

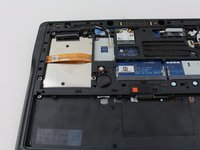
    • Flip the device over so that the vents on the bottom are facing away from you.

  2. Dell Latitude E7440 CMOS Battery Replacement, Release the battery: 手順 2、 3の画像 1 Dell Latitude E7440 CMOS Battery Replacement, Release the battery: 手順 2、 3の画像 2 Dell Latitude E7440 CMOS Battery Replacement, Release the battery: 手順 2、 3の画像 3
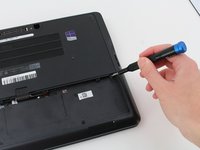
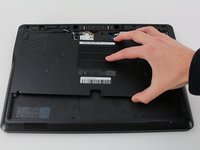
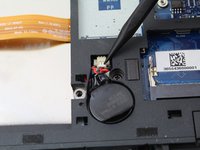
    • Place your finger on the latch located in the center of the laptop.

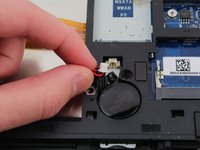
    • Slide the latch to the right, applying enough force to reveal a red indicator.

    • You will hear a soft click when the latch has been disengaged.

  3. Dell Latitude E7440 CMOS Battery Replacement, Remove the battery: 手順 3、 1の画像 1
    • Lift the battery by the top, away from the laptop body.

  4. Dell Latitude E7440 CMOS Battery Replacement, CMOS Battery: 手順 4、 2の画像 1 Dell Latitude E7440 CMOS Battery Replacement, CMOS Battery: 手順 4、 2の画像 2
    • Remove two M2 x 3mm Phillips #0 screws from the base cover.

  5. Dell Latitude E7440 CMOS Battery Replacement: 手順 5、 2の画像 1 Dell Latitude E7440 CMOS Battery Replacement: 手順 5、 2の画像 2
    • Slide the base cover down slightly and remove it.

  6. Dell Latitude E7440 CMOS Battery Replacement: 手順 6、 3の画像 1 Dell Latitude E7440 CMOS Battery Replacement: 手順 6、 3の画像 2 Dell Latitude E7440 CMOS Battery Replacement: 手順 6、 3の画像 3
    • Position your nylon spudger on the edge of the white connector, in between the connector and the port.

    • Pull back on the connector until the plastic head disconnects from the port on the laptop body.

    • If the connector is stuck, move the broader end of the spudger back and forth across the connector to slowly loosen the connection.

  7. Dell Latitude E7440 CMOS Battery Replacement: 手順 7、 1の画像 1
    • Separate the wrapped battery stack from the body by pulling up the wire.

    • You may need to use the flat end of the nylon spudger to separate the battery.

    • The stack is attached using glue, so you might hear a pop when removing it.

    • Reapplying an adhesive to the bottom of the battery is recommended, although not necessary, to keep it in place.

終わりに

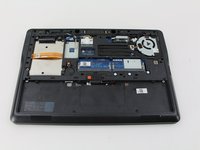
To reassemble your device, follow these instructions in reverse order.

6 の人々がこのガイドを完成させました。

作成者

1人の作成者と共同作成されました。

Akash Kedia

メンバー登録日: 01/24/19

1,445 ポイント

5のガイドは作成済み

チーム

Cal Poly, Team S2-G5, White Winter 2019 Cal Poly, Team S2-G5, White Winter 2019人のメンバー

CPSU-WHITE-W19S2G5

4 メンバー

5のガイドは作成済み

2 件のコメント

You list no part number for the replacement battery. Do we know the part number? I looked on Dell's website and find nothing. Otherwise, nice write-up!

jess13j - 返信

@jess13j, battery is a CR2032 coin cell.

senzog - 返信

コメントを追加

統計データ:

過去 24時間: 2

過去 7 日: 22

過去 30 日: 97

今までの合計 14,218