
Dell Latitude E6510 Fan Replacement

3分
中レベル
はじめに
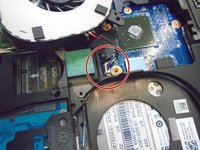
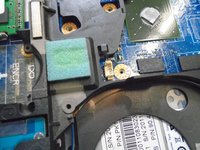
手順 1 に進むThe cooling fan may need to be replaced if the laptop is over heating. Sometimes the fan just may need to be clean, so be sure to clean the cooling fan before buying a new one.


もう少しです!
To reassemble your device, follow these instructions in reverse order.
終わりに
To reassemble your device, follow these instructions in reverse order.
2 の人々がこのガイドを完成させました。

チーム

The Citadel Military College of South Carolina, Team S2-G6, Eggleston Spring 2019 The Citadel Military College of South Carolina, Team S2-G6, Eggleston Spring 2019人のメンバー
CMCSC-EGGLESTON-S19S2G6
3 メンバー
1のガイドは作成済み