メインコンテンツにスキップ

Dell Latitude E4200 RAM Replacement

必要な工具と部品

  1. Dell Latitude E4200 RAM Replacement, Back Panel: 手順 1、 1の画像 1
    • Use PH0 screwdriver to unscrew the 4.49x7.88 mm screw in the middle of the back panel.

  2. Dell Latitude E4200 RAM Replacement: 手順 2、 3の画像 1 Dell Latitude E4200 RAM Replacement: 手順 2、 3の画像 2 Dell Latitude E4200 RAM Replacement: 手順 2、 3の画像 3
    • Place thumbs flat on the front side of the back panel (the side to open the laptop).

    • Push panel upwards sliding it out of the locked position.

    • Lift panel out of socket.

  3. Dell Latitude E4200 RAM Replacement: 手順 3、 1の画像 1
    • Remove panel and screw from the device. This opens up the main board of the device.

  4. Dell Latitude E4200 RAM Replacement, Remove the back panel: 手順 4、 1の画像 1
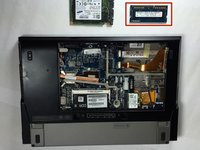
    • Once you removed the back panel, the RAM will easily be located.

    • Be sure to remove the battery first

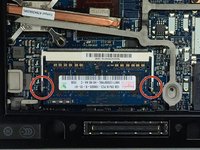
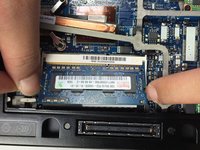
  5. Dell Latitude E4200 RAM Replacement, Take out the RAM: 手順 5、 2の画像 1 Dell Latitude E4200 RAM Replacement, Take out the RAM: 手順 5、 2の画像 2
    • Place your thumbs on each side of the RAM tabs.

    • Gently push outward on the tabs to release the RAM. This will allow you to remove the RAM completely from your device.

    • The RAM should "bump up" after you push away the tabs.

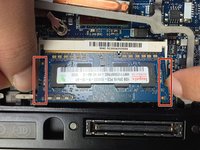
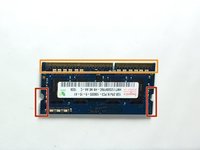
  6. Dell Latitude E4200 RAM Replacement: 手順 6、 3の画像 1 Dell Latitude E4200 RAM Replacement: 手順 6、 3の画像 2 Dell Latitude E4200 RAM Replacement: 手順 6、 3の画像 3
    • Gently grab each side of the RAM and remove it from the device.

    • Please do not touch connection side of the RAM (shown in orange) with fingers. It might causes possible corrosion to the connection.

終わりに

To reassemble your device, follow these instructions in reverse order.

ある他の人がこのガイドを完成しました。

作成者

3人の作成者と共同で作成されました。

Chao Wei

メンバー登録日: 03/22/15

128 ポイント

1ガイドが承認済み

チーム

Baylor, Team 5-6, Williams Spring 2015 Baylor, Team 5-6, Williams Spring 2015人のメンバー

BU-WILLIAMS-S15S5G6

4 メンバー

6のガイドは作成済み

0 件のコメント

コメントを追加

統計データ:

過去 24時間: 0

過去 7 日: 9

過去 30 日: 14

今までの合計 2,634