
Dell Inspiron Mini 10 Keyboard Replacement
5分
簡単
はじめに
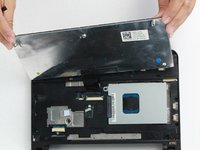
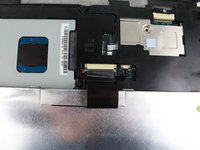
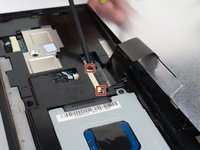
手順 1 に進むThis guide will take you through how to remove the keyboard for cleaning or replacing.
必要な工具と部品


もう少しです!
To reassemble your device, follow these instructions in reverse order.
終わりに
To reassemble your device, follow these instructions in reverse order.
チーム

UW Tacoma, Team 1-4, Rose Fall 2016 UW Tacoma, Team 1-4, Rose Fall 2016人のメンバー
UWT-ROSE-F16S1G4
4 メンバー
10のガイドは作成済み