メインコンテンツにスキップ
Dell Inspiron 17" 7786 2-in-1 Memory Modules (RAM) Replacement

Dell Inspiron 17" 7786 2-in-1 Memory Modules (RAM) Replacement

Delia Padilla

Delia Padilla とその他 2 人の作成者

最終更新日: December 28, 2022

2分
簡単

This is the manual for Dell Inspiron 17" 7786 2-in-1 RAM replacement.

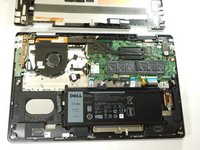
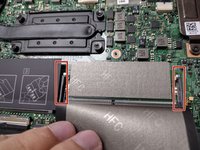
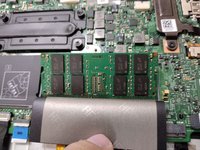
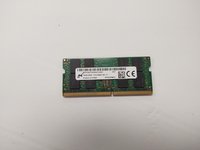
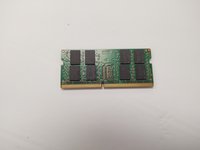
The memory modules, or the RAM, are a way for your computer to store temporary data.

Signs of a faulty RAM are gradual deterioration of computer performance.
You can use the Windows Memory Diagnostic tool to see if you can figure out if there are memory problems.

Some signs of faulty RAM include:

  • The computer is restarting or freezes when you are in the middle of something. You can see a blue screen with a white text showing briefly before the PC restarts.
  • Files you access frequently are now corrupted out of nowhere.
  • You also cannot install a new program for an unknown reason.
  • Your PC may produce multiple beeps or a continuous beep when you turn it on.
  • The memory modules may have had a power surge damage, electrostatic discharge damage or even excessive heat damage to the RAM.
  • If you recently replaced the RAM, it's most likely faulty. It is possible it was part of a bad batch from the beginning so the best option is to replace it. Try removing them and placing them in different slots if diagnostics doesn't show any problems.

A power strip and a surge protector are not the same thing!

必要な工具と部品

ツール

  1. Dell Inspiron 17" 7786 2-in-1 Memory Modules (RAM) Replacement, Base Cover: 手順 1、 2の画像 1 Dell Inspiron 17" 7786 2-in-1 Memory Modules (RAM) Replacement, Base Cover: 手順 1、 2の画像 2
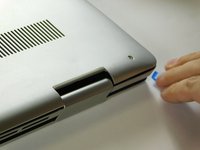
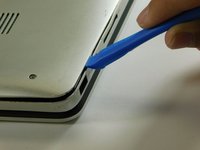
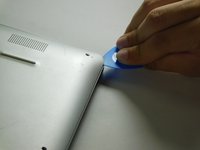
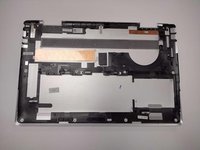
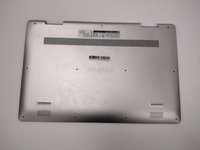
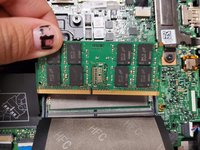
    • Remove the eight M2 5mm screws that secure the base cover using a Phillips #0 screwdriver.

  2. Dell Inspiron 17" 7786 2-in-1 Memory Modules (RAM) Replacement: 手順 2、 2の画像 1 Dell Inspiron 17" 7786 2-in-1 Memory Modules (RAM) Replacement: 手順 2、 2の画像 2
    • Loosen the three captive screws that secure the base closer to the hinges.

    • Do not attempt to remove the three captive screws! You need only to loosen them. They're supposed to stay on the base cover.

  3. Dell Inspiron 17" 7786 2-in-1 Memory Modules (RAM) Replacement: 手順 3、 3の画像 1 Dell Inspiron 17" 7786 2-in-1 Memory Modules (RAM) Replacement: 手順 3、 3の画像 2 Dell Inspiron 17" 7786 2-in-1 Memory Modules (RAM) Replacement: 手順 3、 3の画像 3
    • Carefully pry the base cover using an iFixit opening tool in the crevice near the hinges. Guide the pick along the edges and slightly lift upwards as you go along.

    • Do not start from the speaker end of the edges when opening, or you may cause further damage to your device!

  4. Dell Inspiron 17" 7786 2-in-1 Memory Modules (RAM) Replacement: 手順 4、 3の画像 1 Dell Inspiron 17" 7786 2-in-1 Memory Modules (RAM) Replacement: 手順 4、 3の画像 2 Dell Inspiron 17" 7786 2-in-1 Memory Modules (RAM) Replacement: 手順 4、 3の画像 3
    • Carefully remove the base cover from the laptop.

  5. Dell Inspiron 17" 7786 2-in-1 Memory Modules (RAM) Replacement, Memory Modules (RAM): 手順 5、 1の画像 1
    • Lift the cover to gain access to the memory module.

  6. Dell Inspiron 17" 7786 2-in-1 Memory Modules (RAM) Replacement: 手順 6、 2の画像 1 Dell Inspiron 17" 7786 2-in-1 Memory Modules (RAM) Replacement: 手順 6、 2の画像 2
    • Carefully open the securing clips on the end of each memory module slot until the module stick sticks up.

  7. Dell Inspiron 17" 7786 2-in-1 Memory Modules (RAM) Replacement: 手順 7、 3の画像 1 Dell Inspiron 17" 7786 2-in-1 Memory Modules (RAM) Replacement: 手順 7、 3の画像 2 Dell Inspiron 17" 7786 2-in-1 Memory Modules (RAM) Replacement: 手順 7、 3の画像 3
    • Remove the memory module by sliding it out of the slot.

終わりに

To reassemble your device, follow these instructions in reverse order.

作成者

2人の作成者と共同で作成されました。

Delia Padilla

メンバー登録日: 08/23/22

588 ポイント

5のガイドは作成済み

チーム

Gateway, Team 1-3, Class Fall 2022 Gateway, Team 1-3, Class Fall 2022人のメンバー

GCC-CLASS-F22S1G3

4 メンバー

15のガイドは作成済み

0 件のコメント

コメントを追加

統計データ:

過去 24時間: 0

過去 7 日: 16

過去 30 日: 18

今までの合計 179