メインコンテンツにスキップ

Dell Inspiron 1525 Wireless Mini-Card Replacement

必要な工具と部品

  1. Dell Inspiron 1525 Wireless Mini-Card Replacement, Battery: 手順 1、 1の画像 1
    • Locate the battery release switch on the bottom of the laptop.

  2. Dell Inspiron 1525 Wireless Mini-Card Replacement: 手順 2、 2の画像 1 Dell Inspiron 1525 Wireless Mini-Card Replacement: 手順 2、 2の画像 2
    • Slide the battery release switch away from the lock symbol until you hear the battery click.

    • Slide the battery towards the back of the laptop until it comes free.

  3. Dell Inspiron 1525 Wireless Mini-Card Replacement, Bottom Cover: 手順 3、 2の画像 1 Dell Inspiron 1525 Wireless Mini-Card Replacement, Bottom Cover: 手順 3、 2の画像 2
    • Remove/loosen the eight 4.80 mm Phillips #1 screws securing the bottom panel.

    • The screws may only need to be loosened, as they are generally retained by plastic washers.

    • Remove the bottom panel.

  4. Dell Inspiron 1525 Wireless Mini-Card Replacement, Wireless Mini-Card: 手順 4、 2の画像 1 Dell Inspiron 1525 Wireless Mini-Card Replacement, Wireless Mini-Card: 手順 4、 2の画像 2
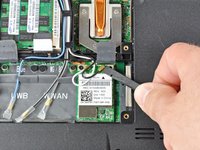
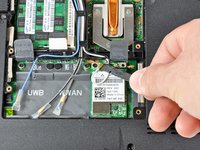
    • Use the flat end of a spudger to gently pry the black and white antenna connectors off the Wireless Mini-Card.

  5. Dell Inspiron 1525 Wireless Mini-Card Replacement: 手順 5、 2の画像 1 Dell Inspiron 1525 Wireless Mini-Card Replacement: 手順 5、 2の画像 2
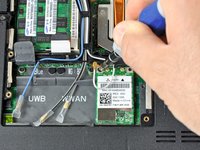
    • Remove the 3.70 mm Phillips #1 screw securing the card to the laptop.

    • The card will tilt up when you remove the screw.

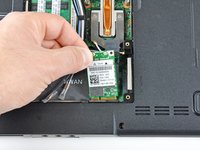
    • Slide the card straight out.

終わりに

To reassemble your device, follow these instructions in reverse order.

3 の人々がこのガイドを完成させました。

作成者

2人の作成者と共同で作成されました。

Miroslav Djuric

158,173 ポイント

144のガイドは作成済み

0 件のコメント

コメントを追加

統計データ:

過去 24時間: 0

過去 7 日: 0

過去 30 日: 8

今までの合計 8,852