メインコンテンツにスキップ

Dell Inspiron 13 7378 RAM Replacement

必要な工具と部品

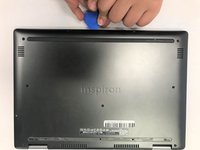
  1. Dell Inspiron 13 7378 RAM Replacement, Back Cover: 手順 1、 1の画像 1
    • Set the laptop with its underside facing up for improved accessibility.

  2. Dell Inspiron 13 7378 RAM Replacement: 手順 2、 2の画像 1 Dell Inspiron 13 7378 RAM Replacement: 手順 2、 2の画像 2
    • Using a Phillips #00 screwdriver, extract the nine 3 mm screws located on the back of the laptop.

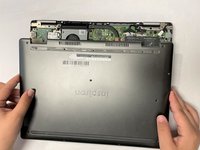
  3. Dell Inspiron 13 7378 RAM Replacement: 手順 3、 3の画像 1 Dell Inspiron 13 7378 RAM Replacement: 手順 3、 3の画像 2 Dell Inspiron 13 7378 RAM Replacement: 手順 3、 3の画像 3
    • Carefully pry open the back of the back of the laptop using opening picks.

    • Carefully raise and detach the back cover from the laptop.

    • Exercise caution to prevent damaging or cracking the device's back cover.

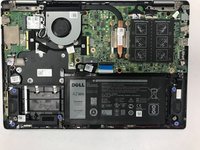
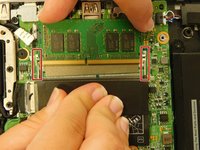
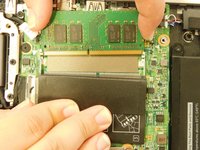
  4. Dell Inspiron 13 7378 RAM Replacement, RAM: 手順 4、 3の画像 1 Dell Inspiron 13 7378 RAM Replacement, RAM: 手順 4、 3の画像 2 Dell Inspiron 13 7378 RAM Replacement, RAM: 手順 4、 3の画像 3
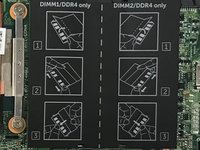
    • To remove a RAM stick, gently pull apart the metal tabs on either side of the stick.

    • Carefully grasp the stick on its side and pull it out.

    • The plastic sheet covering the RAM compartment depicts the process.

  5. Dell Inspiron 13 7378 RAM Replacement: 手順 5、 1の画像 1
    • When inserting the new stick, make sure that the gap on in the stick aligns with the gap in the slot.

終わりに

To reassemble your device, follow these instructions in reverse order.

ある他の人がこのガイドを完成しました。

作成者

2人の作成者と共同で作成されました。

Emma Simon

メンバー登録日: 02/08/22

165 ポイント

1ガイドが承認済み

チーム

Gateway, Team 1-3, Saknee Spring 2022 Gateway, Team 1-3, Saknee Spring 2022人のメンバー

GCC-SAKNEE-S22S1G3

5 メンバー

16のガイドは作成済み

0 件のコメント

コメントを追加

統計データ:

過去 24時間: 1

過去 7 日: 4

過去 30 日: 29

今までの合計 393